Browsing Category

Healthy Eating

Brunch/ Healthy Eating/ RECIPES

Blender Banana Oat Gluten-Free Pancakes

These Blender Banana Oat Pancakes are hearty, gluten-free and tastes just like the gluten-free pancakes from our favorite breakfast restaurant. They take only minutes to whip up and use those ripe bananas that are always have sitting around.

Gluten Free Blender Oatmeal Pancakes

A Pancake Tradition

I have a tradition with my girls of taking them to breakfast after orthodontist appointments. If your teens have had braces, you know these appointments happen often…about every 3-4 weeks for over a year!

Because of this, and the cost of braces, we staggered it and had our girls in braces just one at a time.

I loved using these ortho appointments as an opportunity to have a breakfast date with my girls, but wanted to send them to school with a belly full of healthy food and I didn’t want to pay too much for it!

Because of this, we found a local breakfast restaurant called The Egg and I, and ordered the same gluten-free oatmeal pancake breakfast every time, and split it.

The pancake was hearty and huge and would fill the entire plate, and it came with fresh berries on top and a side of eggs and sausage. We always asked for a double portion of scrambled eggs instead of the meat, and we would leave full and happy!

Continue Reading…

Healthy Eating/ How-Tos/ RECIPES/ Sides

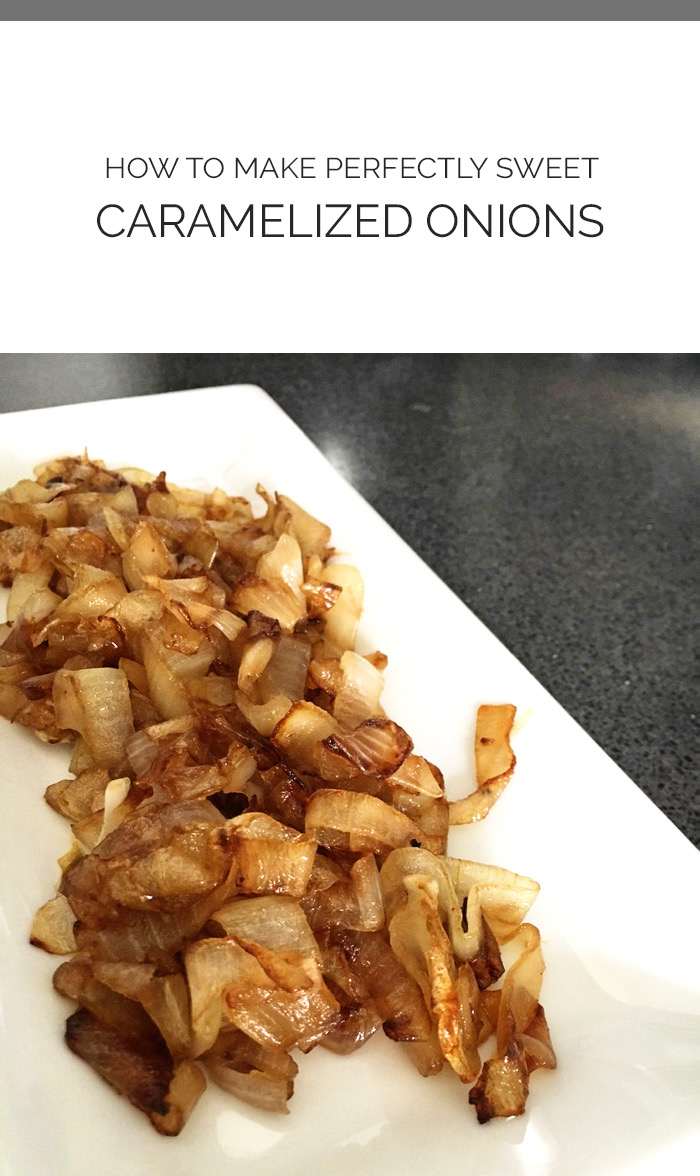
How to Make Perfectly Sweet Caramelized Onions

caramelized onions on a white platter

I am smitten with caramelized onions, and this is coming from a girl who despises raw onion.

One of my earliest childhood memories is requesting that my raw onions would be scraped from my fast-food burger. I would watch my Dad sacrifice a perfectly good french fry and use it as a scraper to get those raw onions off!

Caramelized onions are a whole different food from raw onion. They are soft and oh so sweet!

They add amazing flavor to many dishes and are great for topping sandwiches, burgers, and salads.

They are so popular in our home that they rarely get past the skillet without fingers in them…my Teagan has been known to make a whole pan disappear.


Why You Need Sweet Caramelized Onions

I am not only smitten because of how delicious caramelized onions are but also because they are one of the most healthful foods you can eat!

Research has shown that people with the highest consumption of onions (and other alliums) have a lower risk of several types of cancer, as onions contain several anti-cancer compounds. {referrence}

Quercetin is one of these compounds which has been found to decrease cancer tumor formation and inhibit the growth of cancer cells.

Onions are antibacterial, antifungal, contain antioxidants and have anti-inflammatory properties–so don’t be anti-onion–at least until you try them caramelized.

They help maintain gastrointestinal health by creating and sustaining beneficial bacteria.

They reduce symptoms associated with diabetes, improve the absorption of minerals (like calcium and my favorite calming mineral – magnesium) due to the fructans they contain.

With my cancer history and my Todd using a healthy diet to keep blood sugar levels down, getting onions in on a daily basis is a priority to both of us.

I use chopped onions as a foundation of just about every recipe I make, and also am just as happy making them caramelized as a yummy vegetable side to any dish.


skillet of caramelized onions

What I Do To Make My Onions Perfectly Sweet

The key to making caramelized onions perfectly sweet is patience and a wide, flat-bottomed high sided heavy pan. A well-seasoned cast iron pan is my favorite pan to use.

The caramelization process takes a little patience, and as you will see in the video I share below, they soften and sweeten in stages.

For caramelization, it can take 15-20 minutes of cooking time.

This usually is not a big deal for me, as I just get them going at the beginning of my meal-making, and they cook away and are done by the time the rest of the meal our meal is cooked, and only need a little attention with just a bit of stirring.

There are several different ways to make caramelized onions, and many cooks will just use oil, salt and pepper.

Some swear by adding a bit of sugar at the end to help speed up the process, but I believe we get quite enough sugar in the typical American diet and don’t need to be adding it to our healthy onions!

I let the onions sweeten themselves, and sometimes add a splash or two of balsamic vinegar at the end for even more darkened sweetness. Delish!


dish of caramelized onions

Perfectly Sweet Caramelized Onions

Caramelized Onions
Prep Time
5 mins
Cook Time
20 mins
Total Time
25 mins
 

There is nothing like a perfectly sweet caramelized onion! Even if you are not an onion lover, you may just become one after trying them cooked in this way. 

Recipe Type: Side Dish
Cuisine: American
Keyword: onions
Servings: 4 people
Ingredients
  • 2 large onions
  • 2 tbsp oil or butter (avocado oil, coconut oil or grass-fed butter)
  • pinch salt
  • pinch pepper
  • water (or chicken broth)
  • 1-2 tbsp balsamic vinegar (optional)
Instructions
Prep onions & pan
  1. Peel and halve onions through root end and slice into 1/4" - 1/8" thick slices, using the onions natural grain to make strips for you.

  2. Heat 2 Tbsp. butter or oil in a large flat-bottomed heavy pan on medium heat. 

    Note: The video in the post shows a saucepan, but a larger, heavy pan is much preferred. Using a wide base gives water room to evaporate, allowing onions to caramelize rather than steam.

Cook onions
  1. Add onions to the pan and stir. Then season with a pinch of salt and pepper. Let the onions begin to soften and turn translucent.

Reduce heat, stir & add liquid if necessary
  1. Reduce heat to medium-low and continue to cook onions, stirring often to prevent them from getting too much color in one place or sticking.

     If onions stick or get too brown in one place, reduce heat.

Add cooking liquid if necessary
  1. If you see bare, browned spots in the pan, add a bit of cooking liquid and stir. The liquid will help scrape the cooked-on bits and will season the onions. 

Keep and eye and keep stirring
  1. Once the onions began to take on a caramel color, keep a close eye on them. For extra-dark onions, this is when you add balsamic. 

  2. This is the point when your onions need constant attention. Keep stirring until they are the desired color. I like mine a caramel color with a few dark edges.

Let cool & store
  1. Let onions cool, then transfer to an airtight container OR you can do what I do and eat them right from the pan! 

  2. Chill any leftover onions. They will keep up to one week and can be eaten warmed or chilled right from the refrigerator. They also freeze well!


Have you over caramelized onions? Do you have your own tried and true method?

If you have not, and even if you are not a big onion fan, making them this way may just change your mind.


Watch this video on The Scene.

{the video uses a saucepan, but I prefer a wide, heavy-bottomed cast iron skillet!}


Grab a bag of onions next time you are at the grocery store and get those health-filled onions into you and your loved ones!

Make sure to comment below and let me know if you do, and what your favorite process toward caramelization is.

FEATURED/ HEALTH/ Healthy Eating/ RECIPES

5 Reasons To Eat Seeds Every Day + Super Seed Mix in a Jar Recipe

Jar of layered seeds

5 Reasons To Eat Seeds Every Day


HIGH NUTRIENT FOOD

Eat super seeds every day! They are a high nutrient food and they are packed with healthy goodness. Seeds contain all the starting materials needed to grow into a complex plant, and because of this, they are a very alive, nutritious food.

Keeping a jar of super seed mix in the refrigerator is an easy way to have these little superfoods on hand at all times.


PLANT PROTEIN

Many seeds (like pumpkin seeds and hemp seeds) are a complete protein source! Seeds have more protein and minerals than nuts and less saturated fat.


GOOD FATS FROM A WHOLE FOOD SOURCE

Seeds are rich in ALA Omega 3 fats which feed the brain and plays a key role in metabolism and energy production.

Having a good fat in your diet is important for the absorption of nutrients, including anti-cancer phytochemicals.


LIGNANS

Lignans are antioxidants that may help support the immune system and can help balance hormone levels in the body.

They also have anti-estrogenic effects and can prevent naturally occurring hormones from binding to estrogen receptors and exerting their negative effects.

I am especially interested in the lignans in seeds as I am a survivor of hormone-sensitive breast cancer.


DISEASE PROTECTIVE

Again, as a breast cancer survivor, I am very interested in all of the health benefits of seeds.

My husband has been pre-diabetic in the past, so he also makes sure to get his seeds in every day, too!

Plant foods, in general, can be very disease protective, and so eat your seeds!

Continue Reading…

Drinks/ Healthy Eating/ RECIPES/ Sponsored

DIY Cold Brew Coffee with Healthy Salted Caramel Whipped Topping

Cold Brew Pitcher and Iced Coffee with a straw

*This is a sponsored conversation written by me on behalf of Shopko. The opinions and text are all mine.


DIY Cold Brew Coffee

Are you a cold brew coffee fan but don’t like paying coffee shop prices? Do you love coffee but wish it were less acidic and easier on your tummy? Do you love iced toddy lattes with dreamy creamy toppings but don’t like the added processed sugar?


Whipped cream topped cold brew coffee in a glass

I don’t know about you but I can say yes to all of those questions. I also found a great solution for ALL of them with the help of the Primula 51 Ounce Cold Brew Iced Coffee Maker from Shopko, and an amazing whipped cream recipe to top your cold brew!

I’ve dabbled in making my own cold brew for a few years now, and but never found a process that was streamlined and easy enough to keep doing it on the regular.


Cold Brew Coffee French Press System

My old way of doing it was with a french press but honestly, it was messy and I had to put too much thought into the measurements and the ratio of coffee to water for it to become an easy habit.

If you want to know how to make it in the french press, you simply stir 1/4 cup of coarse coffee grounds into 1 cup of cold water. Let sit out on the counter overnight.  The next morning, add another cup of cold water. Then press the grounds and pour over ice. This makes 2 cups of coffee.


Cold Brew Coffee – Jar System

You could make this in a glass jar instead of a French press, but instead of pressing, strain through a coffee filter twice. Again, it is messy and a slow straining process–not my favorite–but if you are desperate for cold brew coffee and have a glass jar and coffee filters on hand, you can use this method.

Place 1/4 cup of coffee grounds in a jar with 1 cup of cold water. Let sit in the refrigerator on the counter overnight.  The next morning,  add another cup of cold water.  Then strain the grounds and pour over ice. This makes 2 cups of coffee.


cold brew coffee pitcher, towel and succulent


Primula Cold Brew Coffee Maker

What is my favorite way to make cold brew coffee? With the Primula Cold Brew Coffee Maker from Shopko. It takes all guesswork out of making cold brew coffee and streamlines the process, making it as simple as possible.

Continue Reading…

Healthy Eating/ RECIPES/ Sides

Oven Roasted Sweet Potato Fries

Oven Roasted Sweet Potato Fries

I cannot get enough oven roasted sweet potato fries lately. I made this pan and ate over half of them in minutes! Sweet potato fries satisfy my love for all things salty/sweet. The starch and fiber in them keep me nice and satiated.

If any do remain on the pan after my ‘straight from the oven’ snacking, I will use them in wraps (they pair well with black beans), top my salad or lunch bowls (they are great eaten cold), will tuck them away in an omelette, or on top of my avocado toast.

Oven Roasted Sweet Potato Fries


These are nice and crispy when they come out of the oven, but after being in the refrigerator they soften up…there is just no way around that.

I enjoy eating them soft and cold, and have even been known to grab a jar from the refrigerator and throw it in my bag for on-the-go snacking! I really like having them on hand, and they are becoming a staple part of my food week and have been added to my weekly food prep list.

My local health food co-op deli always has these sweet potatoes sitting inside their case–roasted, seasoned and ready to eat. I ordered them so often that I just knew I had to learn how to make them myself! My co-op always add a sprinkling of curry and I  love the flavor, so I have been doing the same.


Vegetarian Lunch Bowl Sweet Potato Fries


In the above lunch bowl, I have 3 foods that I have been prepping at the beginning of each week—-quinoa, ‘refried’ beans (without the refry!) and roasted sweet potato fries. This makes it really easy to make a quick and healthy lunch.

The salad above is greens topped with beans and quinoa for protein, sweet potato fries for a healthy starch, gluten-free chips (from Aldi!) for crunch, salsa in place of salad dressing and seeds sprinkled on top. Gotta get those daily seeds in! This salad bowl would be awesome topped with avocado for a nice healthy fat or even a poached egg for a breakfast salad!


Oven Roasted Sweet Potato Fries


You could take these ingredients and roll up in a wrap. Delish! Today I made the above bowl but without the greens–I topped quinoa (you could use brown rice or riced cauliflower if desired) with all of the ingredients in the picture and added guacamole. I then had my Everyday Green Smoothie later for a snack, so I still got my leafy greens in!

Roasted sweet potatoes fries are a great staple to have on hand! These are packed full of vitamin A and are a great way to add an orange food to your plate to achieve the goal of eating the rainbow throughout your day!


Vegetarian Lunch Bowl Sweet Potato Fries

Oven Roasted Sweet Potato Fries
Prep Time
5 mins
Cook Time
25 mins
Total Time
30 mins
 
Recipe Type: sides
Ingredients
  • 1 sweet potato organic since you will be eating the skin
  • 2-3 tbsp avocado oil  a healthful oil that has a nice high smoking point, could use coconut oil
  • salt & pepper to taste
  • pinch of curry powder optional
Instructions
  1. Preheat oven to 400 degrees.
  2. Wash, scrub and dry your sweet potato. Do not peel. There are great nutrients in the skin!
  3. Place potatoes in a bowl and drizzle with avocado oil to cover.
  4. Sprinkle with salt and pepper. Toss until coated evenly and thoroughly.
  5. Lay them out onto a baking tray so that none of them are touching. This will help them caramelize and allow them to get that deep, delicious, golden-brown color.
  6. Roast for 25 minutes or until golden brown. Don't be afraid to get some color on them...that will give them crispiness and flavor. Flip them over halfway through cooking.
  7. Sprinkle with a pinch of curry powder to taste.
Recipe Notes

If you want the fries crispy again after storing in the refrigerator, you can lightly fry them in a cast iron skillet with avocado oil before eating.

Healthy Eating/ RECIPES

RX Protein Bars with Nut Butter and Chia for Breakfast or Snack

RX Protein Bars topped with nut butter & seeds. Super filling and super nutritious!

*not a sponsored post

I’ve been having a little love affair with RXBar’s.  I was so happy to finally find a protein bar that had just a few ingredients that were actually real ingredients. I’ve had them for breakfast when I’m in a hurry, but I mostly use them as a snack when I’m craving something sweet but want something that adds to my total daily nutrition.

It has been a goal of mine lately to squeeze as much nutritional value from my snacks as possible. I’m also trying hard to stay away from processed sugars and artificial ingredients. This is why these bars are so appealing!

RX Protein Bars use dates to sweeten, which still adds sugar, but it is sugar from a whole food and is lower on the glycemic scale. When eaten in this bar form, the protein and fiber help keep blood sugars stable. The dates are rich in fiber, potassium, and copper, and are said to promote digestive health, reduce blood pressure and fight inflammation. This is what I mean by getting nutritional value from my snacks! Plain sugar does not have these benefits, and corn syrup certainly does not!

RX Protein Bar Topped with Nut Butter & Chia Seeds! Extra nutritious & filling.

The matte packaging is on point and you must admit, seeing the simple ingredients listed on the front is brilliant. I told my teen girls that B.S. stands for “boring stuff.” They didn’t believe me. Seeing just 4 ingredients in the list is so refreshing. Compare that to a PowerBar protein bar…brace yourself…

Seeing just 4 ingredients in the list is so refreshing. Compare that to a PowerBar protein bar…brace yourself…

POWERBAR Ingredient List:

TRISOURCE PROTEIN BLEND (SOY PROTEIN ISOLATE, CALCIUM CASEINATE, WHEY PROTEIN ISOLATE), MALTITOL SYRUP, CHOCOLATE FLAVORED COATING (SUGAR, FRACTIONATED PALM KERNEL OIL, COCOA, WHEY, NONFAT MILK, SOY LECITHIN, NATURAL FLAVOR), OLIGOFRUCTOSE (FROM CHICORY ROOT), FRUCTOSE, WATER, CANE INVERT SYRUP, PEANUT BUTTER, PARTIALLY DEFATTED PEANUT FLOUR, SOY CRISPS (SOY PROTEIN ISOLATE, RICE FLOUR, SALT), PEANUT OIL, AND LESS THAN 2% OF: SALT, GROUND ALMONDS, NATURAL FLAVOR, SOY LECITHIN, BUTTER (CREAM).

Whoa. lots of caseinates which can be rough on the stomach, and look at all of those syrups, & GMO Soy! I’m wrinkling my nose as I type.

In RXbars, there is no gluten, no soy, no dairy, no added sugars or GMO’s. They are preservative free and the protein is from eggs instead of dairy, so if you have a dairy sensitivities you need not worry! My digestive system has been reacting negatively when I have dairy, so I like that the protein is from eggs.

My one complaint about RX Protein Bars is that some of them have “natural flavor.” I never love seeing that phrase in the ingredient list, as it can mean several things and often the “natural” is not so natural. The peanut butter RXbar does not have natural flavors, so I tend to lean towards that one.

RX Protein Bar Topped with Nut Butter & Chia Seeds! Extra nutritious & filling.

I like to doctor these bars up a bit. They are delicious on their own, but are even more delicious topped with a dollop of almond butter and a sprinkle of chia, which add even more health benefits. The almond butter acts almost like a frosting and truly satisfies when I want to eat dessert. Plus, look how pretty it is!

The bars contain 12g of protein, but by adding almond butter and chia, you up the protein to 20g! It adds more filling fiber, too!

I try to eat at least 1-2 tablespoons of chia a day. They have all eight essential amino acids and a bunch of trace minerals and micronutrients. Just 2 tablespoons of Chia has 5 times the omega-3 content of a 1/4 cup serving of walnuts, twice the iron and magnesium of a cup of spinach, as much calcium as a half-cup of milk, and more than twice the fiber of a cup of oatmeal! These little seeds are powerhouses!

Almond butter acts like a creamy frosting on these bars, I just love it as a topping! It truly satisfies when I want to eat dessert. Plus, look how pretty it is! Almond butter offers fiber and protein, just one tablespoon= 4 grams of protein!

RX Protein Bar Topped with Nut Butter & Chia Seeds! Extra nutritious & filling.

{above image for your pinning pleasure}

RXbars are on the pricey side, but the cost is worth it to me, especially when I cut a bar in half and eat one half as an afternoon snack, and the other as an evening snack. Two for the price of one, plus I bust my sugar cravings with a nutrition-filled snack!


What about you? What are your favorite high protein and filling snacks?

What is a favorite grab & go breakfast?

Have you incorporated chia into your diet? If so, how do you like to eat it?


Interested in using dates in your cooking? Check out this Date Paste recipe. Caramel-y delicious!

Want another way to incorporate chia into your diet? —> Overnight Chia Oat Breakfast Pudding

HEALTH/ Healthy Eating/ Nutrition/ RECIPES

Smushed Berry Yogurt Cup Easy To Go Breakfast

Smushed Berry Yogurt Cup for a healthy and easy to-go breakfast! Super filling full of protein and fiber.

If you follow my Instastories, you will know I have been obsessed with Smushed Berry Yogurt Cups!

I am finding myself on the go in the mornings, and have needed a healthy, portable, easy- to- throw- together breakfast that will keep me full well into lunch time.  I found the answer in these great yogurt concoctions.

I first experienced these handy Smushed Berry Yogurt Cups when I recently visited my sweet friend, Karen, in California! I love telling the story of how we met. It was through this very blog! She is a fellow cancer survivor and was searching for something cancer-related and found New Nostalgia. We started emailing and sharing our stories. As our hearts knitted online, she decided to come to Nebraska for a visit and we have been going back and forth, visiting each other, for the last 5 years. We talk every day via the Voxer App. She is one of the sweetest gifts given to me through cancer. My beauty- in- ashes friend.

She took me on many adventures during my last visit to California. We were often in her car traveling to our many amazing destinations, and most mornings she packed Smushed Berry Yogurt Cups as an easy and healthy breakfast to eat in the car. She is even responsible for naming these awesome cups. I love hearing her say it…”shmooooshed berry yogurt cups.” Makes me smile.Smushed Berry Yogurt Cup for a healthy and easy to-go breakfast! Super filling full of protein and fiber.

There are 4 key things to making these cups unique and healthy.

  1. Brand of Yogurt
  2. “Smoooshing”
  3. Berries
  4. Seeds

Smushed Berry Yogurt Cup for a healthy and easy to-go breakfast! Super filling full of protein and fiber.

Oikos Triple Zero Yogurt

I often make my own yogurt and love it, but there are weeks when I want super convenience, and Oikos Triple Zero (this is not a sponsored post fyi) yogurt gives me that! Store bought yogurt is notorious for being full of sugar and artificial colors, and if they don’t have sugar they would be full of artificial sugar and colors.

I stay away from these chemically laden ingredients and searched high and low for a brand that does not contain them. I had found the brand but had not added any fun berries or seeds until my Karen friend showed me how she does it.

Oikos uses the stevia herb to sweeten, uses vegetable juice for color. My one complaint is that it is not organic, which is why I still make my own on weeks that I have time to!

I buy Oikos Triple Zero at Sam’s.

Smoosh Berry Yogurt Cup – Smush and Make Take it To Go

I loved watching my Karen prepare these cups for our travel adventures. She would open it right up, add the berries, sprinkle with the seeds, then top it all with the lid that came with the cups. She then would smush everything right down using the lid.Using a paper towel folded into thirds, she would wrap the cup with the paper towel and stick the cups into a little portable cooler.

Smushed Berry Yogurt Cup for a healthy and easy to-go breakfast! Super filling full of protein and fiber.

Berries For Your Yogurt Cup

I love berries! I usually buy my berries at Sam’s because the price is so right! My favorite berries in these Smushed Berry Yogurt Cup are blueberries and raspberries. I often use strawberries, too, but raspberries are so awesome for smooshing! They fall apart into bitty pieces that mix in so nicely with the yogurt. Berries add a ton of phytonutrients, antioxidants & fiber. I try to eat berries every day, and these cups are my new favorite way!

Seeds For Your Smushed Berry Yogurt Cup

Another thing I try to eat every day for the health benefits is seeds. Seeds are high in fiber, vitamin E, and good fats. They help keep hearts healthy and bodies disease-free. They are a great source of protein, minerals, zinc and all kinds of other nutrients.

My favorite blend of seeds is from Trader Joes called Super Seed and Ancient Grain Blend. It is a blend of seeds like chia, flax, hemp, red quinoa, amaranth and sprouted grains like buckwheat and millet. I love everything about this blend.

The price is right, it is super convenient, and sprouted. Sprouting (germinating) the grains increase the bioavailability of nutrients, so you get more nutritious bang for your buck! I have yet to sprout my own seeds and grains at home. Thank you Trader Joes for doing it for me!

If you don’t live close to a Trader Joes, just sprinkle your yogurt with chia and hemp seeds. Those two are powerhouses!

I have yet to sprout my own seeds and grains at home. Thank you Trader Joes for doing it for me! If you don’t live close to a Trader Joes, just sprinkle your yogurt with chia and hemp seeds. Those two are powerhouses!

Seeds in the Smushed Berry Yogurt Cup are key to keeping you nice and full until lunchtime!

Smushed Berry Yogurt Cup for a healthy and easy to-go breakfast! Super filling full of protein and fiber.

Super Portable Smushed Berry Yogurt Cup

The above 2 photos are from my Instastories, taken on the go to show my new favorite breakfast. I never use a cooler, because I eat them so quickly! I just put on the lid, wrap in a folded paper towel (which doubles as a napkin), and take along a plastic spoon. The cup fits perfectly in my car drink holder. I have found myself eating them in the parking lot of my favorite coffee shops.

My girls are out of school for the summer and I have been escaping early morning to get my writing done at coffee shops. I would rather not buy high sugar muffins that these shops offer that are not good for me. This is why eating my yogurt cup before entering into temptation is key for me! I walk in full and satisfied and save money by only buying a black cup of coffee.

Smushed Berry Yogurt Cup for a healthy and easy to-go breakfast! Super filling full of protein and fiber.

Look at all that goodness all smashed in! My Karen showed me out to take off the lid, and use my spoon to smush the berries right down into the yogurt. The raspberries break up, the seeds get all mixed in. The texture of the yogurt is amazing! Juicy bits of raspberries, the occasional crunch of seeds, the fruitiness of blueberries and a bit of chew from chia that has been sitting and softening in the yogurt. It is so satisfying!

Smushed Berry Yogurt Cup for a healthy and easy to-go breakfast! Super filling full of protein and fiber.

There are days I eat my yogurt at home. If I want to be extra generous with fruit, I will dump all in a bowl like the photo above. The added mango was delicious!

Give Smushed Berry Yogurt Cup a try & let me know what you think.

Let me know your thoughts– does a portable breakfast appeal to you? Do you ever eat your breakfast in the car?

Top