Browsing Category

Simplifying

FUN/DIY/ HOME/ Homemaking/ Organizing/ Simplifying

9 Ways To Use Jars To Spring Organize And Spring Clean

“This shop is part of a social shopper marketing insight campaign with Pollinate Media Group® and Cooking Light and Real Simple, but all my opinions are my own.  #pmedia #FreshandFab http://my-disclosur.es/OBsstV

If you have been reading New Nostalgia, then you know I have a love affair with mason jars.  Why do I love them?  So many reasons!
~They come in many sizes
~They are inexpensive
~They are not plastic
~They are simplistic in design
~They are glass, which does not keep me guessing on what and how much is inside of them!
~They have a gazillion different uses!
I think the understated mason jar is just perfect, and are the perfect example of something from yesterday that can simplify today, which goes right along with the title of this blog, New Nostalgia.
I was recently super inspired by Real Simple magazine & a picture I saw in it. They used my beloved mason jars to organize, but made them even better by using chalkboard stick-on labels.  I think the nostalgia of chalk goes great with the nostalgia of mason jars, and together they make such an appealing look!  Those labels would be the perfect purchase to keep my motivation up to organize, which is perfect as spring is coming and I have got the urge to get everything in its place and spring clean!
Are you a fan of Real Simple magazine?  How about Cooking Light magazine?  They are 2 of my personal favorite magazines, and right now if you buy the April issues of both magazines at Target, you will receive a $5.00 Target gift card from the cashier while supplies last. I got mine and I was giddy excited to get home, relax and read my new magazines!
Here are 9 ways that I’m already using mason jars to make life a bit more simple & organized:
1. Use them as drinking glasses.This Iced Tangerine Mint Green Tea look so beautiful in them!  I also love just simple lemon water in them, and I use them almost daily for green smoothies!

2. Store craft supplies.

Mason jars are great for storing craft supplies, especially DIY Scented Gel Paints!  I like to use the small size jars to round up small craft supplies –like googly eyes and buttons.

3. Use for DIY gifting.

Jars are the perfect container for a large batch of DIY homemade gifts. They keep great in storage to grab and gift when in need!  I love having this Peppermint Stick Hot Cocoa Mix on hand during the holiday months.

4. Use to store leftover foods.

I personally despise stained plastic containers, and REALLY do not like searching for the right lid for the container!  If you use mason jars, there are only 2 lid sizes.  I throw all my lids and rings for the lids in a big bowl for storage.  No more stained plastic.  No more searching for the right lid.

5. Use for food storage in the pantry.

I love the look of jars in the pantry.  Small jars are great for herbs.  Larger jars are great for grains.  They stack nicely and look so pretty!

6. Use for food storage in the freezer.I use jars to freeze leftovers or my some of my favorite large-batch recipes, like this Strawberry Freezer Jam or my favorite Pepper Onion Relish. The smaller pint size jars are great for stacking and fitting a lot of food in a small freezer.

7. Use them to organize your healthy eating and motivate you to eat more plants!

Turn your refrigerator into a work of art where you family will want to come, snack on a rainbow of fruits and vegetables, and get excited about it!  I don’t know about you, but when my veggies are prepped and staring at me through the glass of the jar, it makes me grab and eat!  Jars also make your veggies super portable.  On the go in a rush?  Grab a jar and go!

8. Use for utensil storage.

I love keeping my wooden clips in a mason jar.  I also keep straws in open jars to grab quick for smoothies.

9. Organize your salad ingredients.

Use them to create an at-home salad bar that stays fresh and beautiful for days in the refrigerator!  You can easily put a ready-to-eat layered salad in a jar that will keep for days — just make sure you put the salad dressing at the bottom.  When I have all my salad toppings in jars and ready to go, it makes my goal of eating a big, leafy green salad at least once a day very do-able.  Don’t forget to grab the jars of slivered nuts, dried cranberries & sesame sticks in the pantry to sprinkle on top and make your salad on to look forward to!

_________

I hope these images of beautiful magazines and beautiful jars motivate you to do some of your own spring organizing and cleaning.  Remember to spring clean your bodies by eating good foods, too!

Don’t forget to grab your April copies of Cooking Light and Real Simple, and your free $5.00 gift card.

Happy Spring!

{Don’t forget to Pin It!}


HOME/ Homemaking/ Simplifying

4 Kitchen Tips From Rachel Ray That I Use Everyday

Of all the cooking shows on TV, Rachel Ray 30 Minute Meals is one that I love to watch.  It is so practical!  She gives so many great tips and for some reason, her tips actually stick in my brain and I use them!

Here are 4 tips of hers that I use everyday, that have changed my life.  Dramatic, I know.  But true!  Eating a plant based diet does mean time in the kitchen, and lots of chopping of fruits and vegetables, but this does not have to be a tedious task if you have the right tools!  I personally find being in the kitchen is quite cathartic as long as I have a clean kitchen, efficient tools, and a good work space.

My time in the kitchen is so much more enjoyable and efficient because of these four tips:

Cutting-board

1. Use a Large Cutting Board — Rachel Ray’s entire counter top is a cutting board.  Lucky her! I keep my 24×18 inch wooden cutting board out on the counter at all times.  I love having the room to chop many veggies at a time, and being able to push each pile over with my knife towards the back of the board.  There is nothing worse than a small, nasty, plastic cutting board where everything runs off and messes up the counter & floor!

I use one side of my cutting board for fruits and sweets.  I use the other side of it for vegetables & strong, savory items like garlic and onions.

We rarely eat meat anymore, but if we do, I use a small plastic cutting board for that.

You have seen it in many of my photos as I use the natural light from my kitchen window and the neutral background of the board to take many of my recipe photos. Handy!

41FanwE0feL._SY450_

2. A Waste Bowl — our trash can is kept in the pantry, which is a few steps away from my cooking area and has sliding doors that need opened every time I need to throw something away.  When I am cooking, I make sure I take out my handy dandy waste bowl. It saves me all those steps to my trash can & having to open and close the doors each time.  It makes a huge difference in my cooking time. It also makes separating out plastic or cans for recycling or veggie scraps for composting quite easy.  When meal prep is done, I quick grab the bowl, separate out what is really trash and what can be reused.  So efficient, convenient, and easy.  I have Rachel Rays rubber bottomed waste bowl.  It stays right where you need it. I have the blue one, but the orange one is super fun, too!

Rachel-Ray-Knife

3. One Main Knife--Rachel Ray does 90% of her slicing and dicing with one main knife.  I love the simplicity of this.  You really don’t need an entire knife block taking up precious space on the counter.  I have one main large knife, a small paring knife, and a serrated bread knife.  That is it.  3 knifes, kept in a drawer, one used the majority of the time.  Simple!

Bench-Scrape-Shovel

4. Bench Scrape Shovel–I feel totally professional when my oil is heated in my pan, I have chopped my garlic and onion on my cutting board using my knife, and I use this awesome bench scrap shovel to scoop my cuttings from the board to the pan.  I love the sizzle sound and the immediate scent of vegetables sauteing.  This shovel might seem like a tool that you don’t need, but I make room for it in my tiny kitchen due to the convenience of scooping up what I have chopped in one swipe.  It keeps my floor free from dropped pieces of onion, which used to happen when I would try to transfer my cuttings using just a knife and my hands.  This bench scrape shovel is a must have in my opinion.

——–

Got any great time-saving, space-saving kitchen tips for me?

Frugal/ Healthy Eating/ HOME/ How-Tos/ RECIPES/ Simplifying

How To Have A Friend Over For Lunch Without Cooking Or Baking

I’m slowly getting my energy back after 2 surgeries, but not so much energy that you will find me cooking and baking up a storm in my kitchen just yet!  Thankfully, I have a great little market super close to my home.  It is a little health food co-op grocer and they have a small deli in the back where they sell amazing homemade wraps, salads, etc.
I often use their food to help make entertaining a breeze.  I love that they use ingredients that I would use here at home.  They have lots of vegetarian, vegan & gluten free choices, so no matter who my company is, I can usually find something good for us to munch on from my local co-op.  

Recently I had a friend over for lunch.  It took no time at all to set out a nice little lunch that tasted homemade.  I stopped over at the co-op grocer, picked up a few things, and within minutes had my table set and ready to serve my sweet friend.

I kept the cost down by splitting the wrap in two.  The cake and granola bar is made there at the grocer and are only 99 cents each.  I got a salad mix, some organic corn chips, salsa that is made fresh by the grocer which is to die for, some curry quinoa & chickpea salad, & a couple kiwis.

I peeled a couple of clementines and tossed them into the salad mix along with slivered honey almonds and dried cranberries.
This huge burrito wrap was a little over 3 bucks and was plenty filling for the both of us.
Banana cake with cream cheese frosting & a granola bar cut in half for dessert.  Perfect to eat with coffee!  I bought one piece of cake and one bar and cut them in half.

 Pretty is important…or at least it is fun!! Put food on pretty platters, add a little lemon to the water.  Throw on a pot of coffee and make sure to have some cute napkins on hand to brighten up the table.

 So easy, very delicious!  My friend and I had a great time catching up over lunch & I know she felt loved and cared for by the food I fed her.

{Don’t forget to PIN IT!}

Do you ever buy pre-made food instead of making everything yourself?

What foods do you like to throw onto platters and pass as homemade?

Do you admit to your company that you didn’t make it?    I do, as I like to show people that it is easy to entertain without spending hours in the kitchen.  PLUS, the food is always so good that I always get asked for the recipe, so I might as well fess up ahead of time!  Ha!!

5 Minute Fridays/ HOME/ Homemaking/ Simplifying

How To Fall In Love With Doing Laundry

 
{5 Minutes of unedited, nonstop writing on the week’s given theme.}
 
GO.
 
Laundry and love are two words I never thought I would use together.  Laundry FAIL is more like it for most of my life.  I always said that if I ever have laundry caught up AND put away, then I will have arrived as a Mom.  Well, recently there have been many more days of caught up & put away laundry, but I so have not “arrived” as a Mom.  SO. NOT.
 
But I have grown.
I have become wiser over the years.  
More efficient.
 
I have learned that undone laundry does not define what kind of mother/housewife/woman I am.
I have learned that it is ok to do things imperfectly.
I have learned that it is ok to ask for help and allow kids to participate.
 
I have learned how to love laundry.
 
Love is a dramatic word, especially when it comes to laundry…but hear me out.
 
I have changed my thought patterns when it comes to laundry and now it does not control or define me.  
We are friends now. Not besties, but a friend that I don’t take for granted.

My new thought pattern? 

I love laundry because it shows God has provided.
~He has provided clothes for our family.
~He has provided water & a washing machine that works…a luxury many do not have.
~He has given me children who are healthy enough to play soccer and get dirty.
~He has given me girls that have such great fashion sense that some days it takes numerous outfit changes to find the exact one…which means more laundry…the  most challenging kind, clean laundry caught up in the dirty.  The kind that takes sacrifice to wash again without complaint. 
 
Isn’t that life, the clean and the dirty mixed up together on a regular basis?  
Not ideal, but real.
Signs of life, of living the beautiful imperfect.
Signs that we need Him.
 
He knows all about the washing of dirty laundry.
Of sacrifice.
Of loving that which can be as repulsive as a muddy soccer sock.
Of lovingly washing us, whiter than snow.
 
STOP.
 
 
Need some practical tips to help you love laundry?
 
~Kids 12 and older do their own.  This has changed my life and my relationship with laundry.  My two oldest do their own now.  It has saved my sanity and our relationship.  Now, if clean clothes are on the floor, it does not affect me or my sanity, as I am not the one who will have to rewash them.  They now take much better care of their clothes.  The occasional times I surprise them and do it for them…they are grateful. Kids who are grateful that their laundry is done = winning!
 
~If you have younger kids, have a dirty clothes bucket in their room and another for clean clothes that need hung up.  The goal is to keep clothes off the floor.  If they are old enough, teach them to hang up the clean clothes.  Give it as one of their 3 daily chores.
 
~Use hooks in closets for things like robes, coats, jackets.  These things are a pain to hang up on hangers and kids will struggle with that.  If an item is used almost daily, have a hook for it.
 
~Buy a laundry sorter. I have one like this one and I love it!  Do NOT sort according to color.  Sort according to person in the family.  Mark it clearly so everyone knows where to put their dirty clothes.  Keep in a central location where you can keep an eye on it, and where it is easy for everyone to bring their dirties when asked.
 
~When you see a part of the sorter get full, you know whose turn it is to do laundry.  I have a sorter that has 4 baskets hanging from it.  A full basket makes a perfect full load.  One for my 14 year old, one for my 12 year old, one for my 10 year old, and husband and I share one.  I only have to worry about 2 of the 4, as the older two girls do their own.  I keep our sorter on the main floor in the hallway.
 
~Don’t sort laundry.  Unless we have a new item of clothing that I know will bleed when first washed, I don’t sort.  I think it is a waste of time.  I like to do loads according to person, not according to color.  It makes the folding and putting away so much easier when loads are according to person.
 
~Use sturdy, pretty baskets.  The top picture was taken before I had my oldest 2 start doing their own laundry.  As you can see, I had 3 smaller baskets where I would fold and put each child’s clothes, and they would put their own clothes away.  I folded in the living room so the clothes would not sit.  If they are out and about in my way, I will remember to tell the littles to put their clothes away. This system worked well when they were younger.  The larger basket was for Todd and I.  The medium basket held all socks.
 
 
~Have a hook for each person in the family to keep their towel.  I only wash towels once or twice a week.  I just grab them from the hooks in the bathroom and throw them right into the washer.  Yes, I wash the white towels with the black towels.  It works fine, but make sure to wash separately when brand new a few times.  We only have one bathroom with a shower, so the girls towels are the three on the hooks…they know what color is theirs.  Todd and I use white towels on hooks behind the door.
 
~Wash sheets/bedding/blankets on the weekend.  I just rotate a bed each weekend.  Yes, each persons bedding only gets washed once a month, except for Todd and I, our bedding gets washed twice a month.  Good enough. 
 
~Keep a sock basket.  Keep the sock basket in a central location, where all mismatched or found socks go.  Occasionally grab the basket and have child match any socks as a chore.
 
~Make your own laundry detergent.  LOVE love easy liquid recipe.
 
What is your favorite tip?
FUN/DIY/ HOME/ Homemaking/ Organizing/ Simplifying

Organizing My Pantry & Some Tips For a Efficient & Simple Kitchen

New Nostalgia's organized pantry
 

Now that the kids are back in school, I am eager to continue on in my series of Minimalizing Our Home.  I can’t tell you what a difference it has made in the areas I have already organized/minimalized. It has been so very easy to keep those areas clean and tidy.  It motivates me to get busy and continue on in my mission of embracing the slow life.  Part of living life to the fullest is eliminating that which takes up precious time, and for our family, that means anything excess that I would have to deal with.  
Everything we bring into our home will need attention, whether it needs to be put away continuously, dusted or cleaned, or simply sitting there taking precious space in our home.  Because of this, I have become very thoughtful about what is worthy of my time and attention, and have enjoyed getting rid of anything that does not fit in that category…hence my minimalizing series!
Before and After organizing a large pantry
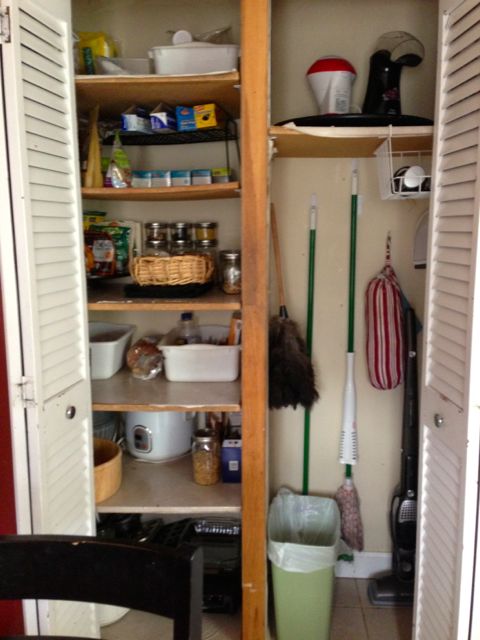
Back to the pantry, it is a space that really is important to keep tidy.  In my pursuit of health, I need to know what I have available to feed my family, and make sure it is accessible so we will actually eat it or I will actually bake with it.  
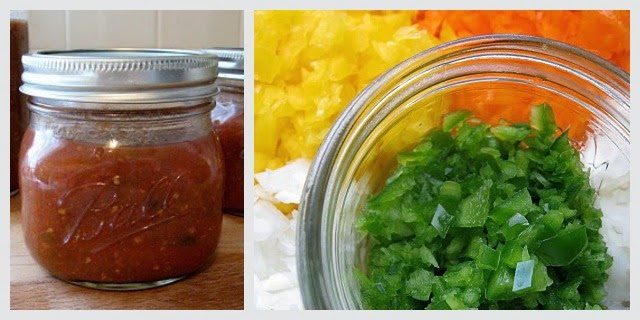
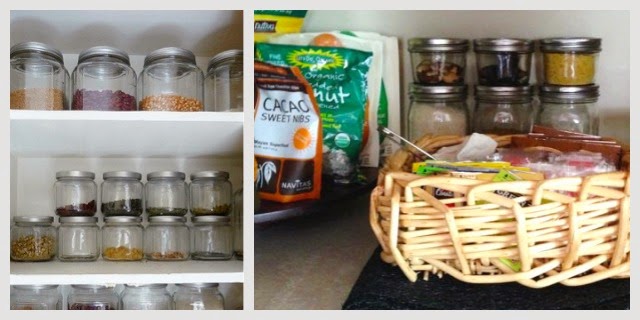
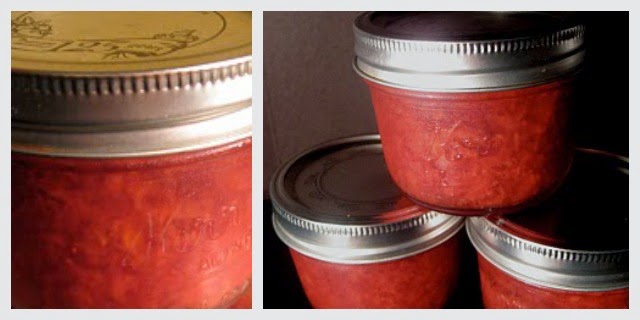
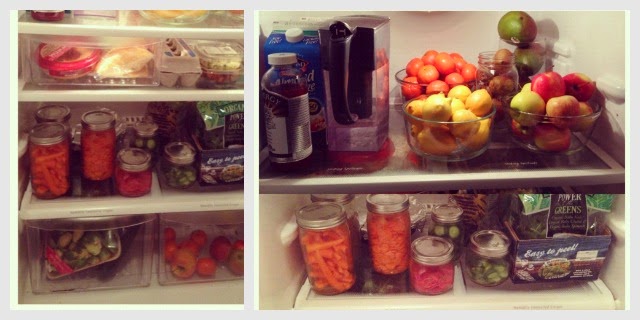
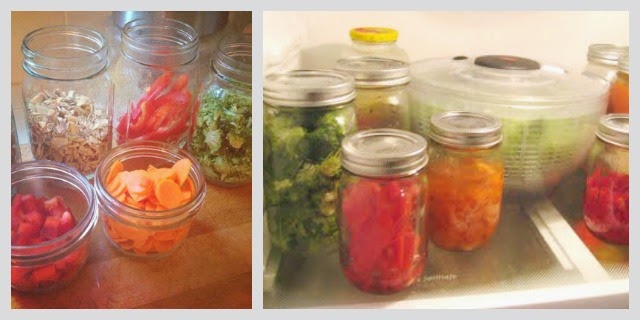
I love mason jars for this very reason.  With a glance I can see what we have and how much of it we have.  My kitchen is plastic free for the most part.  I don’t trust what is in plastics, and mason jars are just so cute and easy for me to store and use.  I keep all the lids in one big bowl, and the empty jars on one shelf.  The small jars can stack which really helps with storage.  I love not having nasty, stained plastic containers and lids of every color and size.  I love the simplicity of mason jar lids.  One bowl, very accessible.
Basket and spices

As you can see, I use mason jars to store my dried goods.  They are great for rice, nuts, seeds, coconut, & nutritional yeast.  I also love using a lazy susan in my pantry for the few things that come in their own resealable bag.  I also keep my peanut butter there, which I use every day so it needs to be in an easy- to- grab place.

The basket holds all my tea.  I like that I can quickly grab it and have everything I need for tea.

Under my tea basket are my place mats.  Again, easy to see and grab when needed.

Shelf for foil and wax paper
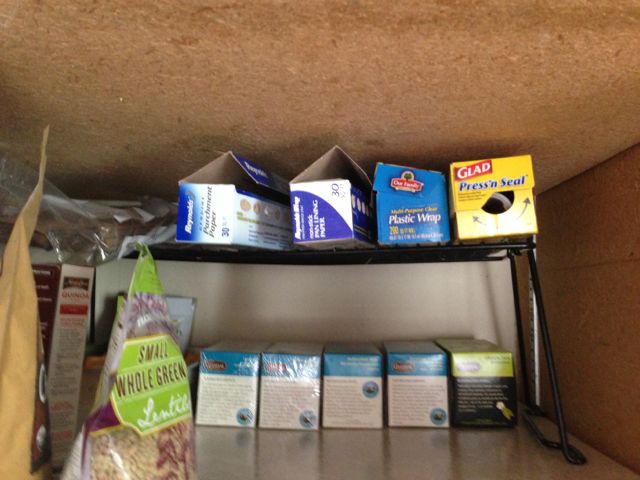
This little shelf works great for storing my foil & wax paper, etc.  I keep my extra boxes of tea underneath.

Using containers for certain foods

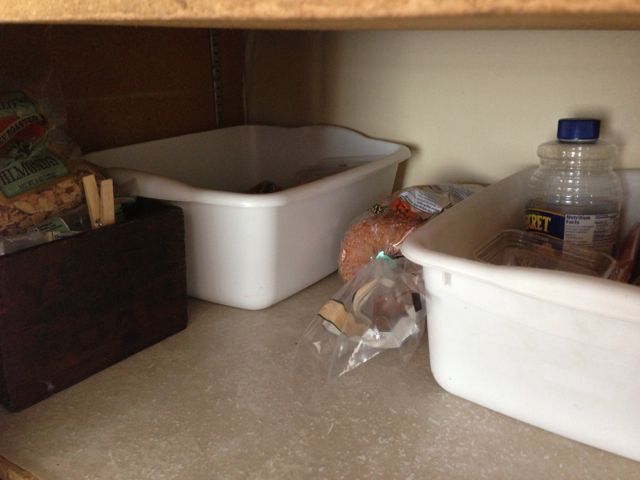
I like using containers to corral certain foods.  I have 2 white tubs on this shelf.  One is for pasta, the other is our snack bucket.  I keep bagels and bread in between the white tubs and the brown wooden tub holds all our nuts.  See the wooden clothes pin sticking out of that wooden box?  This is another way I simplify my kitchen.  I keep a large mason jar full of wooden clips and use them as chip clips.  I like that they are all the same neutral color, and it gets rid of bright colored- plastic chip clips that are all sizes and hard to store.

Salad spinner and rice cooker

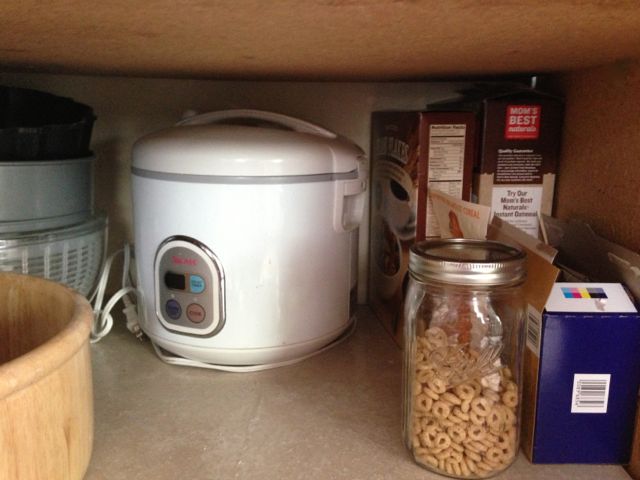
This shelf holds some of my larger items.  My salad spinner, rice cooker and large salad bowl.   I keep clipped bags of chips in that large wooden bowl.  I also keep our cereal and oatmeal on this shelf.

The very top shelf holds any paper products we have, and I have put hooks up to hang our mop, broom, dust pan, mop bucket (in corner, not seen) and a plastic bag dispenser.  The wire basket holds my hand blender and potatoes when I buy them.  I have a large lazy susan for small appliances up top.

Organized pantry with trash can and mops
We recently invested in a larger trash bin with a swivel lid.  It works SO much better than this one in the picture.
Door to kitchen containing a hanging shelf
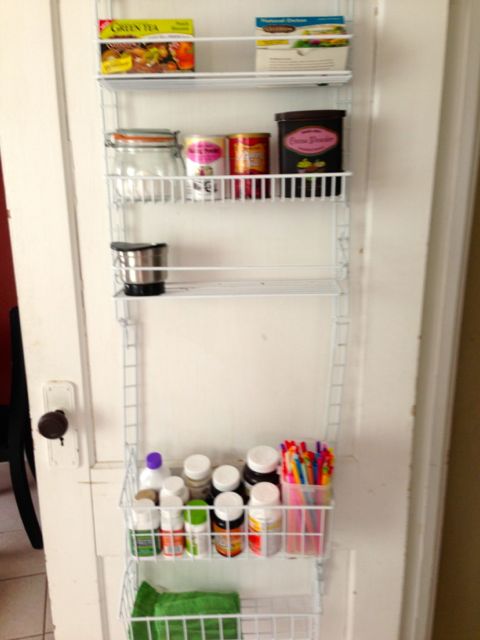
This door is in our kitchen right next to our pantry.  It leads to the garage and to our downstairs.  Our kitchen does not have much storage space, and our pantry is small, so I bought this over-the-door organizer about a year ago.  I keep hand towels & dish clothes in the bottom rack, as we only have 2 drawers in our kitchen…yep…I said 2!  I will share with you in an upcoming kitchen post how I deal with that!  Kids straws (Momma uses glass!) and our daily vitamins in the rack above that. Coffee & coffee filters on the next shelf. Above that are ingredients that I use often in my baking…baking powder, baking soda, salt & cocoa powder.  I usually keep vanilla there, too.  And again, extra tea boxes!  I love tea!
White organized kitchen and sink
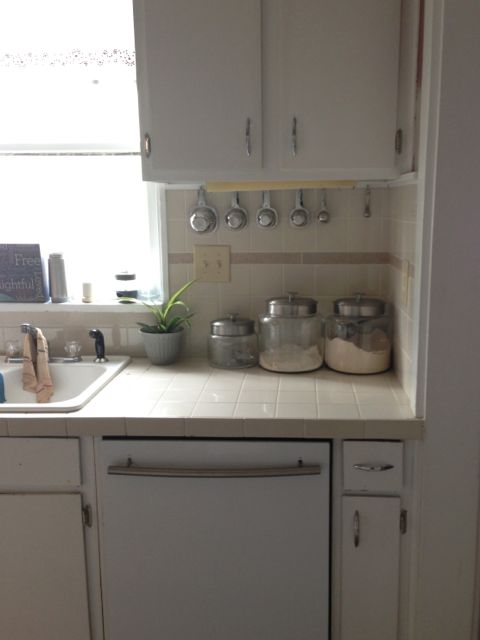
While we are on the subject of baking, it is really helpful to be super purposeful about where to keep  ingredients if you want baking to be a “piece of cake” so to speak. I keep my flours and sugars out on the counter, then just need to turn around and grab the rest of my dry ingredients from the door organizer in the pic above.  My measuring cups and spoons are all right there.  Having everything so accessible has made a BIG difference in my motivation to be more purposeful in whipping up healthy foods for my family.  It makes me WANT to bake.
Recap of tips:
~Use mason jars–they are good for environment, they replace stained plastic, are see-through, and use the same lids which can be stored in one area and simplifies the kitchen.
~Use wooden clothesline clips as chip clips.  They are cute, small, and can fit in a mason jar for storage. Get rid of those big, multi-colored plastic chip clips!
~Use hooks to get your mop, broom and feather duster off the floor.  I have added more hooks against the pantry wall that is hidden for my girls lunch boxes.  Hooks are great for using vertical space.
~Use a holder to corral plastic bags.  This frees up a drawer or shelf/cupboard.
~Keep things that you use often front and center.  Be thoughtful and purposeful about where you place each thing.  This keeps your kitchen running efficiently and simplifies the baking/cooking process.
~Keep like with like.  Pasta together, nuts together, cereal together, vitamins together, snacks together, small appliances together….I really should put all my boxes of tea together…seeing them separate in the pics above is now driving me crazy!
~If you are low in drawer space, get creative with storage.  Use racks for foil, etc.  Use baskets for dish towels/dish cloths.
For More Minimalizing/Simplifying Posts:

Got any more kitchen tips for me?

Are any of these tips helpful for you or “jive” with you?

Drinks/ Healthy Eating/ HOME/ RECIPES/ Simplifying

Easy Iced Tea Concentrate Made In A Mason Jar!

Easy iced tea concentrate in a mason jar
 

I have a super easy way to make Iced Tea that does not include boiling water or sitting it in the sun all day, and uses a mason jar — which we all know I love!

Just take a jar, put in 4 tea bags, fill it to the top, screw on the lid and put it in the refrigerator overnight.  In the morning, take the bags out and give them a little squeeze over the jar.  Voila’…you now have iced tea concentrate! 

 When you want a glass of tea, pour about 1 part concentrate to 3 parts water into a glass of ice and stir. I adjust the amount of concentrate depending on how weak or strong that particular brand of tea is.

Here is the blog that I got the idea from, there are a bunch of comments regarding specific measurements if you are someone who likes more details.

*the picture above was taken before the jar sat overnight.  The concentrate gets much more, well, concentrated:)


I plan on adding some fresh mint leaves or lemon balm from my garden for even more flavor.  Herbs are incredibly good for you so this is a great way to take advantage of their health benefits.

Emotional Health/ FAMILY/ HOME/ Organizing/ Parenting/ Simplifying

Morning Routine For a Work at Home Mom

I’m a huge fan of Amy’s daily routine posts, and because of that have wanted to share my own morning routine with you all. It’s just me and the kiddo right now, and I’m very lucky that she’s so helpful in the mornings and understands the importance of getting everything ready to go!

6:00: Both alarms go off: mine in my room, and kiddo’s in hers.
6:01: I use the toilet and then go to the kitchen to drink a full glass of water. I read about this in French Women Don’t Get Fat. Not sure if it’s kept me from gaining any weight, but it can’t hurt.
Rock balancing


6:05-6:35: While my fashion-conscious ninth-grader does her bathroom routine, I roll out my yoga mat and perform the Five Essential Asanas. Kiddo’s going to get a full round of gym and soccer practice today, but I need to find ways to squeeze in my own exercises. These asanas are specifically designed to stretch the entire body, which is something I appreciate more and more every year. I get one full-length yoga class on Saturdays, but this quick daily practice is enough to keep me flexible and centered between sessions.
6:35-6:45: My turn in the bathroom. I don’t take very long. I have a wash-and-go pixie cut and have long learned that at my age, I look better with very little makeup. I tend to rock a moisturizing wrinkle cream with sunscreen and Retin-A, and just a bit of colored, flavored lip gloss. Yes, I am a grown woman who still buys Bonne Bell. Some things never change.
6:45-7:00: Breakfast time! It’s nearly always cereal and fruit. We save complicated breakfasts like pancakes and eggs for the weekend. Kiddo is trying to get me hooked on eating yogurt with my cereal, which is something she picked up while on a choir trip to London last year. I don’t like eating that much food in the morning, so I tend to stick to my usual skim milk. Cereal also means very few dishes: we clear up our bowls and spoons and put them straight into the dishwasher.
7:00-7:05: Time for us to grab our bags and go. I recently invested in a new briefcase to carry my laptop, client material and electronic chargers (one each for the laptop, smartphone and Kindle). Having a professional-looking briefcase helps me take myself seriously even during a long day of insane client requests.
7:05-7:30: We have to be in the car to make it to kiddo’s 7:30 high school start time. I am going to be so glad when she is old enough to drive herself, but at the same time I’m already worried – I’ve seen the research about teens and sleep, and how changing melatonin levels mean she won’t be fully awake until 9:00 or so. Even right now she falls asleep in the car at least two or three times a week – but carefully, so she doesn’t mess up her hair! 
Cup of coffee
 

7:30-7:45: After dropping kiddo off at the high school, it’s time for me to hit the coffee shop. My favorite local joint has comfortable chairs, super-fast wifi and the best cappuccino in town. I open my laptop, check my email and get ready to face my clients. Yes, I’m a “work at home” mom, but that doesn’t mean I have to do all my work from my house! 

As much as I wish my daughter had a later HS start time, part of me is really glad that I get to start my day so early. Since I need to be ready to pick her up at 3:00, it’s good that I get a full seven hours of work before it’s time to start the evening rush. Between soccer, church choir, play practice and homework, we’re on the go until at least 9:00 p.m. – but I’ll have to save our evening routine for another post!
———-
Christina Moore
Christina Moore is a freelance writer, and stay-at-home Mom in San Diego, CA. She is enjoys staying fit with weekly yoga sessions, running along the beach.
*consideration was received for the editing and publishing of this article
Top