Browsing Category

DIY/Crafts

DIY/Crafts/ FUN/DIY/ Halloween

Posts from the Past: 4 Fun & Easy Halloween Projects To Do With Kids

This is a past post from the New Nostalgia archives.  I love visiting post from the past, especially seasonal type posts.  It is a great reminder to me of what I love, and what was post worthy!  I will be taking a trip down “past posts” road occasionally in the month of October.  I hope you enjoy!
//
We have been having a ton of halloween fun here at the Bowman House.  My girls just  LOVE all things spooky, and have been creating all kinds of spooky fun.  I am not one who is creative enough to come up with a project, so I depend heavily on FamilyFun.com!  It doesn’t matter what the season, the Family Fun website always has great, simple ideas.

Here are a few that we tried recently:

Salt Dough Ghosts and Paper Bag Trees
I can’t believe we have never made anything with salt dough before!  It is a cup of flour, cup of salt and a half of a cup of water.  Mold into any shape and microwave until hardened!  So easy!  The plan was to just create ghosts, but my girls wanted to get more creative, which was great, it kept them busy the entire evening.  The paper bag tree is a cute idea, but all that twisting left my wrists tired, so we decided to make just one!  I think making mini trees with brown paper lunch bags would be much better for little fingers and wimpy wrists.

Apple Bites
Gotta have a snack in the middle of all this creepy craziness!  Apples and Almonds, can’t get much healthier than that!

These were so much fun!  My girls spent almost 2 hours at the table creating these, and every few minutes there would be a trio of giggles drifting from the dining room.  They just loved finding silly face parts to glue on to their bags.  Aren’t they funny?
What would I do without Family Fun?  What did moms do without computers back in the day?  I am very thankful for ours, its kinda SCARY thinking about doing life without it!

BOO!
*Disclosure: this is  NOT a paid post, I just love Family Fun.com!

DIY/Crafts/ FUN/DIY

Sand Paper Printed T-Shirt- A Guest Post by Mini-Me!

*this is a guest post from my youngest Lil’ one.  She is 9 and spent the day working on this post!  She took all the photos, edited them in PicMonkey, made the craft, and wrote the entire post.  She has her own personal blog (it is not public) and she has been doing such a good job that I think she just might have to be a regular contributor here at New Nostalgia!  Enjoy!!
____________________
I found this sand paper printed t-shirt idea on Pinterest.  I thought it was really cool and I knew it would be really fun so I begged my mom to get me some sand paper and a t-shirt and finally she got me one a couple days ago.  I was so excited to try it out and I was hoping it would work well and it did.  
You will need:
 sandpaper, crayons, a white t-shirt, brown paper bag or card board, paper towels and an iron
First you draw any design you want on the sandpaper.  Make sure you push nice and hard, if you do this it will look better.  
Next, lay it upside down and grab your mom or dad to iron it for you. But before you do…

…put a paper bag inside the shirt so the melted crayon will not leak through.  After you iron for a few minutes, (you will see the wax melt and make wet marks on the back of the sandpaper) take a peek to see if it is good.  Then take it off.

After you do all of that, put a paper towel on top of the design & iron that.  This will get any extra melted crayon off.  If you want to write your name or words you will have to write it backwards or it will be backwards on the shirt (I learned this the hard way).  Do you like my TEN TOES in the last picture???
Since I love taking pictures I took a lot and it was pretty fun!  This picture above is my favorite one!
When you are done you can put it on and it will look really cool.  You can wear it all the time and people will wonder how you did it.  I think it turned out pretty neat and I think this is a cool craft so you should try it!
P.S. Oh yeah…My mom said the first time you wash and dry it to wash it by itself.
DIY/Crafts/ FUN/DIY/ HOME/ Organizing

Diversions & Simple Labels Made From Clothespins

This is a guest post from Becky at Clean Mama

//
Hi, New Nostalgia readers!  I’m Becky from the Clean Mama blog.  Today I’d like to talk a bit with you about diversion.  There are times when everyone needs a diversion from the everyday or not-so everyday.  A diversion, or distraction, can be helpful on so many levels.  Babies and kids benefit from diversion – enter screaming baby and noisy rattle – screaming stops and baby is diverted to something new and different.  How about a small child throwing a tantrum – offer a lollipop and the tantrum is gone (not that I’m advocating this, it’s just for example purposes).

Sometimes as adults, we need a diversion or distraction.  I think the beauty of a diversion is when we recognize the need for a diversion as a helpful tool.  How do you create a diversion or distraction?  Is it purposeful  and intended?  Quiet and therapeutic?  I’m not suggesting ignoring real problems or issues, I’m merely suggesting that instead of treading over the same thoughts, divert them for a bit and find something comforting to do.  Diversion looks different for everyone – reading a book, paging through a favorite magazine, sewing, going for a walk, baking up a batch of cookies, creating something….

When I need a diversion, I tend to go to my craft closet and look for something simple to make.  My latest diversion?

  A new twist on clothespins – I have found yet another way to use them in my house.  
I made clips for IN and OUT mail stacks.  Very simple and yet a good diversion.

Supplies:
clips, wood circles, stamp pad, letter stamps (from $ spot at Target), glue, clear coat (if you want)
stamp letters on circle disks
glue
IN/ OUT

some reminder clips were also made
I bet Amy would love to hear some simple diversion ideas in the comments – what’s your favorite diversion?
Want more from Clean Mama? Click here for her July Cleaning Schedule or visit links below!

DIY/Crafts/ FUN/DIY

DIY Simple Decorative Vases

*The following is a guest post from Laurie at Beauty Divine Design*
My office doubles as a nursery for my baby girl, so something I try to do is add in a few modern, creative touches and make sure it’s a place where I can still be inspired to design.
I’m going to share a really easy example of a DIY Simple Decorative Vase project that can be used in so many ways. I love that this project can take an everyday household item and turn it into a work of art without spending a lot of money.

All you need are glass vases from the dollar store (or recycled bottles, jars, etc.), candles or flowers to put inside and a few rolls of washi tape. I get mine from PrettyTape and use it on a LOT of projects. All you have to do is literally put the tape on the vases! It really is that easy.
I started with a vertical stripe. This result was my favorite and the easiest to pull off in a small amount of time. All you have to do is snip off the ends and fold them over the top of the vase.
The next design I tried was a spiral pattern which was a little more difficult only because it was hard to get a perfect angle each time. But luckily, the washi tape peeled off so easily when I needed to redo a strip!
I also tried doing horizontal bands around the vase. These turned out nicely but were actually really hard to keep straight all the way around.
And here’s the final result! So simple and fun.
I love to these for when I have fresh flowers in the house but when I don’t, these work perfectly as artsy candle holders too. Place a few on a mirror for a really inexpensive centerpiece for a wedding. Or you could line a few on your mantel over the fireplace to change it up. The possibilities are endless!
//
Thank you, Laurie, for this awesome tutorial!  I just love how simple it is and how many ways these vases can be used.  I’m off to order some washi tape right now!  
Laurie is author of Beauty Design Blog where she posts on everything from design trends and tutorials to her random daily life. She has such a way with beauty, and her taste is divine!  Click here to visit her blog.
Laurie also is the creator of Beauty Divine Design company which focuses on providing photographers with design templates.  Click here to visit her shop.
You can follow Beauty Divine Design here:
Beauty/ DIY/Crafts/ FUN/DIY

Homemade Natural Lip Balm

There is so much that I love about this little project of Homemade Natural Lip Balm!

~It is easy

~It is natural

~Can be made with no artificial ingredients, colors, preservatives

~It really works!

~It feels great on the lips

~It can be made all organic if you so desire

~It made my girls think I was mom of the year!


The recipe is very simple:


Homemade Natural Lip Balm
click on ingredients to purchase from Amazon –*affiliate links


3 tablespoons Coconut Oil

3 tablespoon Shea Butter

3 tablespoons Cocoa Butter 

3 tablespoons Beeswax 


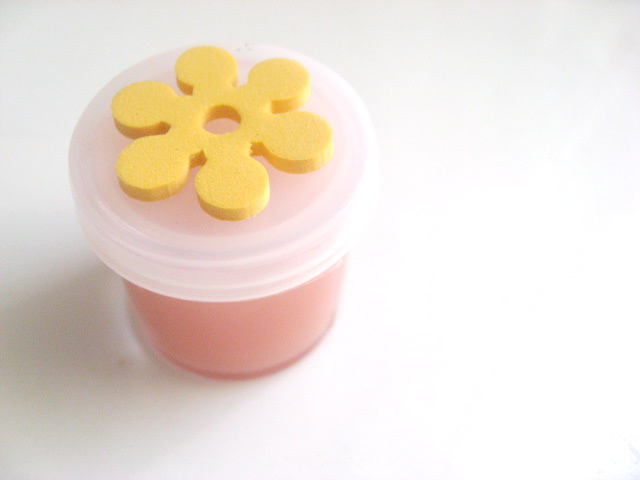
~If you want color, add a bit of your favorite lipstick to the mix.

~If you want flavor, add a bit of candy flavoring to the mix.

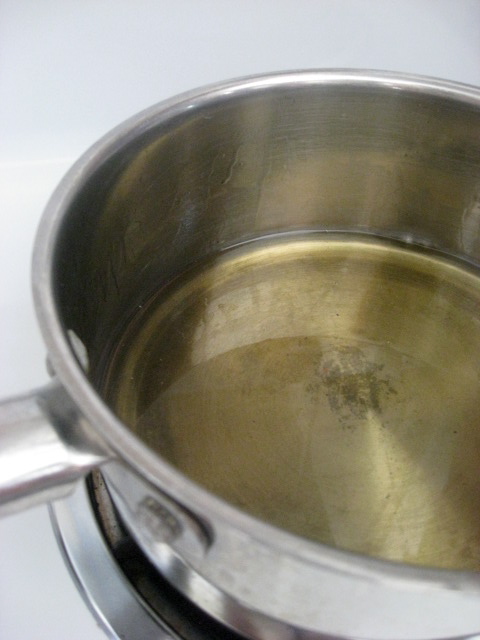
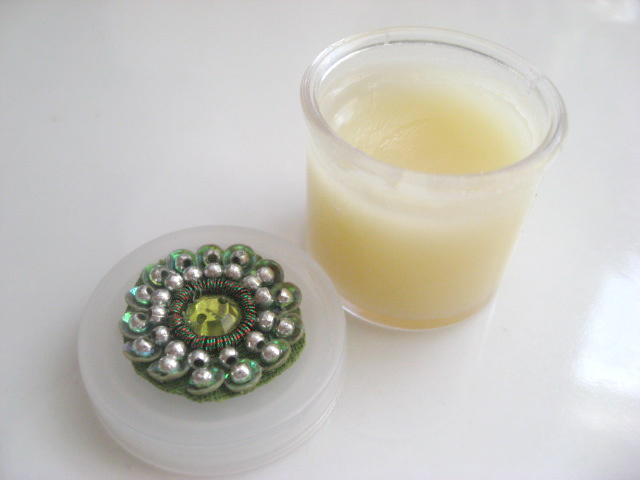
Put all ingredients into a pan.  Melt on low.  Spoon into containers.  Let set.  It takes just minutes, depending on the size of your container, to set up.


I found all the ingredients at one of our local health food stores.

I found our containers at Hobby Lobby.

I found the candy flavoring at Walmart, but I am sure they have it at Hobby Lobby, too.


The containers were found in the art supply section of Hobby Lobby.  I was super excited to find the little square containers, but super disappointed when we brought them home.  I didn’t realize they were stackables, so we only had 4 lids because I bought 2 packages, there were 2 stacks in each package.   That was disappointing, since I thought I was getting about 12 containers with 12 lids.  Instead, we have a bunch of leftover, empty containers that stack.  Grr.


I am SUPER pleased with how it turned out.  I can’t stand paying what health food stores charge for natural lip balm, so I love that I can make it myself.

My girls really got into this and kept saying what a fun project it was.  Next time, I will order some containers Amazon, like this Lip Balm Container, and I will skip the flavoring/coloring.  The cocoa butter/coconut oil gives such a nice scent, and I like the idea of keeping it super natural.  Also, by keeping it natural, you can talk the man in your life out of his yucky Chapstick an into this awesome Natural Lip Balm, minus the girly embellishment on top, of course.

 This recipe made quite a bit of lip balm.  It makes 12 tablespoons, so if each container contains a tablespoon, that is 12 whole containers of lip balm!

I am planning on storing the lip balm we are not using in the refrigerator.  I am not sure if that is necessary, but it may help prolong the life of the lip balm since it is all natural ingredients and no preservatives.

We found cute little embellishments for the tops of our containers and used a glue gun to glue them on.  You can also use stickers.


This would be a great fun at a little girls birthday party or a dress up party!

Enjoy!

More From New Nostalgia


DIY/Crafts/ Holidays/Parties/ Roundups/ Valentine's Day

Valentines Day Craft Ideas

7 Valentines Day Craft Ideas

Egg Carton Heart Art from A Little Hut

I just love this. You could make all kinds of shapes and colors out of these egg cartons. What fun!


Button Heart Valentine’s Day Card from K Werner Design Blog
Simple and Beautiful.


Puffy Tissue Heart from Kaboose
I remember making tissue art as a kid. These are cute, my girls could do this craft without much direction from me. Bonus!


I think this is so elegant. You could use any color felt and a heart-shaped foam form. These white ones would be beautiful to decorate a winter wedding. Red would be great for Christmas. Brown for fall.


Potato Stamp Art from Cafe Mom
I plan on using the inside of brown paper grocery sacks for this project.


This idea almost seems cruel! It smells like chocolate, looks like chocolate, but you can’t eat it!


I have never seen this craft before. What a great way to package little Valentine treats!


Top