Browsing Category

Beauty

Beauty/ Cancer Journey/ HEALTH/ Natural Products

My Every Day Health Decisions As A Cancer Survivor With Tom’s of Maine

My Everyday Health Decisions as A Cancer Survivor

Thank you Tom’s of Maine for sponsoring this post.

I am a cancer survivor. This is the 7th year that I can say those words and every year I grow more and more amazed at what a gift life is. I work hard at not taking it for granted.  Life is so precious!

Because I know life is precious, there are decisions I make every day to help me live a healthy lifestyle.

Whether it’s using my favorite yoga app, switching my deodorant to Tom’s of Maine Natural Deodorant, or taking turmeric capsules, I am passionate about making decisions to live my best life!

I am not in control of what my future holds and whether or not my cancer will ever come back, but I do know it makes a difference in my everyday life to pursue wholeness and health in different areas, and boy does it make a difference in how I feel every day!


Here Are 5 Of My Everyday Health Decisions I Make As A Cancer Survivor

Move My Body

I am not an exercise fanatic, but I have learned that it is important to keep my body moving. I’ve read over and over that getting exercise every day is a great way to stay healthy and cut my chances of recurrence.

I keep it pretty low-key and walk or do yoga every day. When the weather is nice, I will walk our neighborhood or around my favorite local lake. When it is cold, I’m a bit of a wimp and use our treadmill instead. Lately, I have been multitasking and answering email while walking on the treadmill–I really like how productive that feels!

I also love how yoga makes me feel. It has been super important to keep my body stretched and flexible, as the ongoing cancer medications I am on cause joint pain. Yoga makes a huge difference and I feel amazing when I am done, especially my back, neck, and joints! I use the Yoga Studio app on my phone and I LOVE it!

My Everyday Health Decisions as A Cancer Survivor

Supplements

I’ve taken several types of supplements throughout my survivor years, but the main ones I will not budge on are a Multi-Vitamin, Vitamin D, Turmeric, Fish Oil & Magnesium.

I take a Multi-Vitamin not to make up for a poor diet (because I eat quite healthy) but just as reassurance that I have covered all bases.

Vitamin D is something that most Americans are low in, and it is the one supplement my Oncologist was adamant that I take.

Turmeric is a natural anti-inflammatory and is a miracle worker for keeping my joint pain to a minimum. Fish Oil is to make sure I get all those good Omega’s, and Magnesium is the calming mineral, which is a great way to keep any of my worries and anxiety at bay.

My Everyday Health Decisions as A Cancer Survivor

Slow Living

If you follow my Instagram & Instastory, you know I am big into slow living. I often snap my favorite slow parts of the day. Life is busy, but it IS possible to slow, even if it means just slowing your mindset.

Stress can be so hard on the body, and if I’m going ‘a mile a minute”, then I miss out on this precious life I have been gifted with. I find a lot of ways to slow down.

I meditate using the Calm App, I journal, pray, read, & listen to calming music. I light my favorite candle. I deep breathe during yoga and work hard at being aware and present in life moments.

I just started a daily journaling habit. It is called Morning Pages, and I simply put on some soothing music and write 3 pages in my journal. It can be absolutely anything, whatever is on my mind from deep thoughts to lists of things I want to get done. The key is not to censor and just write. I’m loving this practice so far!

I also make sure I get plenty of sleep. It is amazing with all that my body went through while fighting cancer–chemo, radiation, and multiple reconstructive surgeries; plus ongoing medications and treatments that I use to keep cancer away–that I still have so much energy. I believe this is largely due to the amount of good rest I get. I use essential oils (hello lavender!) and melatonin to quiet my body down at night, and I sleep like a baby most nights!

My Everyday Health Decisions as A Cancer Survivor with Tom's Of Maine

Natural Products

I have been quite thoughtful about using products that are part of a healthy lifestyle and have ingredients that I can feel good about putting on my body. As a cancer survivor, I am especially aware of this when it comes to products I use every day.

How often do you look at what is inside products you use every day? Is the ingredient list simple and do you know what the ingredients are and what their purpose is? It is important to ask these questions.

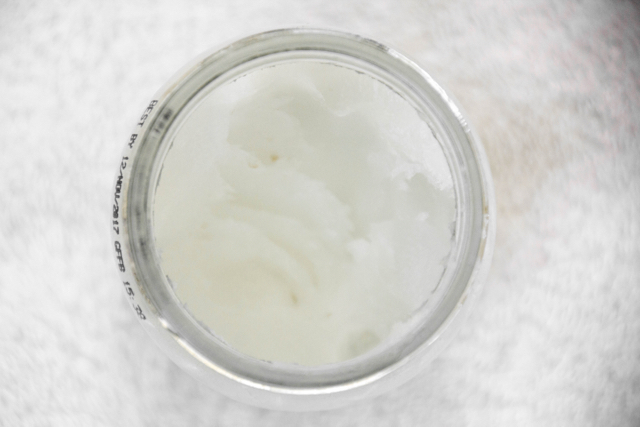
Examples of everyday products I use for a healthy lifestyle are Tom’s of Maine Natural Toothpaste, organic coconut oil as a body moisturizer, organic makeup foundation and Tom’s of Maine Long Lasting Natural Deodorant.

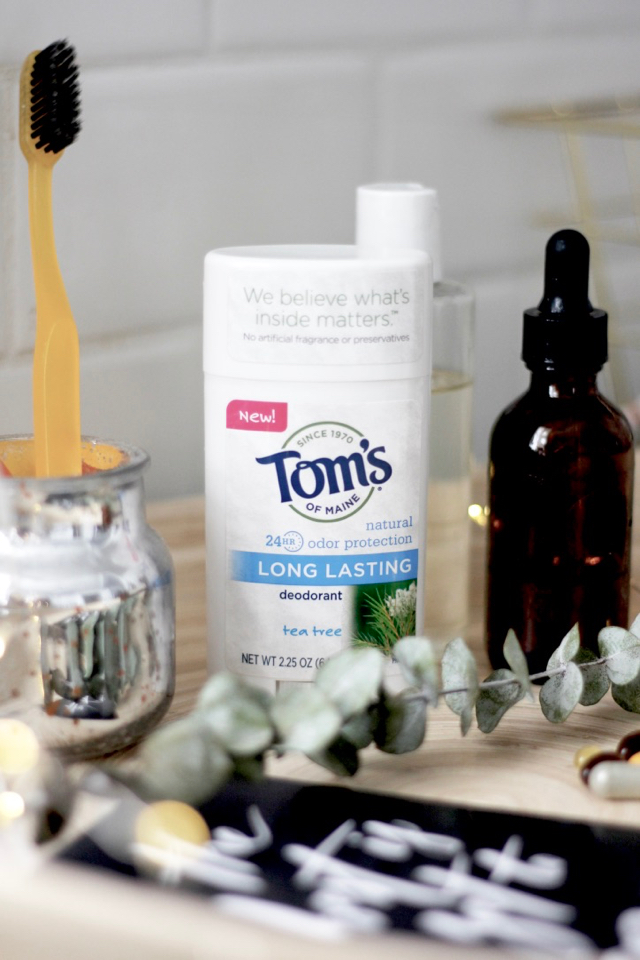
Let’s talk natural deodorant for a minute. I’ve made the switch to Tom’s of Maine Natural Deodorant. It is the #1 natural deodorant brand with a number of award-winning products among its deodorant portfolio–which contains 15 deodorants–in some of my favorite scents, including fresh apricot, wild lavender & tea tree.

Tom’s of Maine Natural Deodorant provides odor control in their aluminum-free formulas. That “aluminum free” part is why I love and am passionate about using a natural deodorant as a cancer survivor. I personally prefer not to have any aluminum in my deodorant.

There is controversy when it comes to what aluminum can do to your health, and I choose to stay way away from it.

My Everyday Health Decisions as A Cancer Survivor

A Note About Natural Deodorants

Staying away from aluminum means staying away from antiperspirants because FDA guidelines state that an antiperspirant must include a form of aluminum as an active ingredient.

Deodorants are not antiperspirants and do not provide the same wetness protection as antiperspirants. I’m fine with that and my body has adjusted to it.

If you are switching from a conventional deodorant to a natural deodorant, it will take some time for your body chemistry to adjust.

Trying the deodorant for at least 7 days, including testing out different scents (or unscented), can help you figure out what is the best fit for your body’s unique chemistry.

Tom’s of Maine Long Lasting Natural Deodorant uses the power of nature and fights odor using hops and natural fragrances, along with a blend of oils, organic aloe leaf juice, and other plant-based ingredients. It is free of petrochemicals, artificial fragrances, parabens, and preservatives.

I love and use the tea tree oil scent. I had a hard time deciding between the tea tree oil scent and the apricot scent–both smell so good. I often use tea tree oil in my everyday life for its antimicrobial properties. Bacteria on the skin can cause body odor, so I chose tea tree oil scent. It smells super fresh and clean.

My Everyday Health Decisions as A Cancer Survivor

Nourishment

Last but not least, I focus on nourishing my body every day. I drink lots of water & green tea. I focus on eating plant foods in all colors of the rainbow (especially berries & greens) and snack on nuts & seeds.

I use a visual food journal app called YouAte App, an easy way to keep me on track and visually see how colorful my food is. I stay away from fake foods or overly processed foods & excess sugar, especially when eating at home.

My Everyday Health Decisions as A Cancer Survivor

{FOR YOUR PINNING PLEASURE}

Are you a cancer survivor? What do you do every day for your health and what would you like to add to your health habits? Do you know someone who is a cancer survivor? Consider sharing this post with them.

Have you thought about the ingredients in the products you use every day? Is the ingredient list simple and do you know what the ingredients are and what their purpose is?

I was selected for this opportunity as a member of CLEVER and the content and opinions expressed here are all my own.

Beauty/ FUN/DIY/ HEALTH/ How-Tos/ Natural Products/ RECIPES

2 Ingredient Lemon Sugar Facial Scrub

DIY 2 Ingredient Lemon Sugar Facial Scrub

I make this simple homemade 2 ingredient lemon sugar facial scrub about once a week.  It is so easy to throw together, and it leaves my skin very soft, smooth, & exfoliated.

Start by juicing a half of a lemon.  I like to use the lemons in my refrigerator that are on the verge of being too ripe to eat.  This is a great way to use those lemons up!

DIY 2 Ingredient Lemon Sugar Facial Scrub

AN EASY WAY TO JUICE YOUR LEMON

Don’t underestimate the power of a simple fork!  I have several fancy lemon squeezing gadgets, but when I am just doing a lemon half, I grab a fork.  It is amazing how much juice a simple fork can extract! Just stick it in the lemon half and give it a twist while squeezing the lemon with the other hand. Rotate the lemon and repeat.

It is amazing how much juice a simple fork can extract! Just stick it in the lemon half and give it a twist while squeezing the lemon with the other hand. Rotate the lemon and repeat.

This lemon facial scrub has organic sugar and organic lemon juice in it. That is it! I squeeze 1/2 a lemon right into the jar, add about 1/8-1/4 cup of organic sugar and stir.

I like to use organic pure cane sugar. Regular white sugar has been bleached and I don’t want that in my body or on my face!

This makes enough for several applications, but in time the sugar dissolves, so I usually let my girls know that I have homemade lemon facial sugar scrub. I’ve been making this since they were young and loved doing “facials” with it.

I remember when they were little they would end up putting lots around their lips so they could lick it off.  Tastes just like lemonade!

It is delicious and ends up being a great lip scrub, too!  You could also take leftovers in the bath with you for a great body scrub.

DIY 2 Ingredient Lemon Sugar Facial Scrub

HOW TO USE LEMON SUGAR FACIAL SCRUB

I put some of the mixture into my palm, and rub in circular motions all over my face.  It feels so good!  I love a good scrub!  I then let it sit on my skin a few minutes until it gets sticky and feels a bit hard.  Then I get a washcloth nice and hot and just lay it on my face for a few seconds.  The steam opens the pores and softens the sugar mixture.  I then wipe off and rinse well.  I will often follow with a dab of coconut oil for moisture.


ATTENTION: My Essential Oil Recipe Blend Recipe Cards is part of the Herbs and Essential Oils Bundle! It is a super short sale so hurry! So much is included… 38 eBooks, eCourses, printables, and a membership site designed to help you use easy and effective natural remedies.

97% off! Click here to purchase and watch a short video all about it!

Find healing with natural remedies


I let it sit on my skin a few minutes until it gets sticky and feels a bit hard.  Then I get a wet microfiber facial washcloth — nice and hot — and just lay it on my face for a few seconds.  The steam opens the pores and softens the sugar mixture.  I then wipe off and rinse well.  I follow with moisturizer.

Lemons do have a lightening quality about them and I notice it has faded sun damage that I have on my forehead.  It is also great for breakouts.  It seems to really help with blackheads and just clearing the junk out of my pores.  I love it!

DIY Lemon Sugar Facial Scrub

2 INGREDIENT LEMON SUGAR FACIAL SCRUB

1/2 organic lemon
1/8-1/4 cup organic sugar

Juice 1/2 lemon using a fork into a mason jar. Add the organic sugar and stir.  Apply to face in circular motions and gently allow the sugar to scrub your skin.  Let sit for a few minutes.  Use a hot washcloth (I love a microfiber facial cloth–it is great for gently wiping away smudged mascara under the eyes) and lay on the face to steam for a minute, then use it to wipe of scrub.  Rinse well & moisturize.  Use the lemon sugar facial scrub once a week.


DIY 2 Ingredient Lemon Sugar Facial Scrub

{For Your Pinning Pleasure}

You might also like:
Homemade Organic Eye Makeup Remover
Homemade Face Moisturizer
100% Natural Oil Cleansing Method
My Favorite Pre-Shave & Post Shave For The Softest Legs

Beauty/ FUN/DIY/ Simplifying

Simple Spring and Summer Style

Simple Spring & Summer Style at Shopko

The older I get, the more important it is to keep my life simple. This includes my style. I’m all about simple basic colors, keeping things classic, and of course, comfort is key! I’ve made a board on Maven showing some examples of all the things I’m loving this summer and spring. They are all super afforedable and can be found at Shopko. Read to the end to learn about Shopko’s Friends and Family event and for a special discount code to use while shopping!

Spring and Summer Styles

{New Nostalgia’s Spring & Summer Style Wishlist Board on Maven}

Breathable & Breezy Spring and Summer Style

Breathable, breezy styles are a necessity for me right now. I take medications as a  cancer survivor, and they can really mess with my body’s internal temperature gauge. It can cause discomfort at times, so it is important for me to chose clothing that does not make my symptoms worse.  I need breathable, and I know I’m not alone in this!

We recently attended a dinner party at one of the most beautiful homes I have ever been too. It was a 5- course dinner that was served outside at sunset. I needed a dress that would keep me comfortable all evening, and found the perfect dress at Shopko! It was black, not too short, allowed me to breathe (through all 5 courses!) and had lace in all the right places. I am finding that lace is a great way to add a touch of feminine but still provide breathable coverage.

{hint: want the dress a bit longer? Do what I did…add a black slip underneath for added length under the lace}

Classic Pumps

I finally bought a pair of comfortable, black pumps. Shopko had both shiny and matte in this style, and I choose shiny! I also chose a heel that was not too high, which makes these pumps quite comfortable. Black pumps look great with dresses, skirts and even jeans.

Simple Spring & Summer Style

Dainty Necklaces

I used to like a statement necklace, but as I’m getting older, I am less about trendy and more about classic style. I have been opting for simple, dainty necklaces. They are feminine, don’t weigh heavy on the neck, and you can wear more than one at a time. I love how several small chains look when stacked. I recently bought a 16″ sterling silver chain from Shopko and have been wearing it all day every day. I love seeing just a touch of sparkle at the neck when light catches the chain just right. I think it is understated sexy.

Ruffles

Just like lace, ruffles are so feminine. They can tend to be trendy, so I look for styles that are classic or vintage and solid in color, like this adorable, touch- of -vintage ruffly shirt.

Oversized Bags

I’m a bag lover. I love all sizes of bags but especially love a large bag to throw in all the things! For spring and summer, I like a more casual bag that can go from shopping to the pool. The touch of shimmery gold metallic on this bag below makes me smile.

Athleisure Wear

The same medication I talked about above, and turning 40, has caused some dreaded weight gain, so this also influences the clothing I choose. Athleisure wear to the rescue! Athletic wear has come a long way and is not just for the gym–although I plan on spending some time there! A nice soft basic black legging or capri legging, cotton shirts that are breezy and are long enough to cover a bit in the back, and athletic shoes have become my favorite style. I look for shirts that are classic colors and that fit well. I also look for simple details that take them from a plain cotton t-shirt to a shirt with some interest.

Hats

Something I refuse to get too old for is a great baseball cap. I will throw one on for an early morning walk in my neighborhood before the sun gets too high and hot. I will throw one on after swimming at the pool to help tame my naturally wavy locks. I also love them at the gym with a high ponytail.

Comfy Shoes

There is nothing more comfortable than a classic white sneaker. If you get the right pair, like the Adidas Woman’s Cloudfoam Advantage, they can go from your gym clothes to jeans, shorts or capris, and even with a t-shirt dress. Throw a jean jacket over the t-shirt dress for those chilly spring evenings.  If you are feeling a bit braver and need some color in your life, I’m crushing on these minty green Puma Leisure Shoe this season.

Spring and Summer Style

T-shirt Spring or Summer Dress From Shopko

Shopko Friends & Family Event

So there is my plan! It has been much fun gathering my favorite Sping and Summer Style items on my Maven boards. Everything is super affordable, especially during Shopko’s Friends and Family event!

Use promo code FNF119 at checkout for Friends & Family event (Extra 20% Off Home & Clothing and Extra 10% Off Furniture & Electronics, valid online from May 21 12:01 AM to May 24 11:59 PM).


What about you? What are your spring and summer must-have’s? Do you relate to needing simple, easy, comfy & breezy?

Beauty/ FUN/DIY

How To Get Beachy Waves With A Curling Wand

How To Get Beachy Waves With A Curling Wand

I am a cosmetologist, and even though it has been years since I worked in a salon, I still love messing around with hair and trying new styles and techniques. I’ve often been asked how to get the beachy waves that I wear, and thought I’d share my techniques and favorite curling wand with you.

A curling wand is the key to easy beachy waves. I use the Infiniti Pro by Conair Tourmaline Ceramic Curling Wand and love it. If you click on the link, it will take you to Amazon, where they show a couple of videos of how to use the wand. I also show 2 of my favorite videos below, one for beachy waves in long hair, one for short hair.

This curling wand gives spiral curls that start wider and taper to smaller (like an inverted triangle) which I prefer compared to the uniform curls of a non-tapered wand. It keeps the curl from starting too tight up high by your scalp, as long as you hold the wand with the tip pointing down. I like that I can hold the hair around the wand longer for a tighter curl, or can pull on the curl after releasing it from the wand to make it more of a wave. I also love that this particular wand allows you to adjust the heat.

I think wands are much easier to use than curling irons, especially once you learn the proper way to use them. Keep reading for lots of tips, tricks and 2 videos.


How To Get Beachy Waves With A Curling Wand

~Comb out your tangles.

~Section hair. Use a clip or hair tie, leave a 1-inch section at the bottom, and clip the rest on top of your head.

~Use a 1-inch curling wand and take 1-inch sections of hair.

~Curl sections around the face away from the face, but alternate the rest—away than toward, away than toward.

~Leave your ends out of the wand (about an inch or two) for a beachy look.

~If your hair does not hold curl well, spray with hairspray (Kenra 25 is my FAV) as you go to give the hair some ‘tackiness.’

~Let curls cool before messing with them in any way. Important! This sets the curl and makes it hold.

~Work around the whole head using 1-inch alternating sections, leaving the ends out.

~When finished with your whole head and after letting curls cool, use fingers to piece out and break up the curls.

~Use backcombing on last 2 layers if you need extra volume. (see video below for technique and volume root tease spray.)

~Smooth any flyaways and finish entire head with a flexible-hold hairspray.


Top 2 Tips for Beachy Waves:

{these are key for a modern, beachy look!}

Curl away from the face around the face.

Leave 1-2 inches of your ends straight.


Keep reading for videos of the technique. Take note the 2 products she uses in the first video. They are easy- to- find drugstore products. I especially like the root lift spray and teasing technique at the crown for those of you who need volume.

Sidenote: notice her eyebrows. I love that thicker eyebrows have come back into style. No more over-tweezed skinny eyebrows! Her brows are a bit more structured than I do, but I still like them! I’ve been filling mine in and will share the brow products I use in an upcoming post.

Have shorter hair? I don’t want to leave you out. Here is a video tutorial for you!

Notice, she uses a large curling iron, but the same technique for beachy waves. You can use a curling wand in place of a curling iron. She uses sectioning, curls away from face around the face, and a leaves bit of her ends out for that beachy waves look! Also, look at her eyebrows. Nice and filled in! Love.

——-

So there you have it! Beachy waves for all lengths of hair. I just adore the undone easy look of the waves and especially love that it looks even better on the 2nd day.

If you try it out, let me know how it goes!

Beauty/ FUN/DIY

DIY Pedicure Routine With Help From A Professional & Amopé

AMORE-PIN

Thanks to my cosmetology license, I can share with you the exact steps I used to give pedicures as a professional in a salon. This DIY Pedicure Routine can be a lifesaver, especially now when flip-flops and sandals show the wear and tear that summertime can bring. Doing your own pedicure will save money, & leave you with feet that feel wonderful and toes that sparkle!

I attended cosmetology school as an 18-year-old, and was working in a salon by age 19. My specialty was hair cuts and colors, but I built up quite a few regular manicure and pedicure clients. I was always happy to see one of them on my appointment book, as it gave me a break from standing with my arms raised, and gave me a chance to just sit and enjoy my client while attending to their nails.

People always asked me if it bothered me to work on other people’s toes. It never did thanks to the soak that each client started out with. By the time I handled their feet, they were nice and clean and disinfected. I quite enjoyed giving pedicures, knowing that it made my clients feel pampered. I remember some great conversations and feeling relaxed as I filed, massaged and polished away!

Below is a step by step DIY Pedicure Routine. It is perfect for summertime, and really anytime! Doing it yourself just might give you the same pampered feeling as a professional pedicure would, but without the cost!

amore-pedicure-supplies-1

Supplies:

Basin big enough to fit both feet

Towels

Hot water

Soap

Epsom salt (optional)

Toenail clippers

Nail file

Nail buffer

Cuticle pusher

Cuticle clippers

Amopé Pedi Perfect™ electronic foot file

Exfoliator

Moisturizer (I use Coconut Oil)

Polish (base coat, color, & top coat)


DIY Professional Pedicure Routine

DIY-Pedicure-Brush

Clean/Soak

Use a container big enough to fit both feet. Fill it with hot soapy water. You can add some epsom salts for a dose of magnesium. Lay a towel down on the floor, put the basin on top, and make sure the rest of your supplies are within reach. Sit in a chair in front of the basin and soak for 5 minutes. This cleanses, relaxes, and softens up the cuticle & rough skin.

DIY-Pedicure-nailclippers

Clip

Dry one foot, and keep the other soaking for these next 3 steps–clipping, filing and buffing. Only clip if you have excess length. Keep toenails straight across to avoid painful ingrown toenails.

File

Use a file to smooth out the rough edges, remembering to keep the toenail straight across, and not too short. Toenails that are too short show too much skin at the end of the nail, which is not aesthetically pleasing and makes polishing difficult. Want to try something different than the traditional nail file? Try the Amopé Pedi Perfect™ electronic nail file.

DIY-Pedicure-files

Buff

Toenails can tend to have ridges, and buffing is an easy way to make the top of the toenail nice and smooth. Start with the roughest part of the buffer, and work your way eventually to the smoothest side of the buffer.

DIY-pedicure-basin

Switch

At this point, switch feet. Repeat above steps with your other foot, and place the foot that you just buffed back into the water.

DIY-Pedicure-pusher

Push

Once both feet are clipped, filed and buffed, it is time to push back the cuticles. Dry both feet off. Gently push back any over-grown cuticle. Use the instrument to get any dirt out from under the toenails. Use the water to rinse and keep things clean.

DIY-peducre-cuticle-nippers

Trim Cuticle

Only do this step if you have excess cuticle. Do not over-trim. Make sure to get any hangnails.

Diy-pedicure-exfoiliate

Exfoliate

Use exfoliator of choice. My favorite is my Coconut Lime Sugar Scrub, or my Lemon Sugar Scrub. If you want to keep it simple, use coconut oil mixed with some sugar and maybe a drop of essential oils. Rub exfoliator into both feet and up onto the ankle. You could go as high as the knee if you’d like. That was our stopping point as professionals. Use basin water to rinse all exfoliate off & dry both feet.

Diy-pedicure-amore-4

Smooth

This is where I get to introduce you to my favorite tool for keeping my feet super soft and smooth. It is called the Amopé Pedi Perfect™ electronic foot file. I bought it at CVS great deal, thanks to a coupon that I used. It is perfect for summertime daily wear and tear, especially for cracked, dry, thick heels! This tool is wonderful for the heel, under the big toe, at the side edge beneath the pinky toe and anywhere you have hard, dry, rough skin that needs to be smoothed. I found it worked much faster and was so much easier than smoothing by hand with a foot file. The Amope’ Pedi Perfect conforms to the shape of your foot and feels wonderful while smoothing. It has a safety stop feature that makes it safe to use, and there are no sharp blades so I feel comfortable letting my teen girls use it. I so wish I had this tool when I was doing pedicures professionally, as I get better-than-professional results with it! It feels great, is easy to use, has replaceable roller heads and is one of my favorite recent purchases. Keep scrolling for an awesome coupon to get one for yourself.

diy-pedicure-coconut-oil

Moisturize

Give both feet one more good rinse, dry them off, then moisturize all the way up to the knee if desired. I simply use coconut oil.

Massage

Take a minute to pamper yourself and really rub the moisturizer into your feet. Pay attention to the arch, each toe, in-between toes and even the top of the foot. Do a couple of toe flexes and ankle stretches while you are at it.

DIY-Pedicure-cotton-pads

Prep

It is now time to polish, but if you don’t remove the moisturizer from your nail beds, the polish won’t stick and will chip immediately. Nail polish remover is perfect for removing any leftover oils and even your own natural oil from the nail bed. This step is key for good nail polish adhesion. Saturate a cotton ball or pad with polish remover and remove all moisturizer from each toenail.

Diy-pedicure-white-polish

Polish

Polish in this order: Base Coat, 2 Coats of Color, Top Coat.

I love getting more adventurous on my toes when it comes to color. I often choose my color depending on the season or if I have a special outing, I match it to my outfit. I love using brighter colors and even glitter polish on my toes, even though I am much more conservative with my nails.

Despite all the talk of adventure, my toenail polish crush right now is white. I love how clean it looks. It makes my feet look much more tan than they really are and it matches every flip-flop, sandal, and outfit that I have.

…………

AMORE-FOOT-CARE

…………………

So there you have it. Step-by step for a DIY Professional Pedicure. It is such a great feeling to have cute summertime toes by doing my own pedicure and saving money.


Beauty

A Healthy Perfume Amber Oil

IMG_5501

I didn’t initially buy this perfume oil because it is a healthier way to wear a scent.  I bought it because the cashier at my local Whole Foods store smelled so fresh & clean that I had to ask her what perfume she was wearing.

She told me it was Amber Oil, and took me over to their essential oil section and showed me Amber Oil by Nemet International. Nemat is a line of rich perfume oil blends that has its company roots going back 170 years to India.

She told me just a few drops in the morning is all it takes to keep her smelling great all day, and that she gets compliments on it all of the time.  I bought it, and now I am the one getting compliments…even from my teenage daughter which is a feat in and of itself!

I call it a healthy perfume because this perfume oil is bare bones with no added filler oils or alcohol.

Did you know that many perfume sprays can be harmful to your health?

Why A Healthy Perfume

  1. Many main stream perfumes have ingredients are irritants and can trigger allergies, migraines and asthma.
  2. They contain chemicals that are synthetic and can be harmful to the environment and toxic to aquatic life & humans.
  3. Many fragrance’s have ingredients are used to enhance the performance of the perfume, such as the one that I am most concerned about personally– Diethyl Phthalate or DEP.  DEP is widely used in cosmetic fragrances for its lingering effect. Phthalates are in most of the popular selling fragrances.  They interfere with hormone function and have been linked to early puberty in girls.  Being a hormone receptive breast cancer survivor, I care about anything that messes with hormones!

Amber-Oil

How I Use Amber Oil:

This brand I use is so concentrated, that it only takes a couple of drops for all day fragrance.  I drop 2 drops onto my wrist, rub them together, then give them a quick rub down whatever I am wearing.  Sometimes that is my scarf, sometimes it is my jacket, and sometimes it is whatever shirt I am wearing.  Don’t worry about oil residue on your clothes…I have never seen oil spots or stains from using Amber oil.  Most of it is rubbed into your skin, the rest is just lightly skimmed over your outfit.

My daughter has commented that when she puts on my jacket, that it smells so good.

Amber oil is never over-powering.  It is a light, clean (without being floral or soapy), fresh, & warm (without being heavy) scent.  To me, it smells like a hug!

……….

Another perk?  It is much more affordable than most perfumes out on the market today, under $15.00. Some have had trouble finding it at their local Whole Foods store.  You can order it on Amazon if you prefer.

Beauty/ Christmas/ FUN/DIY/ Holidays/Parties/ Uncategorized

10 Ways To Sparkle & Shine This Holiday Season

SPARKLE&SHINE


1. Crest 3D White Luxe Supreme FlexFit Whitestrips

I cannot tell you how impressed I am with Crest 3D White Luxe Supreme FlexFit Whitestrips.  They WORK!  You wear a strip everyday for 2 weeks, an hour a day. These strips stick and stay in place–you can even drink water while you are wearing them.

I am about 12 days in and I can’t tell you the difference in my smile. It is pretty amazing. I drink a lot of coffee and tea so I was due for some whitening.  My brother-in-law is a dentist and approves of Crest Whitestrips. He even had my husband use Crest Whitestrips before fixing a front tooth veneer.  He wanted my husbands teeth to be as white as possible before color matching the veneer.  My husband and I were amazed by the results!  Nothing like having a professional recommend Crest Whitestrips for a professional result!

I had some sensitivity to the strips, so I used them every other day instead of everyday, and bought some toothpaste for sensitive teeth.  I had a cleaning in the middle of my whitening experience, and my dental hygenist approved and reassured me that the sensitivity would go away.  It has.

“Get $7 off your purchase of Crest 3D White Luxe Supreme FlexFit Whitestrips at Target.com: http://clvr.li/1vwTKSS”

IMG_0109

IMG_0110

2. Nails That Shine

One thing I love to do around the holidays, especially Christmas and New Year’s Eve, is wear a  glittery, shimmery or sparkly nail polish.  It looks so great & festive to have a little sparkle at the fingertips.  If every nail is too much for you, you could polish all of your nails a color of choice and put a coat of sparkle over the polish on ring fingers only.  It’s a ‘thing’ right now…ya know?

I was just recently introduced to the world of gel nail polish and WOW! I sure didn’t know what I was missing. It has been 3 weeks since my manicure and the polish still has not chipped!  I have stayed away from gel manicures as I like to keep things pretty natural and only used nail polish with less chemicals from my local health food store,  but now that I know what I’m missing it will be hard to not do it again!

 IMG_0111

3. Red Lips & Fun Lashes

I don’t wear red lipstick very often, come think about it, it really is only during the Christmas season that I do wear it.  I love how a simple red lip can make me feel festive, even if I’m wearing all black!  Hint: If wearing a red lip, keep eye makeup natural and toned down.  It usually takes a professional to balance made-up eyes with a red lip.  It is best to keep shadow neutral and light, with just a bit of natural brown eyeliner and mascara.  Choose to either make the eyes pop or make the lips pop, but not both.

A great way to make eyes sparkle is with false eyelashes.  I am wearing them in the picture below.  That photo was taken last year when my man took me out of my birthday.  I don’t wear false eyelashes often.  Really just for very special occasions — like a birthday date, anniversary date or a fancy party.


4. Shine Spray for Hair

Shine spray is my secret weapon against flyaway, winter static, and frayed ends.  I love it, and most brands work well.  The key is to not overdo it, or you will end up with greasy looking hair.  A little goes a long way.  Want a more natural approach to shine hair?  Do my coconut oil moisturizer treatment & then put a tiny bit of coconut oil on the ends of your dry hair to smooth dry ends.


5. Sparkly Headbands

I love that headbands are an option no matter what length your hair is.  I do feel like I’m getting close to the age where headbands might start looking a bit too juvenile, but I will keep wearing them, as long as I can get away with it, especially the more fancy ones with a bit of sparkle!

 FullSizeRender

6. Necklace, Bracelets, Earrings

I have a pretty tame, some would say ‘plain’ wardrobe.  I buy a lot of black, grey & neutrals.  I buy classic.  To give my outfits some personality, I rely on accessories.  A necklace, bracelet or earrings are a great way to add a bit of specialness and sparkle to any outfit.


7. Shine From The Inside-Get Your Greens & Turmeric & Fluids

You all know how much I love drinking lemon water, as I talk about it all the time. It is another great way to shine from the inside out.  When you are dehydrated, it shows.  Being hydrated plumps skin up and helps it glow!

When I am drinking green smoothies, there is a noticeable difference in my skin tone.  When I stop, I look pale and drab. The dark leafy greens in smoothies really do help give some color to skin, as does a carrot thrown into those smoothies.

Good fats like nuts and avocados are a great way to make the skin glow, too. I love adding both to my smoothies.  I am sipping on a smoothie as I type this that is my Velvet Elvis smoothie but with 1/2 an avocado added.  Yum!

Another way to give yourself a bit of color from the inside out is taking Turmeric supplements or drinking delicious Turmeric Chai Tea. Turmeric is an amazing root with tons of health benefits.  The reason I take it nightly is because it is a natural anti-inflammatory and helps bring relief to joint pain that I experience as side effect from my cancer meds.  It is a supplement that I will take the rest of my life due to the health benefits.


 8. Statement Shoes

My birthday at the end of November, which I love.  My Todd and I do not exchange gifts.  Instead, we give each other the gift of experience and memory by going out on a hot date!  I love that my birthday falls right as the holiday season starts.  Everything always feels so festive and fun.  The one draw back is dressing up while it is cold outside!  I hate being cold, so I have found a lot of ways to make a pair of black slacks, leggings, or a great pair of jeans look less than ordinary.  The best way I’ve found to do this is by adding a statement shoe.  High heel is a must, and a shiny red high heel is my favorite around the holidays. I also love a great shoe in glittery gold or silver.

IMG_0607

9. A Sparkly Scarf

I often fall back on this one.  I love showing up to a nice Christmas party or dinner with a warm scarf, and I especially love adding a bit of fun to my bland grey coat with a sparkly scarf.  Look for scarves with silver or gold thread or material running through it.


10. A New Do’

I’ve been crushing on Taylor Swifts bangs & had to copy!  I was looking through my instagram feed and a couple of selfies that I took seemed to be all forehead!  I decided I needed to soften it up a bit so I got my ends trimmed just yesterday and asked my stylist to give me the swoopy- side- Taylor Swift bangs.  She did it and I love it!  Follow my Instagram feed–I will post a picture of how I look with bangs soon!

——

What are ways you add some sparkle and shine to your holiday look?

Do any of these stand out to you?

How about those pearly whites?  Do they need a bit of Crest Whitestrips this holiday season?  They would make a great stocking stuffer, especially if you have teenager girls like I do! Shop at Target and pick them up in time for Christmas.


I was selected for this opportunity as a member of Clever Girls and the content and opinions expressed here are all my own.

Top