Browsing Category

Organizing

FUN/DIY/ HOME/ Homemaking/ Organizing/ Simplifying

9 Ways To Use Jars To Spring Organize And Spring Clean

“This shop is part of a social shopper marketing insight campaign with Pollinate Media Group® and Cooking Light and Real Simple, but all my opinions are my own.  #pmedia #FreshandFab http://my-disclosur.es/OBsstV

If you have been reading New Nostalgia, then you know I have a love affair with mason jars.  Why do I love them?  So many reasons!
~They come in many sizes
~They are inexpensive
~They are not plastic
~They are simplistic in design
~They are glass, which does not keep me guessing on what and how much is inside of them!
~They have a gazillion different uses!
I think the understated mason jar is just perfect, and are the perfect example of something from yesterday that can simplify today, which goes right along with the title of this blog, New Nostalgia.
I was recently super inspired by Real Simple magazine & a picture I saw in it. They used my beloved mason jars to organize, but made them even better by using chalkboard stick-on labels.  I think the nostalgia of chalk goes great with the nostalgia of mason jars, and together they make such an appealing look!  Those labels would be the perfect purchase to keep my motivation up to organize, which is perfect as spring is coming and I have got the urge to get everything in its place and spring clean!
Are you a fan of Real Simple magazine?  How about Cooking Light magazine?  They are 2 of my personal favorite magazines, and right now if you buy the April issues of both magazines at Target, you will receive a $5.00 Target gift card from the cashier while supplies last. I got mine and I was giddy excited to get home, relax and read my new magazines!
Here are 9 ways that I’m already using mason jars to make life a bit more simple & organized:
1. Use them as drinking glasses.This Iced Tangerine Mint Green Tea look so beautiful in them!  I also love just simple lemon water in them, and I use them almost daily for green smoothies!

2. Store craft supplies.

Mason jars are great for storing craft supplies, especially DIY Scented Gel Paints!  I like to use the small size jars to round up small craft supplies –like googly eyes and buttons.

3. Use for DIY gifting.

Jars are the perfect container for a large batch of DIY homemade gifts. They keep great in storage to grab and gift when in need!  I love having this Peppermint Stick Hot Cocoa Mix on hand during the holiday months.

4. Use to store leftover foods.

I personally despise stained plastic containers, and REALLY do not like searching for the right lid for the container!  If you use mason jars, there are only 2 lid sizes.  I throw all my lids and rings for the lids in a big bowl for storage.  No more stained plastic.  No more searching for the right lid.

5. Use for food storage in the pantry.

I love the look of jars in the pantry.  Small jars are great for herbs.  Larger jars are great for grains.  They stack nicely and look so pretty!

6. Use for food storage in the freezer.I use jars to freeze leftovers or my some of my favorite large-batch recipes, like this Strawberry Freezer Jam or my favorite Pepper Onion Relish. The smaller pint size jars are great for stacking and fitting a lot of food in a small freezer.

7. Use them to organize your healthy eating and motivate you to eat more plants!

Turn your refrigerator into a work of art where you family will want to come, snack on a rainbow of fruits and vegetables, and get excited about it!  I don’t know about you, but when my veggies are prepped and staring at me through the glass of the jar, it makes me grab and eat!  Jars also make your veggies super portable.  On the go in a rush?  Grab a jar and go!

8. Use for utensil storage.

I love keeping my wooden clips in a mason jar.  I also keep straws in open jars to grab quick for smoothies.

9. Organize your salad ingredients.

Use them to create an at-home salad bar that stays fresh and beautiful for days in the refrigerator!  You can easily put a ready-to-eat layered salad in a jar that will keep for days — just make sure you put the salad dressing at the bottom.  When I have all my salad toppings in jars and ready to go, it makes my goal of eating a big, leafy green salad at least once a day very do-able.  Don’t forget to grab the jars of slivered nuts, dried cranberries & sesame sticks in the pantry to sprinkle on top and make your salad on to look forward to!

_________

I hope these images of beautiful magazines and beautiful jars motivate you to do some of your own spring organizing and cleaning.  Remember to spring clean your bodies by eating good foods, too!

Don’t forget to grab your April copies of Cooking Light and Real Simple, and your free $5.00 gift card.

Happy Spring!

{Don’t forget to Pin It!}


DIY/Crafts/ FUN/DIY/ HOME/ Organizing/ Sponsored

DIY Glittered Glass With Glittered Duck Brand® Tape

This post brought to you by Duck Brand. All opinions are 100% mine.

I’m so excited to share this easy DIY Glittered Glass project with you!  I’m all about organization, simple beauty, and being frugal, and this project envelopes all three of those things with the help of Duck Brand Craft Tapes.

I’m a girl who loves sparkle, but the mess of glitter projects make me cringe!  Thanks to Duck Brand® Glitter tape, I now can have my sparkle without the mess.  Duck Brand® Glitter Crafting Tapes give a cool glitter effect without flaking!  There is no paper backing to mess with as it is self-adhesive just like all of the Duck Brand® crafting tapes.  It comes in fun bright colors – Pink, Aqua, Silver, and Red.  
I chose the silver and aqua for my crafting project to match the colors of my bedroom.  The aqua is actually a soft blue.  I needed extra storage for my beauty items that I wanted on hand and ready to grab.  I am using my glittered glass containers to hold cotton swabs, fingernail files and my hand lotion, and one to add a touch of green plant beauty.

At the other end of my dresser, I used a glittered glass vase to hold a candle.  The candlelight reflection makes the glitter tape come alive when lit, which is really beautiful!
Here is all you need to make your own Glittered Glass with Duck Brand Craft Tapes.
~Miscellaneous glass containers
~Duck Brand® Glitter Crafting Tape
~Scissors
~Crafting knife
~Craft Cutting Board

I used the round shape of the Duck Brand® Glitter Tape as a stencil for my half moon shapes.  I love anything with a curve!

I simply stuck the tape to the cutting craft board and used the craft knife to cut squares, strips and triangles.
Then the fun part!  I stuck the shapes onto the glass containers, some random, some layered.  When you are working with sparkles you really just cannot go wrong!  Use your imagination and get creative with your shapes!  Get the kids involved and let them help you stick the tape on.
_______
If you love crafting tape as much as I do, make sure to check out the other types of tape from Duck Brand®.  The have Fabric Crafting Tapes, Prism Crafting Tapes and Washi Crafting Tapes! They can be used for so many things, from labeling to scrapbooking to home accents–creativity is never stifled by the Duck! 
 For tons more crafting inspiration, make sure you follow Duck Brand® Tape on Twitter at @DuckTape. 
Visit Sponsor's Site

FUN/DIY/ Holidays/Parties/ HOME/ Organizing/ RECIPES/ Sides/ Sponsored/ Sweets

A Sweet Snack Mix & A Salty Snack Mix– Perfect For Your SuperBowl Party

“This shop is part of a social shopper marketing insight campaign withPollinate Media Group™ and Rubbermaid and Sharpie but all my opinions are my own. #pmedia #RubbermaidSharpie  http://cmp.ly/3/8vNxcO
If I’m going to take the time to make a savory or sugary treat (or both!) that does not offer much nutrition, I’m going to have a few ultimatums.
1. It has to be for a fun reason–a get together with friends, a birthday or a party–like THE SUPER BOWL!
2. It has to make a lot of treat for a little time in the kitchen.
3. It has to be low cost.
4. It has to be easy.
5. It has to taste awesome!
Bonus points: It has to be easy to store.
These two snack mixes do all of those things…times 2!
My favorite thing about both mixes is that they have at least 4 ingredients in common–peanuts, cheerios, pretzels and bugles.  It is so great to buy one bag of each of them and divide it between the 2 recipes! I love efficiency.
These mixes are perfect for feeding a crowd and munching on during a football game.
Let me tell you how I made them the perfect snack for the Super Bowl game.

I headed out to Target to pick up my supplies.  I got 2 glass Rubbermaid bowls for holding the mix, a package of Sharpie Pens, and some plastic cups.  I made sure I got enough cups for holding both drinks and snack mix.  Again, I’m all about efficiency!

While you are at Target, make sure you use the mobile coupon service and text COUPONS to TARGET (type TARGET into the phone number section of your phone) and grab the $1 off food storage Rubbermaid coupon and the $1 off Sharpie 4 pack or larger coupon.  This option will be available January 25- February 8.

I love my Sharpies! If you have been reading this blog long enough, you know I am a huge fan of Sharpie markers.  I use them all the time.  I love them for crafting and I use them almost daily in the kitchen to label my leftovers or write little surprise messages for girls’ lunchbox.
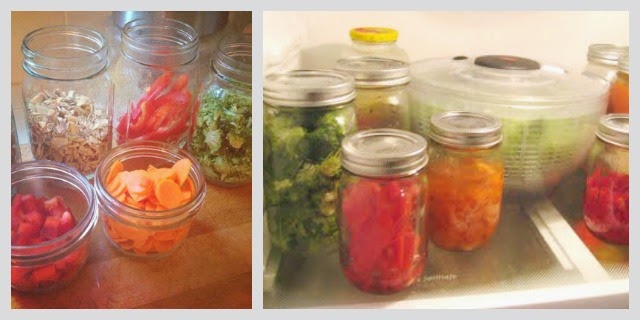
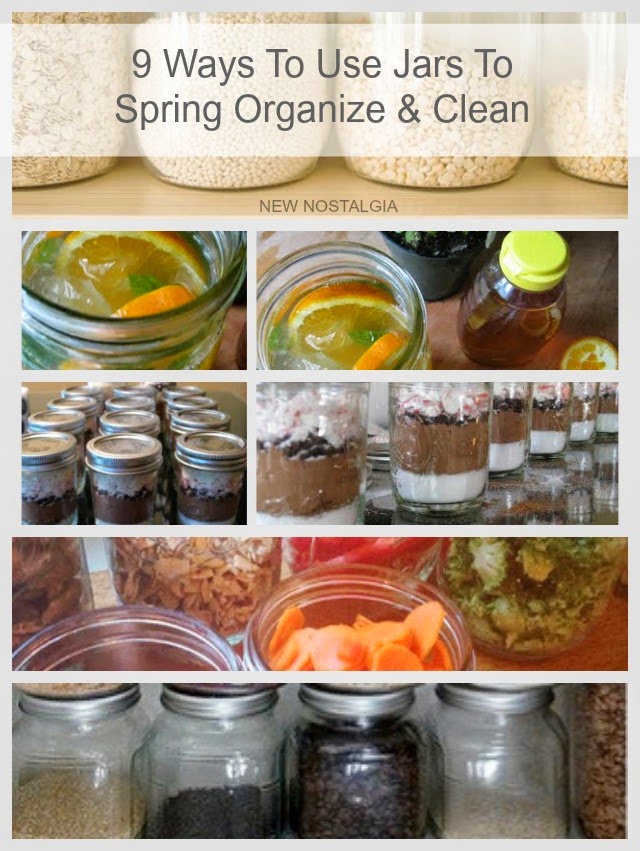
You probably also know I am a big fan of using glass for storage…usually I re purpose jars.  I have been wanting some bigger bowls to store larger portions of soup leftovers and snack mixes.  Rubbermaid glass line is the perfect solution.  They completely seal with one easy touch, they lids nestle into each other for easy storage, or if you want to stack the bowls they do that perfectly, too!

I used the bright green insert from the Rubbermaid bowls — which was actually a picture of green beans– to use as a fun border for my snack tags.  I thought it looked like grass which is perfect for a Super Bowl party.

I cut a piece of white card stock into a square, backed it in the green, then used Sharpie markers to embellish with a simple black and white border on top and the numbers of a football field on the bottom.  You don’t have to be an artist to get crafty with Sharpie!
I used a container I found in the dollar section of Target to put my Sharpie markers in.  It looks pretty to set the Sharpie markers out and let the guests mark their own cups.

Isn’t Juiper the cutest name ever?  My daughter has a friend named Juniper and they call her ‘Junie’ for short.  Ahh..so cute!

Some guests will use the Sharpie Markers to write the team name on their cups– in team colors of course–letting everyone know who they are rooting for.
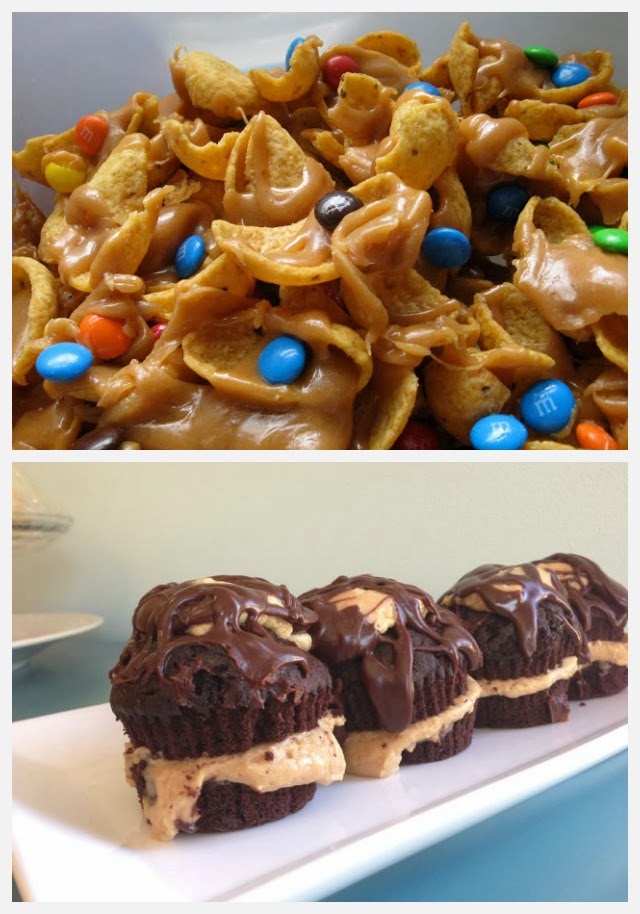
Doesn’t that look yummy?  Bugles, pretzels, cheerios, peanuts and M&M’s!  Like I said, a great thing about making these two recipes at the same time is that they use common ingredients, but no one would even notice because they are such different tasting recipes.
It had been awhile since we had a fun sugar treat in the house.  This is how my daughter felt about that!

Every party should have a little bit of sweet…

…and a little bit of salty!
Make sure you pick some of these cute football brownies up while you are at Target.  They come in a long, thin box with a little girls face on it.  Yea…that one!  They make a fun, football touch to the table without having to spend hours in the kitchen, AND they are inexpensive!

If you are traveling for the party, you can just put the tags on top of the lids and use the lids as snack markers.  If your party is at home, grab a couple little jars, tape a paper clip to the back of the jar, fill it with mix to cover the tape, and display your snack tag.  Easy!  If you love how this looks but are taking the mix to a party, take the jar and and stick the mix in and the tag on when you get there.

I bet you are wondering how these snack mixes taste?
Well, the sweet one speaks for itself.  It is very sweet with just a touch of salty, crunchy with chocolate and peanuts, all covered in white almond bark.  It makes a ton and both kids and adults love it.
The savory, salty mix is a unique one, and you will get asked for the recipe often.  It is salty with a bit of sweet, has chili powder and curry in the seasoning which makes it stand out from your typical snack mix.  It uses some fun colored potato and vegetable chips which also makes it stand out from the crowd. It is very addicting and also makes a very good amount.

What are your super bowl plans?

————–

Super Bowl Sweet Mix

1/2 jar (8oz) peanuts (16 oz jar)
1/2 bag(8oz) pretzels (16 oz bag)
1/2 bag (6oz) bugles (12 oz bag)
1/2 box Cheerios (8.9 oz box)
1/2 bag M&M’s (12 oz bag–use extra to make table pretty, or just eat them :))
1 lb vanilla almond bark

Mix all ingredients except for almond bark in a large bowl.  Melt almond bark as package directs.  Pour over mixture, mixing to coat well.  Spread out onto waxed paper to dry.  Break into chunks and store in airtight container.  Saves well for several weeks.

Super Bowl Savory Mix

1/2 jar (8oz) peanuts (16 oz jar)
1/2 bag (8oz) pretzels (16 oz bag)
1/2 bag (6oz) bugles (12 oz bag)
1/2 box cheerios (8.9 oz box)
6 oz chips (I used Terra Chips- Exotic Harvest)
3/4 cup brown sugar
3/4 cup butter
1 tablespoon worcestershire sauce
1 1/2 tablespoons chili powder
1 tsp curry powder
1/2 teaspoon garlic powder

Mix peanuts, pretzels, bugles, cheerios & chips in a large bowl.

Mix brown sugar, butter, worcestershire sauce, chili powder, curry powder and garlic powder in a small saucepan.  Heat on med until sugar is dissolved.

Pour seasoning mixture over dry mix.  Toss until well coated.  Pour onto 2 large cookie sheets.  Bake at 350 degrees for 40 minutes, stirring after 20.

Healthy Eating/ Organizing/ RECIPES/ Sweets

No Bake Chocolate Peanut Butter Freezer Slice

I will be making this recipe for years and years to come.  Yes, it is that good. It is the perfect chocolatey peanut butter treat!  It is healthy, easy to make, everyone loves it, and it keeps forever in the freezer.

It starts with nuts, and we all know how good nuts are for us.  They are full of protein and all of those good oils that help with digestion and make your skin shine!

There is no processed sugar in these, but they satisfy a sweet tooth and are plenty sweet thanks to the dates, raisins and honey that are in them.  The coconut oil adds a bit of sweetness, too.

Start with processing the nuts in a high speed blender or a food processor until crumbly.  I have a little one who does not like nuts, so I went pretty powdery with my nuts to keep her happy.  She devoured these and kept asking for more!

Add dates, keep processing until they are in small pieces & mixed well.

Add the rest of your ingredients.  Process until consistency can be rolled into a ball…a messy ball.  Keep scraping the sides of your blender or processor to help blend.

Make sure you lick that spoon!

Press mixture into a lined pan. I used my fingers but then smoothed my prints out with the back of a spoon to make it pretty for all of you!

Mix up the icing.

Are you drooling yet?  This is the best part.  Mmmmmm.

Top bars with icing.  Use a bit of water to thin if too thick.  If too thin, don’t worry, it will firm up in the freezer.

Slice it up and hide it in the freezer.  If you share it will be gone in minutes.

The texture of this slice is so satisfying.  It is chewy even when frozen, easy to bite into.  The frosting melts so creamy in your mouth.  I love that they are cold, too, which really adds to the satisfaction!

{Don’t Forget To Pin It!}

Chocolate Peanut Butter Freezer Slice

 
6-8 Fresh medjool dates
¼ cup of raisins
1 cup of nuts (they can be mixed nuts or not. I like to use macadamia nuts, Brazil nuts or walnuts)
pinch of good quality salt
1/2 cup cocoa
1/4 cup peanut butter
1/3 cup of honey
2 Tsp of water
 
Icing
1/3 cup cocoa powder
1 Tbsp coconut oil (melted) (no substitutes)
2 Tbsp honey
2 Tbsp peanut butter
1/2 tsp vanilla
pinch of salt
 

Directions
~Place your nuts into your food processor or high speed blender and process until crumbly.

~Add your dates and raisins and process again. 
~Now add your salt, cocoa, honey and peanut butter.
~ Process till it starts to come together. If the mix is too dry add a little water a bit at a time till the mix sticks together when pressed into a ball. 
~Press this mix into a small lined container. 
 
Directions For Icing 
Mix cocoa, melted coconut oil, honey, vanilla & a pinch of salt to bring out the flavor. Add water if too thick, if too thin, don’t worry, it will firm up in the freezer.


Pour or spread the icing onto the raw chocolate slice. Pop back into the freezer till the icing firms up, then slice and enjoy. This slice keeps great in the freezer if it lasts that long.

———
This post was inspired by our amazing Raw Foods Contributor Teniel Moore from Addicted To Raw. She wrote about a similar chocolate slice minus the peanut butter and high raw.


Christmas/ GF, Vegan & Raw/ Holidays/Parties/ HOME/ Organizing/ RECIPES

Raw Gingerbread Cookies


by Teniel Moore {raw foods contributor}

Who doesn’t love a gingerbread cookie at this time of the year?
To me the smell and spices of gingerbread reminds me of Christmas.

I have a wonderful easy raw gingerbread recipe for you that is made from all wholesome ingredients. Nothing highly processed or artificial.

A cookie you don’t have to feel bad about eating. Sounds good to me! This recipe does require a dehydrator. But don’t despair if you don’t have one. This cookie dough is good enough to eat raw.

Here are the delicious ingredients:


How to:

Raw Gingerbread Cookies
1 cup almond flour
1 cup oat flour
1/2 cup coconut sugar
2 tsp freshly grated ginger
1/4 cup coconut nectar
2 tsp black strap molasses
1 tsp ground cloves
1 tsp cinnamon
1 tsp salt
1/4 tsp nutmeg

Make your own almond and oat flour by grinding nuts and oats in a coffee grinder.

Place all the dry ingredients into a food processor and blend, then add the wet ingredients and blend.  Mix should come together in a ball.

Put mix on dehydrator sheet and roll out with your hands.  Mix will be sticky.  Cut into any shape you like.  Makes approximately 16 circle cookies.
Dehydrate on 105 for at least 6 hours, then take off the dehydrator sheet and continue to dry on trays until dried through.  Usually it will take at least12 hours or more.  Keep in the refrigerator. 

——-

Your mix should come together into a ball in your food processor. It will feel a little sticky but should be firm enough to hold together & ready to be rolled out onto your dehydrator tray. 


You can make the cookies just oval shapes, but I love to make stars, large gingerbread men or Christmas trees. Have fun & make use of your Christmas cookie cutters while in the festive season.

Remember these cookies are not going to rise or change shape so they can be placed very close together on your dehydrator tray.


These cookies go nice with a glass of home made almond milk. A good treat to leave out for Santa this Christmas eve.


Raw gingerbread cookie dough tastes great raw too. So if you don’t have a dehydrator then simply roll the dough into balls and enjoy. I also love to crumble up some gingerbread cookies and top it onto some home made gingerbread ice- cream.

I hope you enjoy these cookies just as much as I do.


Don’t Forget To Pin It!

—————
FAMILY/ Healthy Eating/ HOME/ How-Tos/ Organizing/ Parenting/ RECIPES

How To Establish a Balance Between Healthy Recipes and Non-Healthy Recipes For The Family


A Reader Question:
I can’t help but notice all the healthy things you post about and pin, and yet perusing through your pinterest pages I see that you aren’t shy about ‘non-healthy’ recipes as well.  I am starting to try to eat clean but am wanting to find a balance where I can still go on Pinterest and not have to shy away from everything I see and being able to bake with my kids and actually have them enjoy the finished product, etc.  How do you establish this balance for yourself and your family?


My Answer:
Great question!  We save the fun, unhealthy recipes for our Friday Family nights and for birthdays, holidays and special occasions.  On normal days, we still have some sweets, but they are made with healthy ingredients, like the Apple Pie Bites I just posted.  Most of the time the sweetest thing in the house is frozen or fresh fruit which is great, because then the kids will grab it and eat it!  I work very hard at not having junk in the house during the week, but then always make sure we have a treat on the weekend.

Expanded Answer:
We love food around here, so I make a point of finding a balance between healthy eating and less healthy eating.  I feel good about the fact that we eat very healthy during the week, but then indulge on the weekends or during special occasions.  It is amazing how often special occasions come about, so believe me, my kids are not deprived.  If anything they appreciate food and have a healthy understanding of food that is nourishing and food that is not. They also are aware of how good healthy food makes them feel and how crappy they feel after eating too many sweets….not that it stops them from indulging but it makes them appreciate the necessity of good, nourishing food.

I think key to eating clean and healthy is to know what you are eating.  You are already winning the battle if you are eating from home and making things homemade.  This eliminates fast food & processed foods, artificial flavors and colors, and chemical ingredients that are next to impossible to pronounce.
Another key is finding sweet recipes that have ingredients that are profitable for the body and health.  Below are a few great examples, and my Vegan Desserts board on Pinterest has a bunch more ideas.

Our Favorite Healthy Snacks

Lastly, get your kids involved in the cooking and baking process.  Explain to them why honey is better than processed white sugar, and why whole wheat flour is better than white flour.  Get them used to making recipes with wholesome ingredients and talk about what each of those ingredients will do for the body–i.e. nuts…they have lots of protein that help build strong muscles and give energy!  
My girls are so used to cooking in a mindful manner that this Thanksgiving my 10 year old was appalled at how much sugar we used to make a Cranberry Cake.  It was 1 1/2 cups, and I love that she noticed that it was not the way we usually bake treats.  We also made Potato Casserole and she had NO IDEA what cream of chicken soup was.  I never buy it, and she just couldn’t understand why anyone would want creamed chicken! Then I told her it was really just flavored like chicken, which she very dramatically responded “eww!”  It was a good example to me of how much our eating habits have changed over the years.  A few years ago just about every dinner I made had cream of ‘something’ soup in it…and cheese…and sour cream…and butter.  
Our Not So Healthy Favorite Snacks

Funky Fritos – we make these once a year during football season

I think a balance is important, and I am very comfortable with how we have chosen to eat in our family.  If you are trying to change your family’s eating habits, take it a little at a time, explain why you are making each change as you do, and be patient.  They will eventually adjust and might just start to appreciate mindful, healthy eating.

GF, Vegan & Raw/ HOME/ Organizing/ RECIPES/ Sweets

Amazing Apple Pie Bites

I had 2 weeks worth of delicious meal brought to our home while I was  We were so spoiled with great food, and these Amazing Apple Pie Bites were one of my favorite food items brought.
My friend Andrea brought a great meal for us.  She made us Rachel Rays Italian Sub Stoup.  The flavor of this stoup was SO good. It has been forever since I have had an Italian Sub, and this soup tasted just like one.  Andrea used ground beef instead of sausage, and did not use as much meat as Rachel does in the recipe.  She also skipped the garlic toast floaters and brought us some Beer Bread instead.  She brought the soup in a crockpot and cooked/kept the pasta separate until ready to serve.  She also brought us a simple cinnamon apple salad, which I will write about soon.  It was all so yummy.
On to the Apple Pie Bites!  They are so healthy, a nice protein snack, and really, really good.  I froze half of them and let another girlfriend of mine taste them when she came over.  She LOVED them and could not believe they were sugar free.  The dates make them a nice sweet treat, and the dried apple gives them a great texture and amazing REAL apple flavor.  There is just the perfect amount of cinnamon added.  They are truly the perfect treat.
I was sound asleep when Andrea delivered the meal, but my 3 girls couldn’t stop talking about this little cutie, Andrea’s little helper/delivery boy. How cute us he?  He melts me every time I see him, and the way my girls were gushing about him, I know he had that affect on them, too!
Amazing Apple Pie Bites {from Our Paleo Life}

1 cup pecans
1/2 cup almonds
1-1 1/2 medjool dates, pitted (about 10-12 dates)
3/4 cup dried apple slices (not apple chips) (no sugar added)
1/2 tsp cinnamon
pinch of sea salt

1. Combine all ingredients in the order listed, in a food processor.

2. Process until mixture resembles coarse gravel.

3. While the processor is running, add a thin stream of water, about 1 tsp, maybe less depending on the moistness of your dates.

4. Stop the processor and check the consistency of the mixture.  If it sticks together when you smush it, then you’ve got the right consistency.  If it’s still crumbly, add more water.  You don’t want to add too much water because the bites will be too sticky.

5. When you’ve go the right consistency, roll mixture into tablespoon-size balls.

6. Store in an airtight container in the refrigerator for a week or so.  Can also freeze them.


Top