Every year I find myself keeping Christmas decor more and more simple. It is amazing how freeing it is! Less bins, less mess, less dusting, less time setting the house up & less clutter.
I’ve been pleasantly surprised to find that ‘less is more’ when it comes to Christmas decor. My home feels just as festive, cozy and meaningful as it did in past years. I know this is because I was purposeful with what I decided to keep around.


1.Keep the Twinkle & Sparkle
I adore anything that has a twinkles and sparkles, especially around the holidays. Even my nail polish gets a bit of sparkle around this time of year!
Christmas lights are a great way to add amazing atmosphere in a simple way.

2. Use Books
Books are a practical way to add meaning to your decorations. We had a tradition when the girls were young to buy a Christmas book each year. We now have a collection of about 13 amazing Christmas books. I used to read one every evening when the girls were younger. Now that they are teens and preteens, we save it for Christmas morning, after stocking are emptied but before bigger gifts are opened. It is a great reminder as to why we celebrate Christmas. Every time I pass the book in the picture above, I am reminded of THE gift of this season.

3. Keep Things That Make You Smile & Bring Tradition
It is hard to know what to keep and what to get rid of when downsizing Christmas decorations. This fun pillow was a no-brainer for me. It was given to me by my Mom which makes it automatically meaningful, it adds a pop of color, texture & whimsy to our couch, the kids love it, and it makes me smile. That pillow will be around for years to come.
I must touch on the subject things that are kept because they were gifts from loved ones. Your loved ones do not want their gifts to add clutter, work, stress and extra dusting to your life. It is ok to let things go. If it does not make you smile, get rid of it.

Getting rid of things can bless others. Whether you give your extra items to a local mission or to someone in your life that you know might like it, it can be a super meaningful thing for everyone around.
Here is an example. For years I have drooled over nativity sets every time I would go to Hobby Lobby during the holiday season. Yep, I would lust after shepherds and 3 wise men. I just love nativity sets…but I do not love their price. I settled a few years ago for this little snow globe that has sparkly glitter that floats when shaken and plays music. It brought our family much joy.
This year, my Mother-in-Law texted and said she was downsizing her decorations and asked if I wanted a nativity set. She had 2 to choose from. I get a bit giddy, but asked for a picture as I know I would only want to accept something I would love to keep around and matches my esthetic & taste. I had my fingers crossed for a very simple, all white nativity set.
She sent a picture of 2, and sure enough, one of them as all white. It is so precious to me. It is worth every bit of dusting and packing it up with care that I will need to do. It has brought such a feeling of peace to look at in the midst of a pretty challenging December. I will share a picture of it below, but it brings me to my next point:
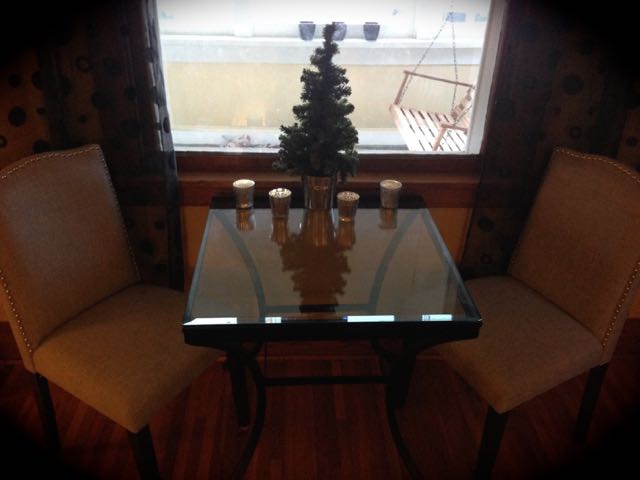
4. Know When to Say Yes To Gifts Offered
The new items in our home this season is the nativity set I spoke of above, and these two chairs. I love that both items that pack a punch. I brought this table out from our kitchen in to the living room. In the world of laptops, I love having a sitting area with a table in my living area. Todd’s Mom, Sharon, knew I needed chairs for it, and my birthday happened to be at the end of November, right when I was rearranging and decorating. She suggested gifting me a chair for my birthday and a chair for Christmas, and even let me pick them out.
These chairs make me so happy! I have already had some amazing heart-felt moments & conversions while sitting in them. I love that the silver embellishments add just a bit of shine. They can be found at Target.

4. Candles, Candles, Candles
Todd and I were at a Christmas party thrown by my sweet mentor. There was a gift exchange and I stole this candle from another person at the party, as it was one of those fun gift exchanges that you are allowed to be selfish at. Love it! This candle smells so, so good. It is a bit of a unisex scent, not too girly or fruity. I want to go grab a couple more up before they sell out for the season. It can be found at Bath & Body Works.
I light candles every day during December. I love having a candle burning, both for the scent and the warmth they bring.

6. Be OK With Using Inexpensive Decorations
I’m all about the dollar store! This little tree and those silver balls both came from the dollar store a couple of years ago. They add a ton of sparkle to a dark corner of our living room. I sprinkled those little glitter balls in a couple of areas, which made that dollar stretch! I like that I am more free to get rid of items if I know they didn’t cost a whole bunch of money, and I like it when things don’t cost a whole bunch of money!
The candy canes also came from the dollar store. Hooked onto a vase, they are super festive & add fun color to my dark book shelf.

7. Add Meaningful With Whimsical
The HOPE photo above was taken by my dear friend Megan Newsom. She used to be a contributing author here at New Nostalgia & she was such a gift! She is an amazing photographer and has such an eye for creating and capturing beauty. It is crazy to think I have never met her in person, as I have such a heart connection to her. She sent me this photo in a care package when I was going through surgery. It was the perfect word & perfect gift. When I look at it, it brings back all the emotions of opening her care package & the love I felt from her in all of the sweet details of it. It makes me very happy!

8. Don’t Take Your Decorations Too Seriously
This is important especially if you have young ones. Cherish every one of those homemade decorations. Notice I didn’t say you have to keep them all! I said to cherish them. Notice them. Display that amazing kid art your kids are so proud of. Use the refrigerator to group them together or even tape them into a collage on a door. A key to keeping things organized and easy on the eye is keep in mind the idea of a group. Kids are packs a sweet punch when grouped together, verses spread out all over the house. When everywhere, the eye doesn’t know where to look. A grouping tells the eye right where to go.
We have the tradition of making a gingerbread house every year. My 11-year-old youngest is the only one still interested in that tradition. She made the one above. I love displaying them every year! I love how they look with our Nutcracker. He is one of the few decorating items I kept from when the girls were young. I remember little chubby fingers playing with it, making his mouth open and close.
The great thing about gingerbread house is they can be thrown away at the end of the season.

8. Wreaths
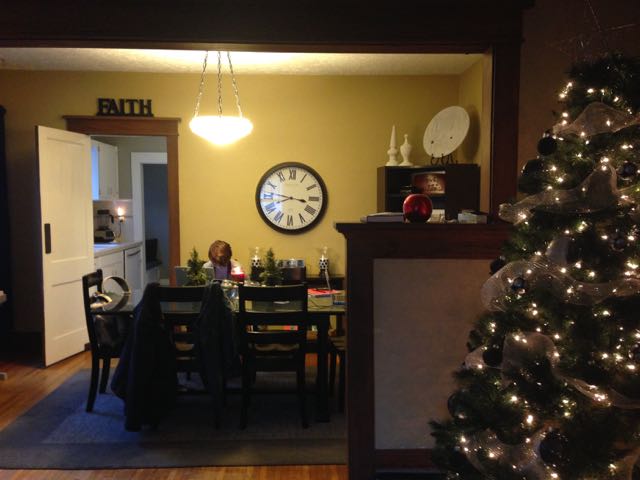
I only have one wreath, and one is enough. I love that it is large-scale, which makes a statement. I also love any Christmas decorations that I can make stretch through the winter season. My wreath is plain enough to keep out until spring, as it just has a few pinecones added to it.
I do the same with a few evergreen trees. They, too, are simple enough to keep out as winter decorations until spring. This year I have two of them at our dining room table. You can see them keeping my Colsie girl company as she does her homework in the picture below.
9. Pops Of Color
My pop of color choice for Christmas is red. It is a no-brainer. It will never go ‘out- of -style’ at Christmastime.
The round, red candle holders below are from my sister-in-law. They add red, shine and sparkle. I have had them for about 5 years now and I love them.

Another way to add a pop of color at Christmas is to use wrapped gifts. The silvery gift wrap you see is so very pretty under the tree as the tree lights reflect off of it & create a sparkle under the tree. I love it so much I will be purposeful about buying reflective gift wrap again this year at the after Christmas sales.

10. It Is OK To NOT Have Christmas Dishes
I got rid of all Christmas dishes, except one festive platter,one red mug, and those little tea bag holders. I love drinking hot chocolate out of my festive mug, and it is made double special as it was a gift from a friend. I use the platter when we are asked to bring a sweet treat to parties.
I do not miss packing up a bunch of Christmas dishes.
What do you think of my new stackable Starbucks mugs? I used some birthday money I was given and splurged on these awesome mugs. I ordered them on black Friday where Starbucks was having a deal of free shipping and $25.oo off every $70 dollars you spend. They were a steal.
I have very little kitchen cupboard space so I got creative with a cabinet that we brought into the kitchen from the living room. I took the doors off and am using it for storage. I freed up a ton of cabinet space by getting stackable, matching mugs. These mugs feel so nice sturdy in your hands, & make me very, very happy!


11. Don’t Decorate Every Room
I used to go nuts and have Christmas decorations in every room. Not anymore. I now keep it to my living room, dining room, a couple pops of sparkle in my kitchen & a festive candle in my bathroom. That is it.
It is what works for me. I no longer dread packing and unpacking Christmas decorations.
The little evergreen in the kitchen window was a birthday gift from a friend. I love!
Notice how even marshmallows in a jar can look festive. Finding ways to decorate yet still be practical is rewarding for me. I love making the mundane beautiful, and my kids love just grabbing the jar of cocoa mix and marshmallows when in the mood for a warm drink. Accessible warm drinks are a must in my kitchen during the holidays!

Whoops…I forgot about this guy in our home office. He has a matching friend on the other side of the desk. These nutcracker’s were kept purposefully and will be given to my girls when they move out. They were gifts from their Grandpa Don which he bought them when he took them to the Nutcracker a few years ago. It was a super special night and it was when I was sick, so I remember being so touched that he would love on them in that way & create such a beautiful memory. I think they look great with our new office painted wall treatment.

Do you see my ‘new-to-me’ nativity? Isn’t it just wonderful?
———-
How about you?
Do you feel like simplifying Christmas decorations?
Why or why not?

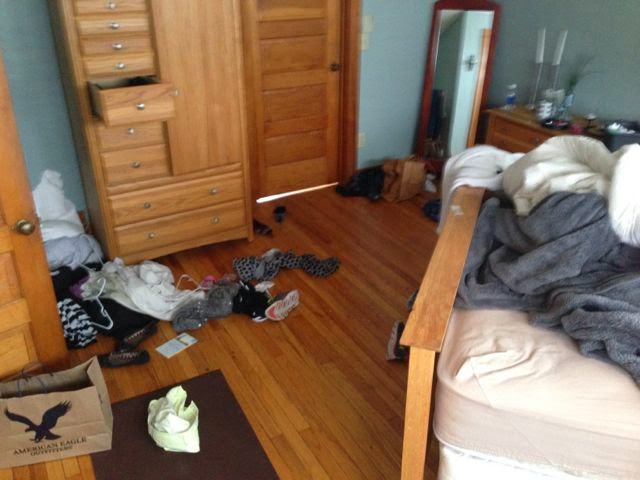
 {BEFORE}