Tonight my husband and I are going out to celebrate our 14th wedding anniversary. I’m so excited! It is a special occasion, so I decided to put some extra effort into making myself look somewhat special for our hot date!:)
The last few months, in the name of simplicity and being more natural, I have not put much effort into my physical appearance. Don’t worry, I have showered (ha), but I have not had color in my hair for the first time in years, I stopped polishing my nails, and it was the first summer where I really didn’t care if I had a tan. There are numerous reasons, such as:
~I wanted to experience my natural hair color before it started turning gray
~I’ve had Melanoma, so baking in the sun is not the best thing for me
~Nail polish was time consuming and always needs reapplied a few days later
~Beauty products are expensive
~I was trying to use more “natural” products. Hair color chemicals and acetone nail polish remover do not quite fit under that category.
All good reasons, but I’m a licensed cosmetologist, and it seems like I just can’t go too long without wanting to practice my creative beauty skills on myself. It is just too much fun being a woman not too!
So, the last 2 evenings, instead of writing blog posts, I have turned my home into a spa and have played beauty shop. It has been fun and worth it, and I feel ready for my date. I have to admit, I did pout a bit thinking about how great it would be to have someone else shampooing my hair and doing my pedicure, but in the end, I SAVED A TON OF MONEY! That is a good feeling.
Here is what I did:
~Cut my hair. I kept in long but put a ton of layers into it.
~Highlighted my hair. My natural color is a coppery red. I added pale blond highlights.
~Shaped my eyebrows
~French Manicure
~Pedicure
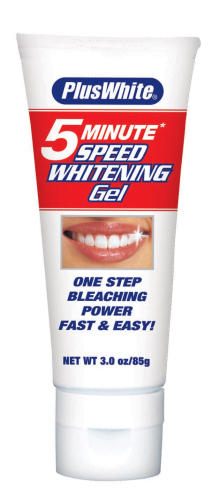
~Whitened teeth
~Tanned using self tanning products
Now just because you are not a licensed cosmetologist does not mean you cannot do this, too. The web is a great resource for tips and tutorials on how to do things yourself. It is where I get a ton of ideas!
Haircut
For the most part, I would recommend you leave this to the pros, unless you are trimming your bangs or making a side swept fringe. Kandee Johnson has a great tutorial on how to cut a fringe.
Highlights
Another thing to leave to the professionals, UNLESS you are a natural light brown or blond. If you were to try and highlight hair that is darker, it will tend to pull a brassy gold color and it will not be pretty. If you are already naturally light, you will have much more luck. Depending on how much warmth you have naturally in your hair and eyes, you may still tend to pull some yellow, but it will be much easier to tone with an ash color and many would not even need to tone. Because I am a natural red head, with lots of warmth, I definitely needed to add a toner to my hair after the lightening process.
Highlighting My Hair
~I pulled strands of hair through the cap (kinda old school process compared to foiling, but I can’t foil my own head of hair!) If you want natural, slight highlights, pull less hair through every other hole. I wanted to be quite blond so I pulled it through quite heavy, every hole. Since I couldn’t see the back, I just stuck the hook through randomly, not caring if I got in the marked holes or not. 🙂
~I put the lightener that came with the kit on the pulled through strands of hair. (it is usually a thick pasty white or purple color, essentially hair bleach)
~I put a plastic Target bag over my head and secured it with a clip. This holds heat in to help process faster.
~I let it lighten until a pale yellow color. This took about 25 minutes for me. Your goal is the color of the inside of a banana peel if you are wanting a beachy, light blond highlight. If you can get it that color, great. Like I said earlier, some people have a lot of warmth in their hair and will get “stuck” in a yellow stage and will not reach the “inside of a banana peel” stage. If you have had the lightener on for the maximum amount of time recommended and you are still too gold, you will need wash and tone with a light blond ash color.
~I shampooed the strands without pulling off the cap, and towel dried with the cap on.
~I mixed a light ash color to tone. If you were at the store you would look for a light ash blond. (as apposed to a light natural blond or a light gold/warm blond)
~I put that on for just about 5 minutes. (it does not take long, if using hair color to tone, do NOT follow the timing directions on the box, or you will end up with strands that are too ashy) Wipe a strand off with a paper towel to determine if the yellow has been toned down. Keep a close eye on it!
~I rinsed the color off with the cap still on, then took it off and shampooed and conditioned my hair.
I saved myself at least $120.00, just by cutting my own layers and doing my own color.
I have to get ready for my date, but I will write soon about teeth whitening, manicures/pedicures, self tanning products, and shaping eyebrows and how doing it all yourself can save you a ton of money! I will write a break down of how much money I saved and let you know what products I used.
More to come…