Browsing Category

Sides

RECIPES/ Sides

A Healthy & Delicious “Cheese” Dip Made From Cashews

Cheese dip made from cashews

There are times when I surprise even myself with how good a healthy recipe can taste!  This dairy-free nacho cheese dip is one of those recipes.  My family cannot get enough of this dip, and my husband said it has better flavor than the typical nacho dip.  That comment made me very, very happy.

Ingredients for cashew dip
{Corn & Bean Salsa from Trader Joes, Seasoned Refried Beans from Trader Joes, Brown Rice cooked in a rice cooker with a can of Rotel Diced Tomatoes & Green Chilis}

This dip is healthy and makes me completely at peace when serving my family nachos for dinner.  They think they are getting a treat, when really they are getting a protein & fiber packed healthy meal.

Rice
Tomatoes

The recipe uses cashews as the base.  If you soak your cashews overnight in water, the dip will be smooth & creamy.  I usually skip this step as we don’t mind if our dip is not smooth.  It is pretty common in the ‘raw foods’ world to use raw nuts as the base to make cream sauces.  Since going dairy free in our family, I have used this idea a few times, and have loved the results every time.

TRY THIS recipe!  I think you will love it.

It is easy.
It is healthy.
It makes you feel like you are indulging.
It is DELISH!

Blending cashew dip

No dairy cheese dip
No Dairy ‘Cheese’ Dip Made From Cashews

{Inspired by Happy Herbivores Vegan Nachos}

1/2 cup raw cashews
4 tbsp nutritional yeast (adds a great ‘cheesy’ flavor and Vit B-12!)
1 tsp onion powder
1 tsp salt
1 1/3 cups plant-based milk (I use almond)
1 tsp lemon juice
1/2 cup sun dried tomatoes in oil
1 tsp cumin
1/2 tsp black pepper
a dash of cayenne pepper

Instructions:
Combine all ingredients in a food processor and process until smooth and creamy.
Transfer to a sauce pan and cook over medium heat, stirring occasionally and allowing the flavors to mesh, about 8 minutes.

Healthy Eating/ How-Tos/ RECIPES/ Sides

5 Reasons Why I Love To Roast Vegetables + 19 Roasted Vegetable Recipes

5 reasons to roast vegetables

Why do I love roasting vegetables?

1. It makes the house smell awesome.

2. It brings out the best flavor of the vegetable-complicated and caramelized deliciousness!

3. It is a great way to use up produce that would otherwise go to waste.

4. My kids like the flavor of roasted vegetables and eat them up.

5. It is easy!

………………..

4 things you need for perfect roasted vegetables:

1. High heat.  I find the best roasting temperature of most vegetables is 425 degrees.

2. Surface space – do not pile the veggies on.  Spread them out evenly onto the pan giving each piece enough surface space to get all nice and brown and caramelized.

3. Vegetables cut in similar sizes.  This helps them all cook at the same rate.

3. Oil, salt & pepper.  Simple ingredients let the veggies themselves shine!

………………..

Oils I use:

1. Unrefined Coconut Oil ~ Refined has more health benefits, but unrefined is still plenty good for you and does not have the coconut flavor.

2. Olive Oil ~ This is a commonly used oil for roasted vegetables.

………………..

What you are looking & listening for:

Cooking times are going to vary with each vegetable.  You are listening for a sizzle as the natural moisture is released from the veggies.  You are looking for a nice browning effect on the bottom of the vegetables.  Most vegetables are done when fork tender.

………………..

Here are some awesome sounding roasted vegetable recipes from my Vegetables Pinterest Board.  

Keep in mind, simple salt, pepper and oil let the veggies shine, but for a little extra special something, try these recipes!


Roasted Parmeasean Green Beans


Butter & Brown Sugar Roasted Sweet Potatoes

Balsamic Roasted Brussel Sprouts


Honey Balsamic Carrots


Easy Roasted Tomatoes


Roasted Fall Vegetables with Lentils


Lemon Rosemary Roasted Asparagus


Parmesan Roasted Brussels, Butternut Squash & Kale


Roasted Broccoli-Pinner says “Best Broccoli of Your Life”


………………..


Asparagus: Leave whole; peel if necessary.

Bell peppers: If not roasting over an open flame, cut these into 1-inch chunks.
Broccoli: Cut into 1- to 1½-inch diameter individual florets, the tips of which get charred beautifully crisp. Peel, then halve or quarter thick stems (which are delicious!).
Brussels sprouts: Halve them.
Cauliflower: Treat like broccoli.
Corn: Cut into kernels; will cook very quickly and you may only want to brown one side.
Carrots: Cut a 1-inch chunk off the top end at a 45-degree angle. Roll the carrot a quarter turn and repeat. This weird oblique shape gives you lots of surface area to caramelize its abundant sugars. ½-inch coins or half-moons also work well.
Eggplant: Cut into 1½-inch chunks.
Fennel: Cut into 1-inch pieces.
Green / string beans: Really! They’re great. Just make sure they’re tender; old, tough ones get tougher in the oven. Leave whole, stems removed.
Onions: Cut into 1½-inch wedges, and break apart into individual layers.
Parsnips: Treat like carrots.
Radishes: Leave whole if small, about 1 inch in diameter; otherwise cut in 1-inch pieces.
Sweet potatoes: Cut into 1-inch pieces.
Tomatoes: Cut 1-inch-wide wedges or ½-inch slices. They won’t really brown well but can have a nice concentrated flavor.
Turnips: Cut into 1-inch chunks.
Zucchini / summer squash: Cut into 1-inch chunks, or oblique-cut like carrots.
………………..
Here’s more roasted goodness from past New Nostalgia Posts:

New Nostalgia: Roasted Strawberries

New Nostalgia: How To Roast/Steam Corn On The Cob In The Oven 

 
…………………

What about YOU?  

Do you have any roasted vegetable tips to share?  
What is your favorite vegetable
to roast?


GF, Vegan & Raw/ RECIPES/ Sides

Crockpot Refried Beans Without The Refry

crockpot refried beans


I’ve been making this Crockpot Refried Beans recipe about once a week lately.  It is great to have on hand, a jar in the refrigerator and a few in the freezer.  My girls make themselves bean burritos as after school snacks with these beans.  I love having a quick wrap for lunch made with these beans, salsa, tomatoes, and lettuce.  They are great smeared on a tostada or to eat as a side to tacos with rice.  Also great for chip dipping.

They have so much more flavor than canned beans, and I feel great staying away from cans due to their BPA lining.  Another great thing about making these beans is that you can make them as chunky or as mashed as you like it.  I like a bit of texture in my burritos, but for nachos, I mash them and thin them out a bit more.

beans

I put off making my own beans for a long time.  I kept reading how you have to sort them and soak them. It felt intimidating and like too much work.  Boy, was I wrong!  Sorting takes minutes, and with this Crockpot recipe, there is no soaking.

beans

I measure out my beans (3 cups for this recipe) on my large cutting board.  I then quickly sort them, the pile in the front are sorted beans, the pile in the back has yet to be sorted.  This literally takes me maybe 2 minutes to sort 3 cups of beans.

reject beans

You are looking for shriveled beans, halved beans, or just plain ugly looking beans.  I also take the ones that look too small out.  Pictured above are my rejects.

washing beans

Put beans in a colander, and give them a quick rinse.

onion, garlic, cumin, salt and pepper

Dump them in the crockpot, along with 1 chopped onion, garlic, cumin, salt, and pepper.  This recipe calls for a lot of salt, but it also makes a nice amount of beans. Use it, they need it.

refried beans

Set the crockpot to high and in 5 hours (can let them cook longer if needed) you have wonderful beans.  I love how these make the house smell.  We are eating less meat around here (next to none) and it has been great, but I have missed throwing something in the crockpot and having it make the house smell good.  Well, these beans solve that problem…they smell so good as they cook!  Yum!

Crockpot Refried Beans (without the Refry)
(from Real Mom Kitchen)

  • 3 cups of dry pinto beans (sorted and rinsed)
  • 1 onion, diced
  • 9 cups of water
  • 3 1/2-4 tsp salt
  • 1 3/4 tsp pepper
  • 2 Tbsp minced garlic
  • 1/8 tsp ground cumin


  • Put all the ingredients in a crockpot and cook on high for about 8 hours.
  • After they are done, drain all of the liquid out and SAVE THE LIQUID!!
  • Mash beans with a potato masher or whatever you mash with. Add liquid, a bit at a time, to desired consistency, but remember you want them a little runny because they thicken over time. (makes about 6 cups)
  • Note: I’ve read about people adding sliced jalapenos to this recipe, for a little kick.  These beans are full of flavor without it, but if you are a jalapeno fan.  Also, these freeze beautifully.

RECIPES/ Sides

Homemade Salad Dressing So Good You Will Want To Drink It Straight

Now that Thanksgiving is over, I am ready for some food on the lighter side!  Enter this amazing Homemade Salad Dressing.  It really IS SO GOOD that you will want to drink it, or at least eat more greens than usual, just so you can have it.  I made this a week ago, and I have wanted a salad every day since.

 I make it a priority to eat leafy greens every day no matter what, whether in the form of a smoothie or a salad.  The amount of nutrients you can get in leafy greens just can’t be beat, & this dressing makes it super easy to actually want and look forward to a daily salad.

This dressing is a breeze to throw together.  It uses ingredients that most people have on hand.  The recipe calls for dijon mustard,  which I didn’t have, so I used plain yellow mustard.  It was still drinkable & delicious!

 {it starts with a base of olive oil & red wine vinegar}

At our local farmers market, there is a booth that I always look forward to.  She has tiny sample cups of salad dressing, and a chunk of bread to soak it up with.  We love her salad dressing, and I buy a bottle every time we go.  I have been missing her dressing now that it is fall, but I must tell you, this recipe tastes JUST LIKE hers.  Even my daughter noticed this when she tasted it.  Looks like we will be saving some money come Farmer’s Market season–or not–now that I have this recipe I will probably need to buy more greens!

 {add seasonings & stir}

This would make a great dipping oil for bread when entertaining, and also a great marinade for chicken or fish.  It is so much better for you than the salad dressings on the market, most of those are full of preservatives and high fructose corn syrup.  Blech!

{pour into bottle & shake before using}

This recipe will be one I use often.  It has been a week and I’m already out.  Time to make more!  Good thing it is an easy recipe.

Homemade Salad Dressing
Prep Time
5 mins
 
{so good you will want to drink it straight}
Recipe Type: Salad
Servings: 6
Ingredients
  • 1 cup olive oil
  • 1 cup red wine vinegar
  • 2 1/2 tsp. garlic powder
  • 2 1/2 tsp. dried oregano
  • 2 1/2 tsp. dried basil
  • 2 tsp. pepper
  • 2 tsp. salt
  • 2 tsp. onion powder
  • 2 tsp. Dijon-style mustard I used regular mustard
Instructions
  1. Mix together and shake well. Store at room temperature tightly covered.
Recipe Notes

from Cooking On Clover Lane


//


Have you ever made your own salad dressing?  Do you have a favorite recipe to share?

Brunch/ RECIPES/ Sides

Buttermilk Biscuits

I had some homemade chicken pot pie filling left over, (the recipe made 2 pies, I only had one pie crust), so I decided to serve it over these Homemade Buttermilk Biscuits. It was a family pleaser!  I had never made homemade biscuits before, but now that I  know how easy they are to make, I will not be buying them in a can or mix again!
Buttermilk Biscuits
2 cups flour
2 tsp baking powder
1/2 tsp baking soda
1 tsp salt
1/3 cup butter (for vegan, use Earth Balance)
3/4 cup buttermilk (for vegan, use alternative milk with 1 Tbsp vinegar)

In a bowl, stir together the dry ingredients; cut in butter with a pastry blender until the mixture resembles coarse meal.  Add the buttermilk and mix until the dry ingredients are moistened.  Turn onto a floured board and knead 6-10 times.  Roll to 3/4 inch thickness and cut with a lightly floured biscuit cutter.  Place on an ungreased baking sheet and bake in a 450 degree oven for about 15 minutes, or until golden.  Makes 12 biscuits.

RECIPES/ Sides

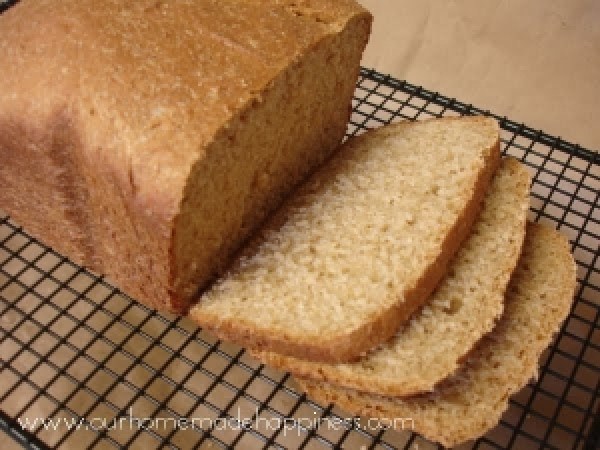
Easiest Homemade Whole Wheat Bread–A Guest Post

Easiest Homemade Whole Wheat Bread — A guest post from Kendra at Our Homemade Happiness

I’ve been making 1-2 loaves of homemade whole wheat bread every week for over a year now. I was tired of the preservatives and chemicals in store-bought bread and the taste was definitely lacking. 

But my handy dandy bread machine should get all the credit. I would never go to all the trouble of making my own bread without one. It’s so awesome because it takes less than 5 minutes to throw the ingredients into the pan and the machine does the rest. After it’s all said and done, I’m left with amazing bread and only one dirty pan. And it’s super easy to clean because it’s non-stick. I’ve included my favorite whole wheat bread recipe below.

HONEY WHOLE WHEAT BREAD FOR THE BREAD MACHINE RECIPE

1 cup water 
1/8 cup milk
2 tablespoons olive oil
3 tablespoons honey
1 teaspoon salt 
3 cups white whole wheat flour
1 1/2 teaspoons bread machine/fast rising yeast (or 2 teaspoons active dry yeast)

Add ingredients according to the directions that came with your bread machine. Use the wheat bread cycle and light color setting. This recipe makes a 1 1/2 pound loaf.

BREAD MACHINE TIPS:

Follow the directions that came with your bread machine carefully. I first got a bread maker eleven years ago. I didn’t follow the instructions and my bread never turned out. Now I make sure my water is at the right temp (my directions recommend 80°F). I spoon the flour into the measuring cup instead of scooping so I don’t use too much flour. My previous bread maker recommended using bread machine/fast rising yeast so I still use that, although my new bread maker says active dry yeast can be used. I keep my yeast in the fridge so it doesn’t go bad.

If your bread doesn’t rise, try adding 2 tablespoons of vital wheat gluten and 2 1/2 tablespoons water. Not all recipes work the same in different areas. I live at sea level. For high altitude areas, reduce the amount of yeast by 1/4 teaspoon and reduce liquid by 1-2 teaspoons until you find the right amount.

This is my rockin’ bread machine that I bought last year to replace my previous Black & Decker model. I was debating between this West Bend Breadmaker for $60 and theZojirushi Virtuoso Breadmaker for $270. Big diff in price! I read all the user reviews for each bread maker and I finally chose the less inexpensive West Bend bread maker. I’ve been very happy with it and I’m glad I didn’t fork over the extra $210 for the Zojiushi model. 

HOMEMADE BREAD SAVES ME MONEY

$0.03 – Milk ($3.50/1 gallon)
$0.37 – Extra-Virgin Olive Oil ($9.44/25.4 oz.)
$0.35 – Honey ($7.48/32 oz.)
$0.01 – Sea Salt ($1.50/26.5 oz.)
$0.58 – White Whole Wheat Flour ($3.64/5 pounds)
$0.27 – Bread Machine Yeast ($4.24/16 envelopes)
$1.61 – Grand Total for 1 1/2 pound loaf
$4.75 – Whole Wheat Bread of Comparable Taste/Freshness from Bread Store

After making homemade bread in my bread maker 20 times, I saved the $60 I spent on it. I also make homemade pizza dough and french bread dough in it. I love that I get fresh, delicious, nutritious homemade bread without hardly lifting a finger! 

Do you have a bread maker? What kind do you have and how do you like it? Do you have a favorite bread machine recipe to share?

//

 So Happy You Are Here
Hi, I’m Kendra!  I blog about all things homemade, especially cleaners, skincare, and healthy eating.  I started my blog, Our Homemade Happiness, after my husband suffered from mono symptoms for over two years and his blood results showed some liver disease.  Since the liver is responsible for filtering out chemicals and toxins from the bloodstream, I started to realize how many chemicals are in everything we buy, from processed food to household cleaners, lotion, and even air freshener.  I’ve become inspired to rid my home of as many chemicals as I can, one product at a time, and blog about it along the way.
GF, Vegan & Raw/ Healthy Eating/ Meals/ RECIPES/ Sides

A Lunch Salad Full of Plant Protein!

This is my favorite on-the-go and go-to salad.  It is very filling, healthy, delicious, and full of wonderful plant protein! Edamame, quinoa & chickpeas make this a plant protein powerhouse! I pick it up at Trader Joes, but don’t worry if you do not live close to a Trader Joes, because this salad can easily be made at home!

Here are the ingredients:

Spinach –about 2 cups

Cherry Tomatoes –2-4

Shredded Carrots – a palmful

Quinoa –1/2 cup cooked (directions here)

Chickpeas –1/4 cup, drained & rinsed

Dried Cranberries–palm-ful

Edamame –1/4 cup, cooked

Pumpkin Seeds –palm-ful

Salad Dressing —Carrot Ginger or your choice.

These are ingredients I now have on hand at home most of the time, exempt pumpkin seeds.  I live right by a health food store that has pumpkin seeds so that is not a problem.  The Carrot Ginger Miso Salad dressing it comes with is really good, but I have made this at home and really this salad goes well with any type of dressing.  For some salad dressing inspiration, click over to my Salad Dressing Pinterest Boards.

Top