Browsing Category

RECIPES

FAMILY/ Healthy Eating/ HOME/ Meals/ Parenting/ RECIPES/ Simplifying

Need School Lunch Ideas & Inspiration? So Did I. Here Ya Go!

Best School Lunch Inspiration, healthy and eco friendly ideas | New Nostalgia

I am on a mission this year to make our school lunches something my kids look forward to.  I also want to feel good about the food I serve them.  By the end of the school year last year, if I even mentioned peanut butter and jelly all 3 of my girls would moan.

I’ve been scouring the web for inspiration and guess what?  I AM SUPER INSPIRED!

I’ve learned that half the battle is having the right equipment, so today I will be going shopping for thermoses, containers & ice packets.  I am so tired of buying little baggies, not to mention the waste, so small containers it is.  They will eventually pay for themselves with the money I save in not buying those zippy little baggies!

On to my inspiration:

This first pin share is a great way to get started.  I am going to print it off and keep it on my refrigerator for inspiration & a quick reference when I am making my grocery list.  It is a list of lunch box ideas sorted according to each type of food–fruit, vegetable, dessert, fillers, etc.

Source: flickr.com via New on Pinterest

This is an awesome site.  This mom documented every lunch she packed for her child for a year.  She said the square box she uses in each lunch is from Target.  I like how she uses a muffin liner to separate foods.  She also writes that she uses press and seal for any “spillable” foods like yogurt or dips.

Make smoothies, freeze them, then put them in lunch box.  They will freeze just enough by lunch time, and also act as a cold pak.

This is a great post by my blog friend Cassidy at Remodelaholic.   She lists 25 best school lunches, some are quite creative.  I like the simplicity of the lunch pictured above.  A silicone muffin liner is another way to separate food, and is reusable.

This is a super fun idea if your kids are banana lovers. Write on them with toothpicks and as the day goes on, the message appears.

I know I will fall back on the trusty peanut butter and jelly sandwich once in awhile, but I don’t think my girls will mind if I add some interesting & healthy sides to it.  That power bar looks awesome, huh? Click link under the photo for the recipe.

This site is in Spanish, but the picture speaks for itself.  What a simple, cute & healthy way to express love.  Kids love and notice little touches.

Source: family.go.com via New on Pinterest

This photo is from the Disney family site.  They have a TON of great ideas for school lunches, all organized and divided up according to what your child’s tastes are.  I love this one with hummus, flat bread and tabbouleh.  Again, the cupcake liners serve as dividers.

Aren’t these so cute.  Easy and sweet.  I’m gonna have my 9 year old make the clips, but I won’t tell her what I plan on doing with them!

School lunch vanilla parfait.  I plan to put my mason jars to good use with this idea!  Yum.

The rest of my shares will be from this amazing site called Easy Lunch Boxes.  There are so many ideas!  I will share my favs:

Served with a thermos of lentil soup.

Served with a thermos of tomato soup.

_____________

Want to see more of my pins?  I’d love you to follow me on Pinterest.

Follow Me on Pinterest
______________

Got any more great lunch ideas for me?  Please share in the comments!

HOME/ How-Tos/ RECIPES/ Sides/ Simplifying

How To Roast/Steam Corn On The Cob In The Oven–No Shucking Mess!

how to roast corn in the oven, no shucking mess.
I am tickled about finding this super great trick to roast and steam corn at the same time.  It is now the main way I make corn on the cob.

Why?

Because I DO NOT like the mess of shucking corn.  Not at all.  Blech.

This ‘steam in the husks while in the oven’ way to make corn is by far my favorite way!  It is fool proof, fast, and mess free.  The steaming process makes the stings super limp, so once the corn cools a bit and you husk it, they come right off!  So much better than husking before cooking the corn!

The only prep you have to do is cut off the tassel part of the corn. Be careful not to cut too far down into the corn, as you want the husks to envelop the corn in order to steam it while it roasts.

Place on a cookie sheet, and bake at 350 degrees for 30 minutes.

Let sit a few minutes before removing husks and be careful.  There is steam in there.  Cool enough to handle comfortably, husk and enjoy!

Oven Roasted Corn On The Cob
courtesy of Tyler Florence on Food 911

4-6 ears of corn

Preheat oven to 350 degrees.  Cut off tassel part of the corn, making sure you do not cut too far down into the corn, as you want the husks to envelop the corn in order to steam it.  Roast for 30 minutes.  Let cool slightly.  Peel down the husks, can use as a handle to eat the corn.

FAMILY/ Healthy Eating/ How-Tos/ Parenting/ RECIPES

12 Ways To Get Kids To Eat Their Fruits And Vegetables

*a repost from the archives
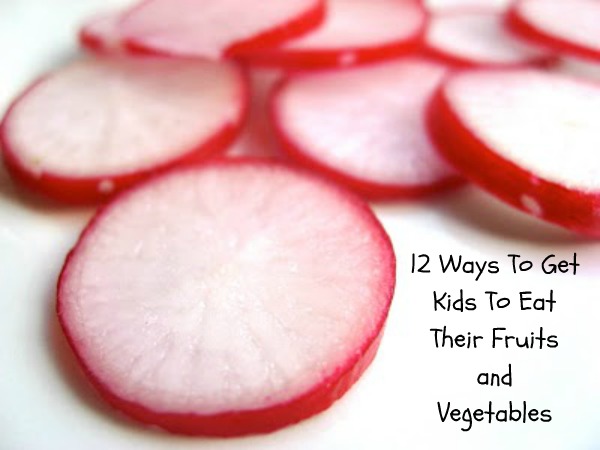
 I have had much success in getting my kids to eat their fruits and vegetables. 
How?

By appealing to the things they love!

~Kids love COLOR
~Kids love GAMES
~Kids love LEARNING
~Kids love feeling “GROWN UP”

Below are some tips that appeal to these very things:

1. Keep It Fun & Playful, Like A Game
 We try to “eat the rainbow” every day in our home.  We talk often about the importance of getting some of each color, everyday. It is 1:00 p.m. and I just asked my 8 year old a question I ask often, “How many colors have you had today?”  Her answer, “Blue blueberries in my oatmeal for breakfast, orange orange juice, yellow banana with my lunch, green asparagus with lunch, red apple with  lunch, green kale for snack, blended up in my fruit- smoothie popsicle.

2. Take Advantage Of Kids Natural Desire To Learn  
Why do we need to eat our fruits and vegetables?  When kids understand the reason for doing something they are much more likely to cooperate. Learn together what “free radicals” are and why we don’t want them in our bodies. Teach what “antioxidants” are what they do to help our bodies. Learn the different nutrients and vitamins in each fruit and vegetable, and how they benefit the body.  “Nutrition For Dummies” is a great resource for teaching simple nutrition lessons.


3. Shop The Rainbow
This can be fun and easily turned into a game.  In the car on the way to the grocery store, talk about how you are going to “shop the rainbow.” Ask the kids for their help.  Ask them to name as many “red” fruits and vegetables as they can.  When they can’t think of anymore, ask them to name the “yellows.”  You could even have one make a list of all the vegetables you come up with under each color category, then vote in the car what you should buy in each category.  Circle those items, take it into the store with you as your grocery list.

4. Take Advantage Of Color
Comment on the  natural beauty of fruits and vegetables.  Talk about all the different, beautiful hues.  The deep purple of eggplant, the bright red of strawberries the bright green of broccoli. While you are admiring the colors also notice all the beautiful shapes and textures. We use mason jars in our home for food storage.  I have many reasons, but my favorite reason is that you can easily see what is in the jar.  There is nothing better than opening the refrigerator and seeing jars full of shredded orange carrots, bright green peas, yellow pepper strips, or balls of pink watermelon.  My kids know that if they are still hungry after a “salty” or “sweet” snack that they can go to the refrigerator and help themselves to the vegetables in mason jars.  I love seeing them grab a jar, grab the dip, and munch away!


5. Keep Your Power 
It is important to keep healthful eating lighthearted and playful, but there will also be times when it is not, and we will have to be the parent. If your kids need medicine it is your job to make them take it. Good food is just as important.  We look at fruits and vegetables as medicine in our home, “Nature’s Pharmacy.”  My kids know that eating their fruits and vegetables is not an option.  They know it is a necessity and it is expected. 

6. Implement This Simple Rule 
To keep power struggles to a minimum, especially at the dinner table, our rule is “no eating your main dish until your vegetable is gone.”  This is very effective.  They come to the table very hungry, smelling the spaghetti and garlic bread.  They are sitting there face to face with their desires.  They eventually give in and eat their vegetable.  It is a great strategy which takes advantage of the fact that everything tastes better when you are hungry!  This rule was needed when they were younger, but we rarely use it anymore as our expectations are now known.
7. Keep Portions Small
Especially when introducing a new vegetable!  Give them time to acclimate to new textures and tastes.  Broccoli is not my girls favorite vegetable so we started with one small broccoli floret, and worked our way to almost a full serving. Gradually work the serving size up to at least a 1/2 cup.

8. Appeal To Kids Desire To Feel “Grown-Up”
One of the most simple strategies we have used is saying (as they are chewing with scrunched up noses), “Oh, you don’t like that vegetable?  Your taste buds must not be old enough for that one yet.  Maybe next time you taste it, it will be different.”  This creates a positive goal in our home, being old enough and having a “mature enough palate” to like all types of vegetables.

9. Talk About Palates
We watch “Top Chef” as a family.  It has been very educational when it comes to different types of foods.  We comment on how the judges have such mature palates.  When my kids like something healthy I will say, “Wow, you have such a healthy palate!”  We have even talked about how eating just a bite or two of a new taste and texture can help train our palates to appreciate all types of food.  This appeals to kids desire to feel “grown-up” and also keeps things lighthearted and fun, like a game.

10. Teach About Texture
Again, the show “Top Chef” has been helpful in this area.  The judges are always talking about how a certain dish needs more “texture.”  For the longest time my kids would complain about lettuce and tomatoes on their tacos.  It would frustrate me because it turned a healthful meal into a “meat and cheese” meal.  Not what I wanted.  So, one night when having tacos, I casually said, “I bet the “Top Chef” judges would say your tacos need more texture.”  I saw this sparked their curiosity and continued, “Lettuce gives a type of crispy crunch and tomatoes are soft and cool down the spice of the meat.  Wow, the textures of the food work and taste beautifully together!”  It worked.  They tried it and agreed. Yes!

11. Make It A Game
Hang a chart on the refrigerator to keep track of “who ate the most colors that day”.  If it is over 5 servings give a sticker!  Or make a matching game- match the color of fruit or vegetable with the main nutrient it provides.  This is a great way for adults to learn too!

12. Grow Them
The last two years, we have had much fun with our Square Foot Garden. {link-https://www.amynewnostalgia.com/time-to-garden/}  When my kids watch something grow from a seed they squished into the dirt they are very eager to eat the reward.

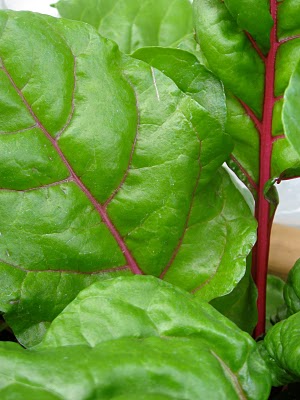
{wrapped lettuce photo here}

Simple Ways We Eat Fruits And Vegetables
~Frozen berries in cold cereal
~Frozen berries in oatmeal
~A bowl of frozen berries thawed to perfection during dinner in time for dessert
~Apple slices almond butter
{link-https://www.amynewnostalgia.com/my-favorite-healthy-snack/}
~Bananas sliced on bran flakes for breakfast
~Banana slices on whole wheat peanut butter bagel
~Celery and peanut butter or cream cheese
~Pepper strips and hummus
~Cucumber slices and dip
~Frozen grapes-so refreshing!
~A 6 cup muffin tin full of different colors for snack
~Clementine slices on our salads
~Frozen mango chunks in a bowl
~Edamame with sea salt-my kids favorite
~Fruit smoothies made green by blending in spinach
~Eggplant in place of beef in our spaghetti sauce
~Fruit kabobs-so pretty and fun
~Fresh berries in pancakes
~Homemade, no- cook berry jam
{link-https://www.amynewnostalgia.com/strawberry-freezer-jam/}
~Sliced berries on ice cream
~Spinach salad with mason jars full of vegetable toppings to add themselves
~Make our own fresh vegetable and fruit juices using our juicer.
Meals/ RECIPES

Pasta with Tomatoes and Chard

Last night was one of those evenings that I simply did not want to make dinner!  I was so tempted to order a pizza, but then took a little stroll out to my garden.  We have had little rain, and I have been very lazy in watering, so my garden is pretty sad looking right now, but I was able to harvest some beautiful cherry tomatoes and gorgeous swiss chard.

I decided to buckle down and throw some dinner together, so I put a pan of pasta on to boil, added some olive oil & garlic to a sauté pan, washed and roughly chopped the chard, and cut the tomatoes in half.  Pasta with Tomatoes and Chard was born.

It was awesome & so simple.  The swiss chard became almost buttery tasting, and the tomatoes added a sweetness and helped form a light sauce.  It was the perfect simple summer supper!

Pasta with Tomatoes & Chard

1/2 lb. pasta
3 cloves garlic, minced
1/2 tsp dried basil*
1/4 cup olive oil
3 large leaves swiss chard, ribs cut out & roughly chopped
1 cup cherry tomatoes, halved
salt & pepper to taste
______

Parmesan cheese, shaved (optional)

_______
Boil pasta according to package directions.  Drain and set aside.
Meanwhile, heat a sauté pan on medium heat.  Add olive oil & garlic.  Let garlic soften, then add basil & swiss chard.  Cook for 5-10 minutes, until chard shrinks and softens & turns a dark green color.  Add tomatoes.  Cook 2 minutes more.  Season well with salt and pepper.

Serve tomatoes & chard on top of pasta.  Top with parmesan cheese if desired.

(*if you have fresh basil, add it with tomatoes at the end.)

Meals/ RECIPES

Oven Roasted Veggies On Pasta

This is a guest post from Kendra at Our Homemade Happiness

This recipe is one, healthy; two, super easy; and three, delicious enough to serve to guests. A rare trifecta! It’s awesome because you can throw in whatever veggies you have on hand. Definitely use tomatoes. The tomato juices have so much flavor when they are roasted in the oven with a little olive oil and salt. It’s like a homemade chunky marinara sauce. Some other veggies that taste great in this dish are onions, zucchini, bell peppers, squash, mushrooms, carrots, eggplant, kale, spinach, . . . and the list goes on and on. 


OVEN-ROASTED VEGGIES ON A BED OF PASTA RECIPE

INGREDIENTS:
4 medium tomatoes + veggies of choice, chopped
2 garlic cloves, pressed
extra-virgin olive oil
salt and pepper
whole wheat pasta or quinoa pasta
fresh basil, chopped

DIRECTIONS:
Cook pasta and drain. Cut up tomatoes and whatever veggies you have on hand. Place chopped veggies on baking sheet. Throw on some pressed garlic. Drizzle with olive oil. Add salt and pepper to taste. I mix it all together with my hands to keep dirty dishes to a minimum. (Or you can mix in a bowl and transfer to pan if you prefer.) Cook for 20 minutes in the oven at 425°F. Serve on a bed of pasta. Add some chopped fresh basil. Serves 4.


Underneath that hoard of veggies is a silicone baking mat I got for Christmas from my sister-in-law. It makes clean up a breeze because nothing sticks to it. I went a little overboard and used more veggies than normal for this batch (pictured above) because it was for the blog. Had to be blog worthy, ya know? I used 4 large tomatoes, 1 onion, 4 cloves of garlic, 1 zucchini, 1 banana squash, 8 oz. mushrooms, 1 orange bell pepper, and 2 leaves of kale (don’t use the tough stalk in the middle). I could barely fit all the veggies on the pan! Leftovers lasted a couple of days, but I’m not complaining!

Hi, I’m Kendra! I have a passion for all things homemade, especially cleaners, skincare, and healthy eating. Going back to simpler times and natural ingredients, all while sticking to a budget. 


Featured/ GF, Vegan & Raw/ RECIPES

Date Paste – A Healthy. Raw Sweetener

Date Paste is popular in the raw food world.  After making it a few times myself, I can see why!  I am not a fan of dates-maybe it is their shriveled up wrinkly appearance but when softened with water and blended in a food processor into a smooth paste, then I become a BIG fan!

Date paste is creamy and has an almost “caramel-y” like flavor that I fell for immediately. My favorite way to use date paste is on my oatmeal in place of brown sugar.  I have also used it to sweeten smoothies & chia oats. We have spread it on tortillas, added banana & chia, then rolled up as a healthy snack (post on that coming soon!)  My kids loved these, but FYI, make the date paste when they are not around.  My girls saw the dates soaking and were a bit skeptical to try it.  The second time I made it, I did it privately, and called it “sweetener.”  They ate it up.

So why go to the trouble to make date paste?  Well, first, it is not much trouble.

Second, I like that it is one more way to satisfy our sweet tooth while keeping blood sugar levels stable due to the fiber that dates contain. They are also good source of iron, vitamin A & potassium. They have their fair share of antioxidants and are not processed like most sweeteners are.

I have seen date paste used not just raw, but in all types of baking, like this Banana Date Paste Bread Pudding, which I want to try, it looks awesome!

______________

Date Paste

1 1b Medjool dates

1/2 cup reserved soaking water

Pit and cover dates with water.  Soak for 10 minutes.  Pour off water reserving 1/2 cup.  Process in food processor until desired consistency, adding more water if needed.  Place in a jar and refrigerate up to 2 weeks.

______________

What about you?  Do you look for more healthful ways to satisfy your sweet tooth?

FAMILY/ How-Tos/ Meals/ Parenting/ RECIPES

Saucy Asian Meatballs & Getting Your Kids To Help In The Kitchen

I will get to this awesome recipe of Saucy Asian Meatballs in just a minute.  It made my whole family VERY happy and I enjoyed the sauce with veggies and rice.  But first let me tell you how it came about that this recipe even made it into our family favorites.

I am reading a book on parenting (whose title I will share with you soon when I remember it…I am sitting in a coffee shop and it is at home).  Anyway…it is an awesome book that has my wheels turning when it comes to parenting and what I expect out of my kids.

It has challenged me to challenge my kids. To expect more out of them and to encourage them to do things they don’t think they can or don’t want to do.

My oldest who will be 13 in a month, REALLY does not like to cook.  At least I thought she didn’t like to cook.  Every time I would try to pull her in the kitchen, she would shuffle, moan, groan & we would end up frustrated with each other.  I have decided that learning to cook is a non-negotiable in our home, as I want them prepared as possible to run a home of their own someday, so I have been trying to come up with a way to make cooking less of a drudgery for my oldest.

Enter Pinterest.  I have watched my daughter slowly build a following on Pinterest as she has super great taste and an eye for beauty.  She loves pinning things, and I noticed one of her boards was named “Get In My Belly.”  I checked out the recipes she pinned, and noticed that many of them were cheesy and full of sugar, so I cringed when I found myself saying to her, “Hey, how about you pick a recipe from your ‘Get In My Belly‘ boards to make for dinner.  I will let you pick what you want, I will buy the ingredients, but you have to make it.”

She immediately went to her boards and I was pleased with what she chose.  I was happy it was not deep fried or oozing with cheese and cream of something soup.  She chose Saucy Asian Meatballs.

I was interested to see if she would follow through with no complaining, and she did just that.  I sat in with her at the table, but I was very careful not do anything but guide her with my words.  She did all the chopping, shaping and baking.  I was amazed and very proud of my non-cook, cooking!

It took a few minutes to get her to use her hands to mix the raw meat mixture (can you blame her?) But, she gave in and we laughed about her dramatic facial expressions as she mixed by hand.  Blech.

Here she is with her finished dinner.  I showed her how to prepare rice in our rice cooker & make a side of frozen vegetables.  Her dinner got rave reviews from her sisters and her dad, who loves great flavor & “mmm’ed” all through dinner.

{Wanna pin it? She would be thrilled.  Pin button down by the comments}

 I was proud and so was she.  I’m eager to see if this will work again with her.  I sure hope so.  I totally enjoyed being with her in the kitchen and I loved seeing how empowered she felt by working hard and producing an entire meal by herself!

Want to follow her on Pinterest?  I know she would be thrilled to see her numbers grow.

Click here if so!

________________

Saucy Asian Meatballs Recipe


*we doubled the sauce to make sure we had enough for my rice & veggies

{from Give Me Some Oven, click through for amazing photos of this recipe! She also talks about the flavor & how they won a taste testing contest by her friends after making numerous meatball recipes}

Ingredients:

Meatball Ingredients:

  • 2 lbs. ground pork or ground beef (we used beef, local & grass fed)
  • 2 tsp. sesame oil
  • 1 cup Panko or breadcrumbs (we used regular breadcrumbs)
  • 1/2 tsp. ground ginger
  • 2 eggs
  • 3 tsp. minced garlic
  • 1/2 cup thinly-sliced green onions
  • optional garnish: toasted sesame seeds, sliced scallions

Asian Sauce Ingredients:

  • 2/3 cup hoisin sauce
  • 1/4 cup rice vinegar
  • 2 garlic cloves, minced
  • 2 Tbsp. soy sauce
  • 1 tsp. sesame oil
  • 1 tsp. ground ginger

Method:

Preheat oven to 400.

In a large bowl, mix together meatball ingredients until well-combined.  Shape into balls (I made mine about 1.5 inches, which yielded about 35 meatballs, but 1 inch is probably standard), and place on a greased baking sheet or in a 9×13 baking dish.  Bake for 10-12 minutes, or until meatballs are golden on the outside and no longer pink on the inside.

While the meatballs are baking, whisk together all of the sauce ingredients until blended.  Once meatballs have finished cooking, you can either dip each meatball individually (using a toothpick) in the sauce mixture.  Or you can pour the sauce over the meatballs and gently stir them until covered.


Top