Browsing Category

Beauty

Beauty/ HOME

What I Buy And Why-Glow Lotion!

It has been awhile since I wrote a “What I Buy And Why” post, so as I was getting ready for my date with this guy, I thought I would take a minute and share my favorite body lotion with you.

I love everything about this lotion.  I love the clean smell, I love the texture, I love how it moisturizes.  I love that the ingredients are safe.  But my MOST FAVORITE thing about this lotion is that it makes you glow!  It contains itty bitty bits of the mineral, mica, in it, which is super reflective and gives a healthy glow–no chunks of glitter in this lotion, just a nice shimmer!

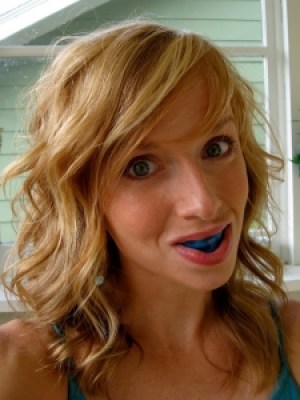
{I am wearing it in this pic.  See the slight shimmer on my neck/chest area? 
 I put a bit on my cheeks, too. The forehead glow is just my natural oil from the day.  Ew. :p}

I got to be up close and personal with the beautiful mineral called mica in our recent trip to Colorado.  We visited an old mine and learned how to pan for gold.  I loved the panning process and found it quite relaxing.  I kept thinking I struck gold, but low and behold it was only little bits of beautiful mica shining at me, reflecting the sun.  No wonder this stuff is wonderful in lotion!

{Stopped in the middle of my gold hunt to take a photo}

*Tip:
I sometimes put a small bit of this in my hair for a nice shine.  I also like putting it on my collarbones and even a bit on my cheek bones to make them stand out.

Let me know if you try it out and what you think.
What is YOUR favorite lotion?

Beauty/ Frugal/ HOME

Whiten Teeth For Cheap

I first heard about PlusWhite 5 minute speed whitening gel from a Kandee Johnson video (click here for video).  She always has the best recommendations, so I tried it.  I’ve done 5 applications and I love it.  The kit comes with the whitening gel, some pre-whitening rinse, and a mouth piece.

The first time I did it, I filled the mouth piece with gel, and it was way too much!  The directions say to squeeze the gel into the mouthpiece, and the opening of the tube is pretty large, so a lot came out.  It got all over the place, including my tongue which I noticed made my snack taste weird for awhile afterwards.

The next time I did it, I used my finger to spread some of the gel all over my teeth, (mainly the teeth that you can see), making sure I got between the teeth, then stuck the mouthpiece in.  Doing it this way will make the tube last a long time, so teeth whitening becomes ultra cheap!

I have used Crest Whitening strips, but they were messy, expensive, tasted nasty, and made my teeth sensitive.  PlusWhite gel does not taste bad, and I have not had any sensitivity.  It is super easy to use, and because of Kandee’s suggestion, I do it in the shower, so it just becomes part of my “getting ready” routine.  It is suggested that you use it twice a day at first.  I didn’t because I noticed whitening fairly quickly, so I have just done it once a day. I will continue a few more days, I have a feeling I’ll have to stop myself because it really is kind of addicting!

Some people on Amazon. com reviews have said the mouth piece is kind of uncomfortable for smaller mouths.  I have a super small mouth and it is fine for me, but if you would like something softer that molds to the teeth, you must watch the video that Kandee made.  It shows how she took a regular sports mouth guard,(at Walmart for a buck) softened it by boiling it, then she stuck it in her mouth and sucked in with her teeth together.  It molds to the teeth and–voila!  A custom mouthpiece for a buck!  That is impressive, but since my kit came with a mouth piece, I skipped the custom one.

Let me know if you try this and what you think.
Do you whiten your teeth?  What do you use?
More From New Nostalgia
Beauty

My New Favorite Self Tanner

{continued from this post}

My new favorite self tanner is Jergens Natural Glow Foaming Daily Moisturizer.  I have used Jergen’s self tanning lotion in the past and really like it, but this was even better!  It dried much faster than the lotion, so getting dressed right after application was not an issue, and it did not leave a greasy feeling.
I used this product 4 days in a row, and I really like the results.  It is gradual color that looks natural.  I had no streaking, no orangey spots, and the scent was very mild compared to most.  I noticed color right after the first application, it took me from quite light to a color that looked like I put a powder bronzer on.   By the third application, I had enough color for my husband to notice.  Jergens has 2 kinds of Natural Glow Foaming Daily Moisturizers, fair to medium (what I used), and medium to tan.

A little goes a long way, so go easy with your first pump– it comes out fast.  I think one bottle will last me quite awhile, after 4 applications I am happy with my color and will now only use it every few days, if that.  I started using it to have some color for a night out, to celebrate our wedding anniversary, so I am not sure if I will continue to use it on a regular basis.  We’ll see if the fun feeling of being “girly” with beauty products, will outweigh my desire to keep things simple and natural.  I am not over-top-tan, but have color and do not feel paste-y anymore, which is nice!

The only prep I do, is in the shower.  I use an exfoliating soap pouch that looks like the one above, which I LOVE.  It makes my bar of soap last forever, and keeps my skin exfoliated.  Ever since I started using this soap pouch and a natural bar (made locally with no sodium lauryl/laureth sulfate and a coconut oil base, like this one), the little bumps on the back of my arms have vanished, and there has been no irritation when I shave (I use the same natural soap to shave).  I’ve seen a huge difference in my skin!
 In the review of the pouch above, some people have said that their soap falls out the bottom.  I have never had that problem, but if I were to buy a new one, I might try one like this:

AquaBella Loofah Soap Pouch


                                                AquaBella Loofah Soap Pouch
or this:

Body Crystal Ayate 100% Agave Soap Pouch


                                         Body Crystal Ayate 100% Agave Soap Pouch
The only other tip I have for you is right after I put the self tanner on, I take a tissue and wipe my knees and elbows, just because these are the areas that tend to grab onto product and turn darker.  I don’t know if it is necessary with this foam, but I’ve always done it with the lotion so now it is habit.  When I use it on my face, I do the same with my eyebrow area and right around my lips.

Do you use a self tanner?  If so, what brand?

This post is linked to:
WFMW @ We Are That Family

Beauty/ Frugal/ HOME

How I Saved Over $200 By Not Going To The Spa

Tonight my husband and I are going out to celebrate our 14th wedding anniversary.  I’m so excited!  It is a special occasion, so I decided to put some extra effort into making myself look somewhat special for our hot date!:) 

 The last few months, in the name of simplicity and being more natural, I have not put much effort into my physical appearance.  Don’t worry, I have showered (ha), but I have not had color in my hair for the first time in years, I stopped polishing my nails, and it was the first summer where I really didn’t care if I had a tan.  There are numerous reasons, such as:

~I wanted to experience my natural hair color before it started turning gray
~I’ve had Melanoma, so baking in the sun is not the best thing for me
~Nail polish was time consuming and always needs reapplied a few days later
~Beauty products are expensive
~I was trying to use more “natural” products. Hair color chemicals and acetone nail polish remover do not quite fit under that category.

All good reasons, but I’m a licensed cosmetologist, and it seems like I just can’t go too long without wanting to practice my creative beauty skills on myself.  It is just too much fun being a woman not too!

So, the last 2 evenings, instead of writing blog posts, I have turned my home into a spa and have played beauty shop.  It has been fun and worth it, and I feel ready for my date.  I have to admit, I did pout a bit thinking about how great it would be to have someone else shampooing my hair and doing my pedicure, but in the end, I SAVED A TON OF MONEY!  That is a good feeling.

Here is what I did:
~Cut my hair.  I kept in long but put a ton of layers into it.
~Highlighted my hair.  My natural color is a coppery red.  I added pale blond highlights.
~Shaped my eyebrows
~French Manicure
~Pedicure
~Whitened teeth
~Tanned using self tanning products

Now just because you are not a licensed cosmetologist does not mean you cannot do this, too.  The web is a great resource for tips and tutorials on how to do things yourself. It is where I get a ton of ideas!

Haircut
For the most part, I would recommend you leave this to the pros, unless you are trimming your bangs or making a side swept fringe.  Kandee Johnson has a great tutorial on how to cut a fringe.  

Highlights
Another thing to leave to the professionals, UNLESS you are a natural light brown or blond.  If you were to try and highlight hair that is darker, it will tend to pull a brassy gold color and it will not be pretty.  If you are already naturally light, you will have much more luck.  Depending on how much warmth you have naturally in your hair and eyes, you may still tend to pull some yellow, but it will be much easier to tone with an ash color and many would not even need to tone.  Because I am a natural red head, with lots of warmth, I definitely needed to add a toner to my hair after the lightening process.  


Highlighting My Hair
~Last night I bought a highlighting kit that comes with a plastic cap and hook.

~I pulled strands of hair through the cap (kinda old school process compared to foiling, but I can’t foil my own head of hair!) If you want natural, slight highlights, pull less hair through every other hole.  I wanted to be quite blond so I pulled it through quite heavy, every hole. Since I couldn’t see the back, I just stuck the hook through randomly, not caring if I got in the marked holes or not.  🙂

~I put the lightener that came with the kit on the pulled through strands of hair. (it is usually a thick pasty white or purple color, essentially hair bleach)

~I put a plastic Target bag over my head and secured it with a clip. This holds heat in to help process faster.

~I let it lighten until a pale yellow color. This took about 25 minutes for me. Your goal is the color of the inside of a banana peel if you are wanting a beachy, light blond highlight. If you can get it that color, great.  Like I said earlier, some people have a lot of warmth in their hair and will get “stuck” in a yellow stage and will not reach the “inside of a banana peel” stage.  If you have had the lightener on for the maximum amount of time recommended and you are still too gold, you will need wash and tone with a light blond ash color.

~I shampooed the strands without pulling off the cap, and towel dried with the cap on.

~I mixed a light ash color to tone. If you were at the store you would look for a light ash blond. (as apposed to a light natural blond or a light gold/warm blond)

~I put that on for just about 5 minutes. (it does not take long, if using hair color to tone, do NOT follow the timing directions on the box, or you will end up with strands that are too ashy) Wipe a strand off with a paper towel to determine if the yellow has been toned down.  Keep a close eye on it!

~I rinsed the color off with the cap still on, then took it off and shampooed and conditioned my hair.

I saved myself at least $120.00, just by cutting my own layers and doing my own color.

This post is a “to be continued…”
{My New Favorite Self Tanner} saved $30.00!!
I have to get ready for my date, but I will write soon about teeth whitening, manicures/pedicures, self tanning products, and shaping eyebrows and how doing it all yourself can save you a ton of money!  I will write a break down of how much money I saved and let you know what products I used.  
More to come…


This post is linked to:
Nifty Thrifty Tuesday @ Coastal Charm
Thrifty Thursdays@ Tales From Bloggeritaville
Penny Pinchin’ Party @ The Thrifty Home
Beauty/ FAMILY/ Parenting

Real Beauty, Fake Beauty

from Dove.com

For Valentines Day, we got our girls gift cards to Clair’s jewelry and accessories.  We didn’t buy them very much candy this year, so we thought a $5 gift card would be fun for them.

They loved it! We spent almost an hour in that little store as they decided what to buy.  We really got lucky, they had 80% off their clearance items, so that small gift card was able to purchase quite a bit!

Makeup (along with hair accessories and jewelry) was chosen by all 3 of them- glistening lip gloss and shimmery eye shadow.

They have had much fun playing dress up, and my oldest has even left the house with a bit of shimmer on her eyelids.  I thought about demanding she go wash her face, but it was just a hint of shimmer, so I let it go.  Later I decided that for us, this was a molehill, not a mountain. (heavy black eyeliner would be a mountain:))

Instead of getting all uptight about them using makeup, I stayed pretty relaxed about it.  I wanted to see if they would be responsible and figure out the line of what is appropriate and what is not, on their own.

They have really done a great job, and I am very proud. My younger 2 have been playing dress-up much more than usual with their new purchases, and my oldest has been experimenting with different shades and layering, which makes me smile to see the artist in her.

She has come to me and asked, “mom, is this too dark?  can you see it?  is it appropriate?” The makeup they chose is made for kids, so the pigment is very light and see-through, so it has not been a problem.

What it has done is open up some beautiful conversations about—beauty!

We have a saying in our home that is often repeated in various ways.  They go something like this:

*”What matters most is the inside”

* “It’s the insides that matter”

* “What do your insides look like right now, are they as pretty as your outside?” and…

*”AHHH! I can’t even look!! AHHH! your insides!!!”

(must say this dramatically, while squeezing eyes shut, when insides are not too pretty, which usually gets a giggle and then there is beauty again.)

 My girls have heard me say these phrases so many times! When I can tell they feel beautiful and are flaunting it, I tell them how pretty they look and many times follow it up with, “but..do the insides matter or the outsides?”

I even hear them ask each other that question while playing “dress-up.” Pretty cute.

My oldest has been fun to watch lately.  She loves fashion and likes to look unique.  She works with very little clothing, (most of which comes from thrift stores or garage sales) and is able to make great outfits, some I would never think to put together!

I love to see her express what her idea of beauty is, and I love that it doesn’t always follow the crowd.  I try hard to let her be who God made her to be and keep my focus on what her heart is telling me, instead of getting wrapped up in what I would want her to wear.  As long as she is modest and age-appropriate, I’m a happy mom.

We have been having some deeper conversations about beauty, and I’ve let her watch the videos dove.com videos of a natural looking model being transformed into a flawless runway model, all done by computer, and not reality.

I want to give her a realistic view of what is beautiful, and how the world can distort beauty and tries very hard to redefine what is beautiful.

We talked about how God is the ultimate artist who created us all to be different and unique, and how the world’s message says “everyone needs to look a certain way to be ok,” which is a lie.

Lightbulbs went off as she watched.  She was fascinated by the artistic side of what computers are capable of doing, and also seemed to “get it.”

At the end of the first one, she said “she isn’t even ‘her’ anymore”  which was the perfect opportunity to talk about how we can lose who we really are if we are too focused on our outsides.

It was a bit deep for her, but I know it was one more time to let truth sink into her little brain, even if it was just a nugget.

Beauty

8 Simple Ways To Freshen Up Your Look

Getting tired of your winter wardrobe?  Hang on, spring is coming!
Until then, here are a few simple ways to freshen up your look.

1. Layered Necklaces- I was slow to jump on this bandwagon.  My first thought was, “c’mon people I’m trying to keep it simple, and you want me to buy MORE necklaces?” Well, the look has won me over, and I am finding that places, like Claire’s, have necklaces that look like there are many, but actually it is just one, and are quite inexpensive. I’ve also found that you can mix and match different metals and colors, so using what you have on hand is easy and looks great.

2. Scarves-I already wrote about how great scarves are to freshen up a look.  You can read here about the many different ways you can wear them.  I am happy to see they are coming out with lighter- weight scarfs for spring and summer, these are more of an accessory than something to keep in warmth.  I’m all over this trend, I love that I can keep my same simple outfits (jeans and a ribbed tank top for example) and add some interest with a simple scarf.

3. Patterned flats-the same idea as a scarf, just on your feet instead of around your neck. Think of them as an accessory.  It is fun to give a little interest at your feet with stripes or polka dots, plaids and even florals.

4. Hair accessories-if I ever get the time and motivation, I am going to make a bunch of these homemade.  There are so many fun things out right now that would be so easy to duplicate-headbands with feathers or flowers and tulle, little clips with single silk flowers on them edged in glitter.  I’ve got all kinds of ideas swirling in my head! Give me a box of duckbill clips and a glue gun, and I’ll become a accessory  makin’ crazy lady!

5. Hats-I wear a lot of hats in the winter.  They help create a look, keep my noggin warm, and hide my bedhead.  Below is a military style hat, which is a cute, casual look.  Fedoras are all the rage right now in Hollywood- I think if I were a celebrity I’d want to hide under one, too!

6. A Colorful bag- I’ve been keeping my eye out for the perfect mustard colored bag.  My thinking is, it would match with everything!  Bright colored bags are great for adding to an outfit, even if wearing all black, carrying a great bag on your shoulder creates a point of interest and a pop of color.  Powerful, those handbags are, powerful!

7. Leggings-Lately I have been putting leggings with shorter dresses that really are for summer, but paired with a long sleeve shirt underneath and leggings, “summer” dresses can be worn in the winter.  Leggings are great for longer sweater/shirts and skirts, and they keep legs warm in the winter.  They look great with boots over them, or throw on some of those patterned flats we were talking about as the weather gets warmer.

8. Bright nail polish- Did did you see the new color line from OPI polish?  It is inspired by Alice in Wonderland and it is BRIGHT and even has a few glittery colors.  I don’t know if I would wear many of the colors on my fingers, but I am quite brave when it comes to my toe nails.  Bright nails are just happy, so why not try some?

9. Bangles-stack them on!  The look is not uniform, so grab a handful of different textures and sizes.  Mix and match, anything goes!

Beauty

Think You Gotta Be A Stick To Wear Skinny Jeans? Think again!

I loved this post on Blogher by Susan Wagner, and completely agree with her.  You don’t have to be a size 3 and in your twenties to wear skinny jeans.  Don’t believe me?  Click on this link, and check out her post and picture…she is rocking those jeans!  I think she looks great, tasteful and age appropriate.

If you can think of jeans as a type of leggings or tights to wear with a longer tunic, blouse or sweater, then it may be less intimidating to wear them.  I’ve seen them worn with a dress and a ballet flat, and they look great!  
If you own a pair of boots, whether fancy knee high boots, winter snow boots or clunky Ugg boots, you will for sure appreciate a skinny jean.  There is nothing worst than trying to stuff wide leg jeans into boots, you end up looking short and frumpy.  It is hard to find a jean wide-legged enough to fit over boots, and really it defeats the whole purpose of buying a great boot if you are just gonna cover them up with your jeans.
As Susan says, it is all in the fit and proportion, if you can get them to fit well in the hip and thigh, find a great shirt or sweater to balance out the narrow leg, you may be pleasantly surprised at what a great look it is!  Check out these Miribelle Dark Wash Skinny Jeans, in plus size. They have a reputation of being comfortable and stretchy. Put a great tunic that hits at the hip bone, throw on so heels, and have a night out on the town!
Top