Browsing Category

Beauty

Beauty/ HEALTH/ Natural Products

10 Must See Beauty Treatments To Do At Home That Are Inexpensive And Natural

Homemade natural beauty products
 

I have had much fun gathering a few fun DIY beauty tips.  I love how most of them are natural, inexpensive and use ingredients you already have at home.
———-
10 Must See Beauty Treatments To Do AT Home
10 Must see beauty treatments to do at home
 
 “Works wonders on your face. Salicylic acid helps clean out pores and battle acne. All you need is water & 3 aspirin tablets. You can also add honey if you want a binding agent.”
 
2 ingredient homemade lemon facial scrub via New Nostalgia
 
“Lightens sun damaged areas, exfoliates, helps with blackheads and breakouts. Leaves skin super smooth and soft.”
 
Oatmeal and Baking Soda Exfoliante
 

Oatmeal & Baking Soda Exfoliante via Our Best Bites
“Try this baking soda exfoliant for super soft skin.”

Black-head Remover
 

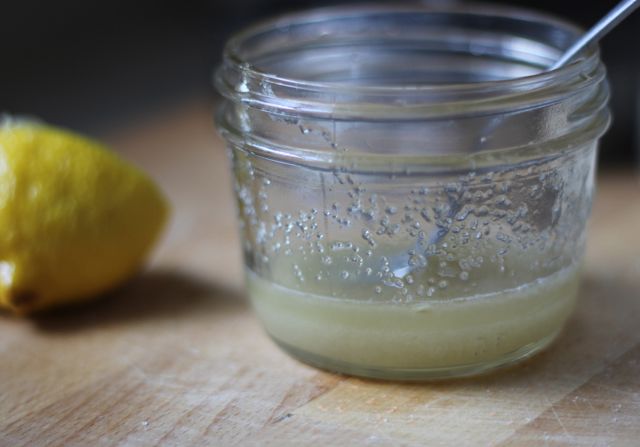
Black-head Remover via Stylebees
“Use half lemon from the fridge (doesn’t matter if some juice is already squeezed from it) and put 3-4 drops of honey on it. Rub the lemon on your face, emphasizing trouble areas. Leave the lemon and honey mixture on your face for 5 minutes and then wash it with cold water. You will be able to see the results immediately. Additionally, lemon juice will also fade other marks/spots on the face and honey will moisturize.”

Lavender facial toner
 

Lavender Facial Toner via New Nostalgia
“Most commercial toners have alcohol and chemicals in them and are too harsh.”

Whiten stained Nails
 

“How to get white nails after so much nail polish — make a paste using 1 tbsp peroxide and 2 1/4 tbsp baking soda. Let this paste sit on your nails for 5 minutes and voila! White nails! REMEMBER THIS AFTER USING Dark NAIL POLISH!”

Coconut oil for moisturizing hair

Best Moisturizing Hair Treatment– Coconut Oil! via New Nostalgia
“20 minute pre-shampoo coconut oil treatment REALLY helps dry or brittle hair.”

Minimizing pore baking soda mask
 

Minimizing Pore Baking Soda Mask via ehow
“After you’ve washed your face, place 2 tbsp. baking soda in the palm of your hand and add just enough water to form a thick paste. Massage the paste into your face, resisting the urge to scrub, for about 30 seconds. Rinse the paste away with cool water. You should notice that your pores are smaller almost immediately. After a week of this regime you’ll see visible results as your skin becomes clearer and less prone to breakouts.”

Vinegar soak for feet
 

“Soaking feet in vinegar (apple cider being best) for the softest feet ever!  Also great for tired feet, toe nail fungus, foot fungus & athletes foot.”

Whiten teeth for cheap
 

Whiten Teeth For Cheap via New Nostalgia (not natural, but inexpensive!)
“I’ve used this for years and love it.  I usually use it while I am in the shower.  It seems like it is the only place I get away with not talking for 10 minutes!”

————-

More From New Nostalgia:


Want to see more?  All of these and LOTS more can be found at my Pinterest boards.


Click here to follow me on Pinterest.


Beauty/ DIY/Crafts/ FUN/DIY

DIY Layered Necklace

DIY Layered Necklace
 

by Laurie Cosgrove
Arts & Crafts Contributor

 Happy Saturday! I love getting crafty on the weekends and today I have a really fun funky necklace craft for you to try. I recently got inspired when I saw this necklace and this necklace on pinterest. I think layering up accessories can make the most basic outfit trendy and cute. You could just pile on three or four pieces to achieve this look but if you’re like me, there isn’t always time for that. I usually throw on an accessory as I’m running out the door, so untangling and fastening several necklaces probably isn’t going to happen often. Since I made this necklace last week, I’ve worn it with three different outfits and it seemed to transform each one of them. I loved that I could just grab it and go.


Here’s how to make one of your own…

Making a layered necklace


You’ll need:
>A set of pliers
>Three or more necklace chains
>A variety of charms
>An extra link (optional)

Chinese symbol charm

For my chains, I just recycled a couple from old necklaces I never wear and then purchased the last one from Walmart for $2. The charms and extra links were also found at Walmart . I really like the look of round discs and found these with Chinese symbols in the dollar bin. I’m not really sure what they say but hope it’s nothing too crazy;) I also love keys so I grabbed a set of those as well.

Layering necklaces

Step 1 | String a charm onto the longest chain. This will probably be the main focal point of your necklace so you might want to choose this to be the largest charm as well. On the second longest chain, string another charm (I chose the key). 

Charm necklaces

Step 2 | Decide where you want the second charm to lay on the finished product. I wanted the key to be attached to the first necklace a few inches above the disc. To do this, use your pliers and pry open an extra link, slide it through the chain and the charm where you want it. Then close the link with your pliers.

Step 3 | Combine the two necklaces together. Using your pliers again, open the links closest to the clasps on your longest necklace and slide them through the ends of your second longest necklace. Then you can remove any extra clasps or extra length of chain so that only one clasp is holding the two chains together.

layering charm necklaces

Step 4 | Take a third chain (probably the smallest) and slide on any last charms. Then decide where you want this one to lay. Combine the third chain with the other two like we did in Step 3 with your pliers. You should end up with three necklaces connected by one clasp. 

Finished product (layered necklace)
 
Finished!
Note: If you’re unsure about where the necklace should lay, a good rule of thumb is to measure in face lengths. For example, measure one face length from your chin to the top of your necklace (the first charms) and then another face length to the bottom of your necklace.
——————–

This post was written by 
Laurie Cosgrove
Laurie Cosgrove
Art & DIY Contributer

Laurie is a graphic artist and the author of Beauty Divine Design where she posts on everything from design trends and tutorials to her random daily life. She has such a way with beauty, and her taste is divine!  

Laurie also is the founder of Beauty Divine Design company which focuses on providing photographers with design templates.  Click here to visit her shop.

You can follow Beauty Divine Design here: {Facebook} {Twitter} {Pinterest}

———————

More posts written by Laurie at New Nostalgia:


Beauty/ HEALTH

Best Moisturizing Hair Treatment – Coconut Oil!

Coconut oil for moisturizing hair
I recently went from a blond to a red head.  I love a fun hair color change, but to get the exact shade of red that I wanted, I had to put 3 red applications on my hair.  This left my hair feeling a bit dry and brittle. Boo.
You all know I’m a fan of coconut oil around here, and thanks to this pin on Pinterest from How Does She, I found one more way to use it!  Coconut oil is the best moisturizing hair treatment.  Now, if you don’t know, I am a licensed hair stylist, and I have tried SO MANY top- of-the-line professional hair moisturizing treatments.  I know a good treatment when I use one, and friends, this is a good treatment!
This is a pre-shampoo treatment, so you put the coconut oil into dry hair.  Take a handful (amount depends on the thickness and length of your hair) and work it into dry hair. The goal here is to make sure all strands are coated.  If your coconut oil is in a solid form, no worries, it will melt as you work it into your hair by the warmth of your hands and head.
Messy updo
How I Used Coconut Oil As A Moisturizing Hair Treatment
I put it in, combed through my hair to make sure it was evenly distributed, then scrunched it into a messy bun,  I then walked around like that for about 20 minutes.  Although some other sites recommend adding heat, I’m all about keeping things simple and who has time to sit under a hairdryer?  I found this works wonders without heat.  You could put a shower cap or bag on your head, then wrap your head in a towel and allow the heat from your scalp to work.  I didn’t do this and still had great results.
Nutiva coconut oil
Click Here For My Favorite Brand
After 20 minutes, shampoo and condition your hair like normal.  If you don’t get a good lather the first shampoo, lather a second time, then condition.
Healthy moisturized red hair
TA-DA! Healthy, moisturized soft luscious locks.
My hair is back to how it was before I colored it.  It is super soft and shiny!
Amy Bowman New Nostalgia
My little one kept putting her hands through my hair and saying how soft it was.  Even my oldest girl who is short on compliments these teenage days commented on how good it looked.
Healthy hair
I will spare you the details of what my Todd thought of my new, soft red hair.  Let’s just say I got some extra smooches. Hee!
Beauty/ Sponsored

PEOPLE’S Special Double Oscar Issue + A Peek Into My Refrigerator

People Magazine 2012 Oscars

So did you watch the Oscars?  I sure did…I especially loved the red carpet show, which really is my favorite part.

I sat on my living room floor with my big bamboo cutting board and chopped vegetables for the week while watching the Oscars.  I tend to feel less guilty watching hours of TV when I double task!  
organized refrigerator
Look what I accomplished!  Not bad for a night at the Oscars, huh?  I will be writing more about prepping healthy food  and what we ate for the week in an upcoming post.
Back to the Oscars…I swooned over Ann Hathaway’s look.  Her hair is growing out from her role in Les Miserables where she shaved her head.  I think she looked so pretty and ladylike!   I loved watching her win “Best Supporting Actress.”

Anne Hathaway Oscars
Image credit: Kevin Winter/Getty Images

Did you see how she wore her necklace backwards?  Double swoon!  Great idea.

Anne Hathaway necklace oscars 2102
Photo Sources: A Retail Salmon and UK Lifestyle.

I’m enjoying the aftermath of the Oscars, thanks to PEOPLE Magazine 2012 Oscars Double Issue.  It came out at TARGET stores March 1, and will only be available until March 18, so hurry and get your copy.

People magazine 2012

Speaking of TARGET, we have a winner of our $25.00 TARGET gift card giveaway! Congrats Sara!

We have not been feeling well around here– a little one with a stomach bug– so I have enjoyed having some great reading material while I lay around with her.

People Magazine Jen and Justin

I have also been testing my PEOPLE trivia skills for a change to win!  You can too.  Enter each week for a chance to win one of hundreds of rewards cards! Click the link to play now.

Beauty

SnowPocolypse & Scarves

Snopocolypse and scarves

I live in Nebraska, and we have been gearing up for what has been called the storm of the year.  The Weather Channel guys are even here!  6-12 inches of snow are predicted, and my girls are thrilled that school was called off and it is a ‘snow day.’

snowstorm weather {that’s a nice looking storm, huh?}
weather channel
{the Weather Channel is in town!}

So, I’m propped up in my bed, still in my pj’s & crazy, cozy socks at 10:00 a.m.  I’ve got a cup of coffee and we are going to make pumpkin waffles & eggs for lunch.  Yep, lunch.  My girls are 9, 12 &13, so sleeping in on snow days is quite popular around here.  Breakfast was skipped altogether.

trader joe's pumpkin pancake and waffle mix
{Trader Joes Pumpkin & Waffle Mix–Buy Here}

I thought it would be fitting to share some of my most favorite scarf looks with you on this cold, blustery, SnowPocolypse day.  I’ve been organizing my Pinterest boards, and noticed I had a ton of scarf pins in my ‘Outfit Ideas’ board.  I decided they deserved their own board, so I created one!

pinterest outfit ideas board
{My Pin Boards-Click Here To Follow}
ways to wear a scarf


I love scarves.  I love how they can add instant warmth and comfort to an outfit.  I love how they can add a pop of color to an outfit.  I love that they come thin and soft or thick and cozy.  I love that you can use them to cover up bad hair days.  I think the scarf is the ultimate, all season accessory…but for this post I will feature my most favorite cozy-looking scarves in honor of snow day!

Click on photo above for 12 Ways To Wear A Scarf

……………………….
Cute stuff, huh?  Now I’m off to make some Salted Caramel Chai. 
Cheers to snow day & happy scarf tying!

Beauty/ HEALTH/ Natural Products

2 Ingredient Homemade Lemon Face Scrub

2 ingredient lemon facial scrub

I make this simple homemade 2 ingredient lemon facial scrub about once a week.  It is so easy to throw together, and it leaves my skin very soft, smooth, & exfoliated.

squeezing a lemon

Start by juicing a half of a lemon.  I like to use the lemons in my refrigerator that are on the verge of being too ripe to eat.  This is a great way to use those lemons up!

use a fork to squeeze lemon

Don’t underestimate the power of a simple fork!  I have several fancy lemon squeezing gadgets, but when I am just doing a lemon half, I just grab a fork.  It is amazing how much juice a simple fork can extract!

I add about 1/8-1/4 cup of organic sugar, and stir.  This makes enough for several applications, but in time the sugar dissolves, so I usually let my girls know that I have homemade lemon sugar scrub and they love doing “facials” with it.  They end up putting lots around their lips so they can lick it off.  Lemonade!  It is delicious and ends up being a great lip scrub, too!  You could also take leftovers in the bath with you for a great body scrub.

lemon scrub

I put some of the mixture into my palm, and rub in circular motions all over my face.  It feels so good!  I love a good scrub!  I then let it sit on my skin a few minutes until it gets sticky and feels a bit hard.  Then I get a microfiber facial washcloth nice and hot, and just lay it on my face for a few seconds.  The steam opens the pores and softens the sugar mixture.  I then wipe off and rinse well.  I will often follow with a dab of coconut oil for moisture.

lemon facial scrub

Lemons do have a lightening quality about them and I notice it has faded sun damage that I have on my forehead.  It is also great for breakouts.  It seems to really help with blackheads and just clearing the junk out of my pores.  I love it!

2 Ingredient Lemon Facial Scrub

 1/2 lemon

1/8-1/4 cup sugar

Juice lemon.  Add the sugar and stir.  Apply to face in circular motions and gently allow the sugar to scrub your skin.  Let sit for a few minutes.  Use a hot washcloth, lay on face to steam for a minute, then use it to wipe of scrub.  Rinse well & moisturize.  Use once a week.

You might also like:
Homemade Organic Eye Makeup Remover
Homemade Face Moisturizer
100% Natural Oil Cleansing Method
My Favorite Pre-Shave & Post Shave For The Softest Legs

Beauty/ HEALTH/ Natural Products

The Oil Cleansing Method-100% Natural Moisturizing Face Cleanser

A Guest Post from Kendra @ Our Homemade Happiness
//
I’ve been using olive oil to wash my face for the past two months. Yeah, you heard me right. I wash my face with oil. Sound like an oxymoron? Here’s how it works: like disolves like. The clean oil dissolves the dirty oil from your face, all without stripping your skin’s natural protective oils. This all natural, gentle cleansing approach is called the oil cleansing method or OCM in the blogosphere. Not only do I save money compared to my old Clinique face wash, it also doubles as my eye makeup remover. Yay for simplifying! The best part? My face has never looked and felt better. 


dCalifornia extra virgin olive oil

Recommended Oils

You’ll want to use a little castor oil mixed with a carrier oil. Castor oil is very cleansing. Start with one of the following ratios listed below. If your skin feels too oily, use more castor oil. If your skin feels too dry, use less castor oil. Castor oil is very drying, so don’t use too much. You should be able to find these oils at your local health food store,Amazon, or Mountain Rose Herbs. It may take time to find what works for your skin. When I started OCM, I used 100% olive oil because my skin was so dry. Now that my skin has adjusted and isn’t dry anymore, I use 10% castor oil, 90% jojoba oil.

  • Oily Skin: 30% castor oil to 70% carrier oil
  • Normal Skin: 20% castor oil to 80% carrier oil
  • Dry Skin: 10% castor oil to 90% carrier oil
  • Really Dry Skin: 0% castor oil to 100% carrier oil
Moisturizing Carrier Oils:
  • Jojoba–all skin types, especially acne-prone, oily, sensitive, and normal
  • Sweet Almond–all skin types, especially oily and normal
  • Avocado–all skin types, especially dry, itchy, sensitive, and aging
  • Apricot Kernel–all skin types, especially dry, sensitive, aging, and normal
  • Grape Seed–all skin types, especially acne-prone and oily
  • Kukui Nut–all skin types, especially dry and normal
  • Olive–all skin types, especially dryRinse Face. Rinse face with water.
    First: Rinse Face. Rinse face with water.

  1. Massage with Oil. Lightly massage oil in a circular motion over your face for two minutes. Massaging your face can lead to firmer, more radiant skin by minimizing fine lines and wrinkles, releasing tension, and improving circulation. Just remember that when you’re getting bored and wondering if the two minutes are up yet.
  2. Remove Eye Makeup. Gently rub oil across your eye lids and eye lashes to remove eye makeup.
  3. Steam. Soak a washcloth with hot water. Hold it over your face for 10-15 seconds.
  4. Wipe Off. Gently wipe oil off your face and eyes with your washcloth. When I’m finished, my face feels clean and moisturized, never greasy. I’m still amazed that oil can clean my face.
    (Don’t forget to admire your beautiful, glowing skin in the mirror.)

essential oils

Customize with Essential Oils

You can make your cleansing oil even more luxurious and customized to your individual skin type by adding essential oils. Essential oils are natural compounds extracted from parts of plants, flowers, and trees. They have been used throughout history for their medicinal and therapeutic benefits. They are extremely concentrated so you only need to add a few drops to your bottle of oil. Never use undiluted essential oils on your skin. Click here for more essential oil safety. You can find essential oils at your local health food store, AmazondōTERRA, or Mountain Rose Herbs.
  • Mature Skin/Wrinkles: frankincense, helichrysum, geranium, lavender, myrrh, sandalwood, carrot seed
  • Dry Skin: rose, lavender, geranium, sandalwood, rosewood, ylang-ylang, chamomile
  • Oily Skin: lemon, cedarwood, cypress, juniper, lavender, lemongrass, grapefruit
  • Acne-Prone Skin: tea tree, lemongrass, lavender, geranium, peppermint, rosemary, sandalwood
Questions About OCM:
How often do you wash your face with oil?
I do OCM most nights to wash my makeup off, but many people do it less often. I wash my face with water only when I shower in the morning. I don’t use facial cleansers anymore because they strip too much of the skin’s natural protective oils.
Do you need to moisturize after OCM?
My face was quite dry when I started OCM, so I had to moisturize. Over the past two months of doing OCM, my face has gotten less and less dry so I don’t even need to moisturize anymore. But I do it anyway to help prevent wrinkles (it’s never too early). I also use oil to moisturize, which you can read about here.
Does washing with oil make you break out?
No, I get less blemishes now then I did before OCM. Occasionally I’ll get a tiny blemish when I’m lazy and don’t wash my makeup off at night. Do OCM for at least three weeks to give your face adequate time to adjust. Be patient. It took some time before I figured out what oils worked for my skin and for my face to adjust to this new way of doing things.
How does OCM save you money?
Here’s how much money I’m saving by switching to olive oil/castor oil. Not only do I save money, I don’t have to worry about all the chemicals in commercial cleanser anymore. I also use oil as a natural make-up remover so that saves me even more money.
$3.90/oz. Clinique Foaming Cleanser ($19.50/5 oz.)
$1.68/oz. Olive Oil ($9/24 oz) & Castor Oil ($10/8 oz.)
 So Happy You Are Here
Hi, I’m Kendra!  I blog about all things homemade, especially cleaners, skincare, and healthy eating.  I started my blog, Our Homemade Happiness, after my husband suffered from mono symptoms for over two years and his blood results showed some liver disease.  Since the liver is responsible for filtering out chemicals and toxins from the bloodstream, I started to realize how many chemicals are in everything we buy, from processed food to household cleaners, lotion, and even air freshener.  I’ve become inspired to rid my home of as many chemicals as I can, one product at a time, and blog about it along the way.
Top