by Teniel Moore–our Austrailian Raw Foods Contributor
At times when fresh fruit is abundant I love to make fruit leathers, or as we call them here in Australia Fruit Roll Ups. I also freeze all types of fruit for use when out of season. Currently in Australia its not stone fruit season. We are in the middle of winter. So the recipe below is more suitable for what’s in season now.
However I do have a stash of mangoes in my freezer from summer that makes amazing fruit leathers also.
Like any of my recipes this is only a guide. The ingredient list for fruit leathers are endless. Today I will be sharing 2 recipes with you. I hope you enjoy them as much as we do. They make a great addition to a healthy lunch box for adults or children.
*You will require a dehydrator & a blender for this recipe.
Raw Berry Pear Fruit Leather
Ingredients
1 large apple
1 large pear
1 cup of frozen berries
2 leaves of kale or 2 leaves of silver beet (optional)
1 Tsp raw honey or coconut nectar to keep it vegan
Instructions
Blend all the ingredients in a high- speed blender.
Then pour the mix onto dehydrator trays with the dehydrator sheet and spread evenly with a spatula.
This amount will make about 2 trays worth. Dehydrate on 105 overnight or until dry.
When ready the roll ups will peel easily away from the dehydrator sheets. Roll up the dehydrated fruit and cut into long strips. Keep in airtight container in the cupboard for up to a week.
…….
Tip – If you add the kale or silver beet your kids will not be able to taste the greens at all. However the berries and greens will turn the roll ups a dark green once dried.
I look for every excuse to get more greens into my kids and this way I promise they can’t taste it at all, so why not add them!
Raw Pineapple Mint Kiwi & Kale Fruit Leather
Ingredients
2 -3 Kiwi fruit peeled
1/2 – 1 fresh pineapple
1 stem of curly kale
Generous handful of fresh mint
Instructions
Blend all the ingredients in a high- speed blender.
Then pour the mix onto dehydrator trays with the dehydrator sheet and spread evenly with a spatula.
This amount will make about 1.5 – 2 trays worth. Dehydrate on 105 overnight or until dry.
When ready the roll ups will peel easily away from the dehydrator sheets. Roll up the dehydrated fruit and cut into long strips. Keep in airtight container in the cupboard for up to a week.
……………….
Other fruit leather combinations to get your creative juices flowing are
Mango & mint
Berry & Honey
Apricot
Mango & coconut
………………
Amy here: If you do not have a dehydrator, you can use the oven method below.
Here is what I do when making fruit leathers/roll ups:
~Spread out on freezer paper on top of a cookie sheet (can use waxed paper)
~Put them in the oven for about *4-5 hours (150 degrees is recommended, the lowest my oven went was 170 degrees)
~Take them out, let them cool
~Cut them into strips and rolled em’ up
~Store in a mason jar. (or Ziplock bag or any airtight container)
*I put them in the oven after dinner and took them out right before I went to bed. I let them sit out on the counter all night, then cut and rolled in the morning.
I am just coming out of a quiet season, one in which I have been extra reflective and purposeful in sorting out all that is going on in my heart and head. It has been a profitable time, a time of growth.
The joy of journaling has played a large role in this growth as I have used it to reflect on all this life brings, the good and the bad.
There are many reasons why I journal, here are just a few:
WHY I JOURNAL
~it shows glimpses of this precious thing called life, and captures moments while emotions are still fresh, real and pure.
~it helps me to put onto paper thoughts and emotions that can clutter my brain and make my perspective cloudy, which brings clarity. It keeps my brain sharp, helps me to retain information better, and the practice of writing makes me a better writer.
~it is a safe place. A place for inner words that are not ready to be introduced into the world yet.
~depending on the type of journal, it is also a place to leave a legacy and capture thoughts and words to share with generations to come
~it can record a journey. Where was I one year ago today? What were my thoughts & desires? How have I changed?
~A journal can create a place to look back and remember more hopeful times in the bad times. It also records hardships that have already been walked through and overcome, which in reading can bring hope.
Journals & diaries can be workshops for the soul, laboratories where we an investigate and examine our lives, our secrets, hurts, resentments, memories & joys.
Journals are records for the heart and mind. They chart the joys and sorrows of our daily lives, and, like a road map, they can direct us back to our hearts.
Journals are testaments of our lives that we live as fully and consciously as we can.
-Roseann Lloyd – Journey Notes
TYPES OF JOURNALS
If journaling intimidates you or just feels too big, know that it does not have to be an everyday thing. It also can be many words or just one word. There are so many ways to journal and types of journals. The key is to just write.
1. Fill in the blanks
I love these types of journals. I love having a question to stimulate my writing. I have given these types of journals as gifts to my mom and my grandmother, asking them to fill them out and give them back to me. They then become treasures.
2. Art journals
My youngest girl Avery started an art journal. She has the gift of drawing, painting, and taking bits of paper memorabilia and making it into beauty. She is pretty proud of her creation. Gel pens like the Uni-Ball® 307™ Gel Pens found at Office Depot are perfect for these types of journals, as they roll beautifully onto all types of paper– even glossy paper– skip-free and no smudge! They come in a variety of vibrant colors.
3. Thankful journals
There has been very few other practices I have done in my life that are as profitable as journaling my thankfulness. I started doing it with my 1,000 gifts series here on the blog, but this year I started journaling my thanks by hand, in a daily planner type journal. There is something beautiful that takes place when I sit with my thankful journal and pen & gain perspective of all the wonderfulness that happens, even on the most murky of days.
4. Inspirational journals
It is quite a practice to take quotes from inspirational type books or from scripture and apply it to oneself. Writing the inspirational quote or verse down then making it personal is something I enjoy doing. I will either substitute my name where applicable or ask, “What does this say about me?” “How do I apply this to my life?” and then journal it.
5. Nature journal
Go out in nature and journal what you see, hear, smell. Even just simply listing it creates a beautiful journal. You could also take photos and make a nature photo journal.
6. Calendar Journal
My great-grandmother kept a calendar journal. As her granddaughter, it was so precious to read through what everyday life was like through her calendar journals. She would jot down who she visited, what appointments were made, and what she did on certain days. Little daily glimpses of her life, which turned into a great big snapshot of my sweet grandparents and their life together for their grandchildren to enjoy.
7. Classic Journal
This is the type of journaling I do most often. Anything goes. Some days I write pages, some days just a paragraph. My classic journal is lined and contains lists, thoughts, reflections, verses of songs I want to remember & things I am learning. I make it a point to have no rules for myself, as there is no perfect way of journaling.
As you can see, there are so many different ways to express your emotions on paper…so explore them all!
TOOLS OF JOURNALING
~Journal
I am a big fan of Moleskine journals. They are well made, classic, I like that they look uniform on a shelf and will last for years to come. They come ruled, squared or plain. I prefer ruled as without it, my handwriting tends to slant down to the right.
~Pens
To me, the pen is just as important as the journal. I am a bit picky when it comes to the pens I use. They must feel right in my hand and allow me to write without thinking about the tool that I am using, which means it must flow freely & smoothly. I need a pen that inspires me to write. I have found just that in theuni-ball® AIR™ Rollerball Pen which can be found at Office Depot. It writes so smooth and at every angle. It gives a perfect fluid writing experience and the ink shows up nice and bold. It is elegant and sophisticated, and features exclusive uni Super Ink for three-way protection against water, fading and fraud.
~Coffee or Tea
Ok, ok, not a necessity for everyone, but it sure is for me. There is nothing like sitting down with a warm cup, my journal & my favorite pen to clear my head and help me to just exhale.
WHY WRITE VS TYPE
I’m sure you would have guessed that I am a nostalgic person, especially with the name of my blog being New Nostalgia. There is something so nostalgic about handwriting. I have cards with my great- grandmothers beautiful, loopy cursive writing that I have saved, not because of the card itself but because of how priceless it became once she wrote in the card by hand.
As a blogger, I do my share of typing. I even write a series to my girls called “Leaving a Legacy” which too, is quite nostalgic. But, I love that despite all my typing, they will also have plenty of journals with my handwriting in them. It makes it so much more personal. Think about it… would you rather have a typed list of things your mother or father were thankful for or would you like to see it in their own handwriting?
I also keep a recipe box with handwritten recipes, with key family recipes in it that are also hand written. I have hand written recipes from aunts, friends, my mom and grandma. I just love seeing all the different handwriting from those I love!
One last point, handwriting is something helps you retain what you are writing and can be quite therapeutic. Handwriting is the result of a singular movement of the body, typing is not. It takes movement, thought, fluidity, & pen to paper.
Ahhh…pen to paper. Even typing that makes me feel nostalgic & makes me crave a cup of tea!
——–
What about you?
Do you journal? Do you keep an online journal or a written journal? Do you still keep a handwritten recipe box? Do you like taking notes by typing or writing?
This is a sponsored conversation written by me on behalf of Uni Ball. The opinions and text are all mine.
School is back in session & I’m enjoying getting back into a fall routine! I find myself exhaling as I settle in and get busy doing the things I feel I am most gifted at doing — blogging and being a Mom!
For me, part of being a Mom with kids who are back-to-school is making sure they have a nutritious snack to come home to. My kids come home famished and go straight away into the kitchen looking for something to eat.
I try to have several healthy options for them, but one favorite option is a smoothie. I love whipping up a smoothie for them, as long as they are nutritious. I like having something that has both fiber and protein in it, that will fill their bellies and renew their energy until dinnertime.
This Creamy Chocolate Covered Cashew Smoothie tastes decadent and you would never guess how nutritious it is.
Check out the nutrition in this shake:
Cashew Butter = protein
Banana = fiber & potassium
Cocoa = antioxidants
Cashews = more protein!
Oats = whole grain fiber
Honey = a natural sweetener with antioxidants
Cocoa Nibs =heaps of antioxidants & considered a superfood!
Silk Chocolate Cashewmilk = a non-dairy, gluten-free, verified non-GMO, lactose free, no preservative or artificial colors or flavors, cholesterol-free milk
Pretty impressive, huh? My blender is big enough to double the recipe to make smoothies for 4. I like to whip them up ahead of time and store them in the refrigerator in mason jars for my girls to just grab and go!
Creamy Chocolate Covered Cashew Smoothie
{makes 2 – 15 oz smoothies}
1/4 cup cashew butter (or almond butter or peanut butter)
1 banana
1 tbsp cocoa
1/2 cup cashews
1 cup oats
1 1/2 cup Silk Chocolate Cashewmilk
2 Tbsp honey
1 cup ice
Optional: cocoa nibs
Add all ingredients to the blender. Use a high-speed blender for best results. If you don’t have a high-speed blender, let the oats and cashews sit in the milk for a few minutes to soften. Blend until smooth. Add more Silk Chocolate Cashewmilk if needed. Consistency is right when a vortex forms in the blender and contents move freely.
………….
Let’s talk a bit more about Silk Cashewmilk. It comes in 4 flavors: Original, Unsweetened, Vanilla & Chocolate. It is a great, super creamy but calorie-conscious, alternative to dairy milk.
Visit Silk Cashewmilk website to sign up for registration, get a coupon & find lots more dreamy, creamy cashewmilk recipes!
………….
What are your favorite nutritious, after-school snacks?
This conversation is sponsored by Silk. The opinions and text are all mine.
There are several things I do at the beginning of the week to make sure we can easily access healthy food and snacks during the week. I try to get the grocery shopping done on Saturday or Sunday, which really helps make me feel ready for the week. I especially do this during the school year, when I need to make sure we have all that we need to pack school lunches and have healthy after-school snacks.
1. When shopping, keep foods as clean and pure as possible.
Avoid packaged foods with mile long ingredient lists. We eat packaged foods in our family, but I make sure I buy them from stores that promote more healthful ingredients, like Trader Joes or our local health food store. For example, if you look on the package of Trader Joes chocolate chip cookies, it is familiar ingredients I would use here at home to make chocolate chip cookies. I like that I know what they are and can pronounce them. This is not the case if I were to buy packaged cookies from a regular grocery store, unless maybe if they were in the specialty organic foods section.
Making food homemade as much as possible just tastes better and you are in charge of the ingredients. The freezer salsa in the above picture was made with our homegrown tomatoes and tastes so good!
2. Buy organic…or not. Know when to compromise.
Most of the time I buy only organic fruits and veggies, but lately, to get my kids to snack on more vegetables during the week, I have been picking up this tray of already cut up vegetables and dip. It is from Sam’s and the dip is a ranch greek yogurt dip. Yes, I would love it to be organic, but it is not. Sure, the yogurt dip has some ingredients that are not so clean and pure, but I’m ok with it. It is only 9.99, it is super convenient, and it gets a ton of vitamins and phytonutrients into our bodies. We eat it up every week, and I often will chop some of the veggies up even further to throw on our dinner salads. Eating healthy is not about eating perfectly. Compromise is ok.
3. Hard boil some organic eggs.
I’ve been doing this at the beginning of every week & it is a great way to get added protein into the body. I often find my girls with the egg slicer out, ready to snack on a protein rich hard-boiled egg. I also love throwing them on top of our dinner salad for added flavor, texture & protein.
4. Make some tea.
At first glance, caffeinated tea might not seem like the best healthy option, but it really depends what you are comparing it to. It is SO much better than grabbing a coke, whether diet or not, and does not have added sugar, artificial colors, or dreaded artificial sweeteners. Tea also has antioxidants which other sweetened beverages do not. I usually try to buy my tea organic but right now I’m crushing on this Tazo Iced Blushberry Black Tea.
Get rid of the pop, get rid of the Kool-aid. Drink tea! I make a big pitcher at the beginning of the week and it lasts quite a few days around here. It makes a nice change from typical plain water.
4. Keep lots of leafy greens on hand.
Here is another purchase I make from Sam’s at the beginning of each week. The container is huge and the price is right. I have a salad many times for lunch, and if not, I throw these greens into a green smoothie. I also try to make sure we get some sort of leafy green salad with every dinner, so a big package is a must around here. I’m very happy that Sam’s usually gets fresh shipments in daily, so the date on the package gives us a good week to eat up our greens. Tonight we will be topping taco’s with these greens.
5. Go nuts with nuts.
I really like having lots of nutritious nuts on hand during the week, and I really like storing them in mason jars. Putting them in a jar shows them off a bit, and makes it super easy to grab and start snacking. I also like how easy it is to just unscrew the lid and sprinkle them onto our salads. I have a big crush on cashews right now, and top almost every salad I make with them. Who needs croutons when you have crunchy cashews?
………………..
What are some ways you start your week off to help with healthy eating throughout the week?
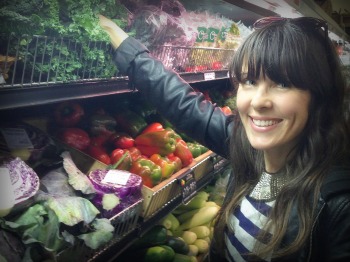
by Teniel Moore–our Austrailian Raw Foods Contributor
Now that I have your attention……. Do your kids get enough vegetables in their day?
I know as a mum of 3, with 2 younger kids it can be a challenge. But quite simply you can get loads of greens into your little darlings even before they walk out the door for school or kindy that day. It’s as simple as throwing a few items in a blender and off you go.
I have included a few recipes that I make for my kids as an example. But like any recipe you can make it what ever you want. Just remember to include a leafy green and or a vegetable. Lets face it. Most kids get enough fruit in their diet. It’s the veggie part I’m trying to emphasise here.
If you have to start off by hiding the greens you put into your drinks, then do so. Do whatever you can to get your kids enjoying them. After they taste how delicious drinking their greens are, they might not mind you adding the mystery items.
I have come to a point now where I don’t need to hide what I put in. They see me throw in zucchini and kale and they still drink it. Some are more popular than others, so don’t give up. Just keep trying new recipes and combinations until you find what works for your child.
Green Pineapple Smoothie : Aka Tropical Slim
1 cup of good quality coconut water (look for one that has no added sugar)
1 large handful of organic baby spinach
1 Tsp of Raw honey (or your sweetener of choice)
1/2 small pineapple
1/2 zucchini (trust me, you can’t taste it)
Blend until smooth & creamy. Pour into a fun cup or mason jar with a straw. Kids love straws.
Banana Smoothie: Aka Nutty Monkey
1 Banana fresh or frozen
1 cup of Almond milk
Generous dash of cinnamon
Stevia to taste
1 Tbls of Nut butter
Dash of vanilla
Ice
1/2 peeled zucchini (I peel the zucchini in this recipe to keep the colour nice)
Blend all in a high-speed blender till smooth & creamy. Pour into fun glasses with a straw.
Green Juice : Aka Rise & Shine
1 Small aloe vera leaf (leave this out for newbies)
1 – 2 celery stalks leaves & all
1 bunch of Pak choy or Bok choy
1 green Apple
1 Lemon peeled
Handful of green grapes
Juice all your ingredients. If you do not own a juicer you can blend everything in a high-speed blender & strain through a nut milk bag then pour into a glass and serve with a cute straw.
My Tips For Getting Kids To Drink Them
1. Give them a choice of the type of smoothie flavour they want and work from there
2. Let them help you make it
3. Make up crazy silly names for the drinks
4. They gotta taste good
5. Make their smoothies attractive and fun to look at. It’s as simple as giving them a straw or a fun cup, Let them add a topping like coconut, chia seeds, fruit or crunchy nuts or seeds
I’m all about being perfectly imperfect lately, and serving my company leftovers is a great example of embracing the imperfect and reaping quite perfect benefits.
About a month ago I had my Mom over for lunch. I love having her as I know her favorite foods and flavors. I know she loves meatloaf and sweet potatoes which we actually had for dinner the night before, I also knew that one of her favorite flavors is coconut, which ended up being the perfect topping for our sweet potatoes!
We had a wonderful lunch together, and although she knew most of the meal was leftovers, she enjoyed it and we had precious time together.
So let’s talk leftovers. At first I felt weird serving my company leftovers, but then I thought about my favorite deli at my local health food store, and realized everything they serve ‘to -go’ would be considered a ‘leftover.’ The have a glass case with a wonderful selection of foods, and I know that all of their foods are fresh, but not all are made exactly that very day.
I know there are some people who really dislike leftovers, but I love them. I love the ease of just reheating food and enjoying a hot meal that was easy to just heat and eat!
Just about everything we ate that day for lunch would be considered a leftover. Even the wine I served was a bottle that was opened the night before, but one that my girlfriend and I did not finish, so I served it with our lunch. Why not?
The meatloaf, beans and sweet potatoes were all made for our dinner the night before. Even the salad was tossed the night before. The cheesy bread was a asiago cheese bagel leftover from breakfast that we split, since there was only one and limiting carbs is always a good thing. A simple sliced apple was a great way to round out our little lunch. Can you tell that my Mom and I don’t mind our food touching? I purposefully used small plates to make the lunch look filled out and hearty.
Nuts were the appetizer and cupcakes that my lil’ one made the night before was dessert. A few little touches like lemon in our water and fun napkins made the table look special.
I don’t know about you, but if leftovers looks and tastes like this lunch did, I’m all for reheating food and offering it to my loved ones.
………………..
What about you? Do you use leftovers? Would you or do you use them for entertaining?


 There are several things I do at the beginning of the week to make sure we can easily access healthy food and snacks during the week. I try to get the grocery shopping done on Saturday or Sunday, which really helps make me feel ready for the week. I especially do this during the school year, when I need to make sure we have all that we need to pack school lunches and have healthy after-school snacks.
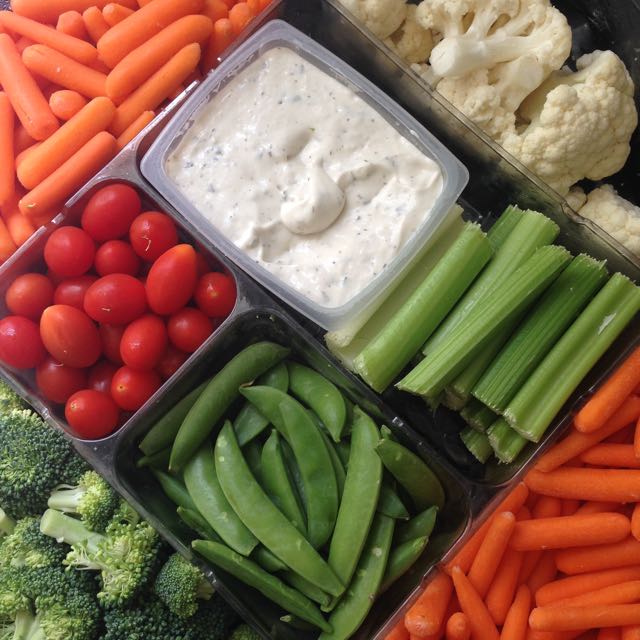


 I’m all about being perfectly imperfect lately, and serving my company leftovers is a great example of embracing the imperfect and reaping quite perfect benefits.


