Browsing Category

Healthy Eating

Healthy Eating/ How-Tos/ RECIPES

The Simplicity Of Sprouting

**This is a guest post written by Kelly from The Morris Tribe.  Enjoy~
During the winter months, I truly miss the fresh produce from my garden.  I also resent the high prices of mediocre produce at the store!  Sprouting is an option that has worked very well for our family and may be something you might want to consider.  Not only is it inexpensive and highly nutritious, but it’s fun!
Sprouting is like having your own little garden in your kitchen all winter long.  Your supply of sprouts keep coming every few days, just about the time it takes to eat your last batch.  They require only a sunny window and two rinses a day, how easy is that?
All of the energy that a plant requires to produce a full-sized plant is released when a seed germinates, or sprouts.  This time in the life cycle of a seed is the best time to consume them. 
The nutritional value of sprouts is just short of ridiculous, read here.  They are a wonderful supplement to your winter repertoire.  I count on them to help my family with building immunity during cold/flu season.

 Sprout People is a great source of information about what seeds are best to sprout and gives this nutritional info for sprouts:

Nutritional info:
Vitamins A, B, C, E and K
Calcium, Iron, Magnesium, Phosphorus, Potassium, Zinc
Carotene, Chlorophyll
Amino Acids
Trace Elements
Protein: up to 35%
You’ll need a mason jar, a lid ring and some cheesecloth.  You can purchase a sprouting lid for a wide-mouth mason jar here for just a few bucks.  I prefer a plastic lid myself.  The most important thing to remember is that it needs to be clean!  I like to put my jar in the dishwasher to sterilize it.
For high-quality, organic sprouting seeds, check around your town.  I usually purchase my alfalfa seeds at the health food store, but they are available at grocery stores and on-line as well.  A small package of seeds will cost just a few bucks and will last a year or longer as you only need a tablespoon of seeds at a time.
You’ll want to soak your seeds in a few inches of water overnight.  The next morning, rinse them thoroughly.  That’s it!  Just set your jar near a sunny window and watch them grow!  Rinse them again that night.  Be sure to drain the seeds well, you don’t want excess water in the jar.
The next morning, rinse them again and then once more at night. 
By day 3, you’ll be getting pretty excited as your sprouts will have germinated and will be close to ready.  Just rinse your sprouts every morning and evening thoroughly.
You might want to take a taste of your sprouts on day 3 or 4 and see how you like them.  Their taste will change just a bit from day to day, you can establish what day you like them best.
Once they are complete, you’ll want to rinse them well enough to get the hulls off.  Then store them in a sealed container in the frig. 
I like to just munch on them myself, but they also make a great addition to sandwiches.  I have used them them in smoothies, the kids will be none the wiser!  A strong flavored fruit like blueberries or blackberries will insure that.
The Sprouting Book” by Ann Wigmore is an excellent resource on sprouting and fairly inexpensive as well. Being an older book, I’m quite sure you could get it from the library. 
 Kelly Morris is a wife and mother to 9 children, 6 biological and 3 adopted, living in small town Ohio.  She can often be found blogging, writing, reading, cooking, gardening, digital scrapbooking and drinking good coffee.  Kelly authors “The Morristribe: Creating Balance for Busy Moms” and loves helping other moms find balance in their lives.
*** Kelly made this super helpful video on the sprouting process.  Once I saw on this video & how simple it is, I felt way less intimidated by sprouting.  It is EASY!  
Thanks, Kelly, for this great post and for being such a great friend to me!
Cancer Journey/ HEALTH/ Healthy Eating/ How-Tos/ RECIPES

Fighting Cancer With Nutrition

I’m slowly but surely making decisions everyday about attacking this cancer from a nutritional standpoint.  There are so many suggestions and so many things one could choose to do in this area, and it could be overwhelming.  I’VE DECIDED NOT TO LET IT BE.

 This is another area that I have had to just release to God and know that He will lead me to what He wants for me.  I’ve had an open mind to those I trust the most, and through them I feel like He is guiding me. It is a calm, imperfect, slow process and I LOVE IT:P

I will share with you the different things I am embracing and why, some may sound quacky, but when you have Stage 3 Invasive breast cancer, quacky is allowed!

If you think about it, putting chemicals in your body that are so harsh that they eat up your blood veins, kill good cells along with cancer cells, and make you bald, is pretty quacky, too, but that is what we are doing along with nutrition.  Makes granola and green stuff sound a bit more normal, huh?

My husband walked out the door this morning saying, “Babe, get what you need to get.”  His support and trust in my decisions in this area means the world and made me feel so loved and cared for.

I’ll start with what I am doing so far, it is just the beginning but its is something.  I am NO EXPERT, whatever I am doing is just me stumbling along choosing to do what makes the most sense, all the while knowing it is PRAYER that heals, and whether that is healing here on this earth or my ultimate healing in heaven, only God knows what His perfect plan for me is.

I so desire to be a good steward of my body, and a good steward of information that God has sent my way.  Prayers in this area would be so appreciated!

1. WATER
Chemo has to be one of the most dehydrating things known to man. I have drank so much water in the last week, and not much is coming out, so obviously my body needs it!  TMI?
I use an Eco Vessel water bottle and it is by my side 24/7.  Literally!
I love it.  It holds 17 oz, fits in most cup holders, has a lid that allows ice in (very important to me), and is insulated, which keeps my ice from melting for hours.  I wake up at least 2-3 times a night very thirsty, so it stays filled and cold on my headboard.  There were days when I was very nauseous and it was a chore to make myself drink, but I did.  I feared getting dehydrated, I know so many who have to be hospitalized during their cancer fight because of dehydration, and that can be very serious.

2. Very little sugar.
We have had amazing desserts delivered and I have had bits of each of them and enjoyed them, but for the most part I enjoy seeing my girls and Todd delight in them.  Chemo has done a weird thing to my taste buds.  It makes everything taste sweet.  Not a very good, sweet, either.  For example, a glass of juice can taste like I’m drinking a glass of sweet cough syrup.  Yea, ick.  It has been a great way to steer me away from the sweets, but I am ready for normal taste buds again.  I am not off sugar, but I am very aware of how much sugar I eat, and when possible I use Sucanat (like on the oatmeal I am eating right now:)

3. Lots of fruit
This one has been easy for me because I am so spoiled.  My Grandma and Grandpa Earl signed me up for Harry and David’s fruit of the month club. SUPER GREAT GIFT.  Nectarines are the fruit of September and they have been DELISH!  I have also been able to afford lots of good fruit thanks to meals that have been delivered by friends and family.  It saves our grocery budget, so I buy fruit, veggies and supplements with the extra money.  Every meal we have received has had some sort of fruit (or veggie) with it, so that is pretty awesome.  I am trying to pick lots of different colors of fruits.  My freezer is full of different types of frozen berries that I use for smoothies, to put on my oatmeal, or just eat slightly thawed. I recently found the best black, seedless grapes! I’m trying to get creative so it doesn’t get boring. Just this morning a dear friend dropped off some treats along with organic bananas and carrots–nourishing foods are such a great gift to me!!  Thanks, Johanna!!
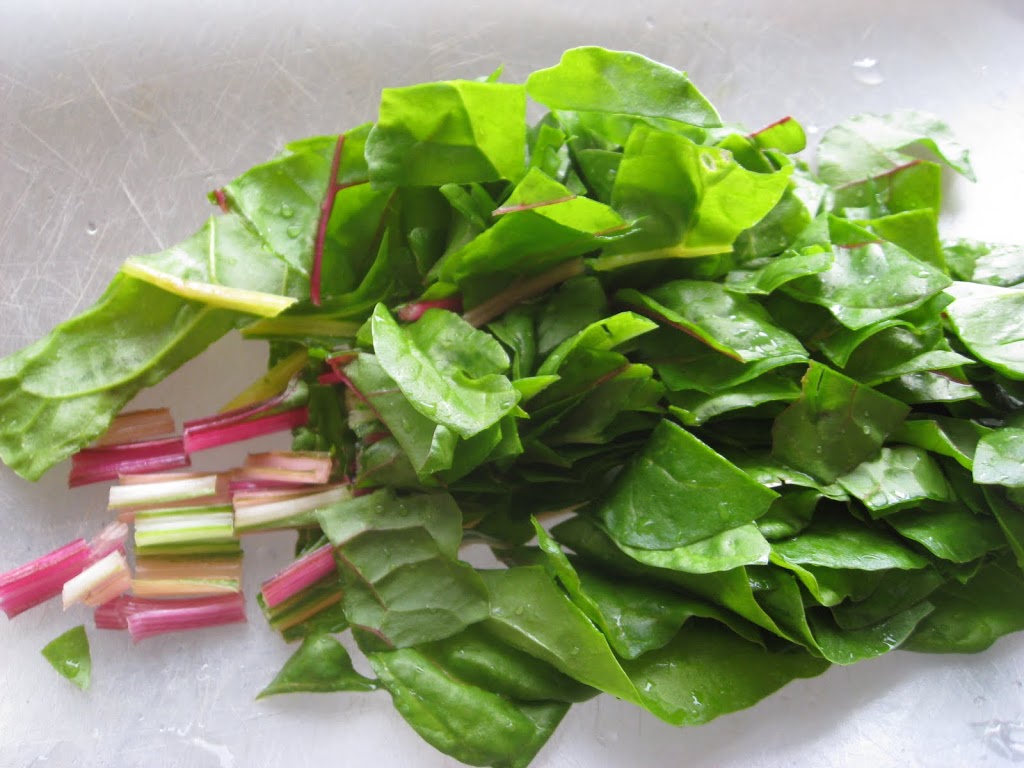
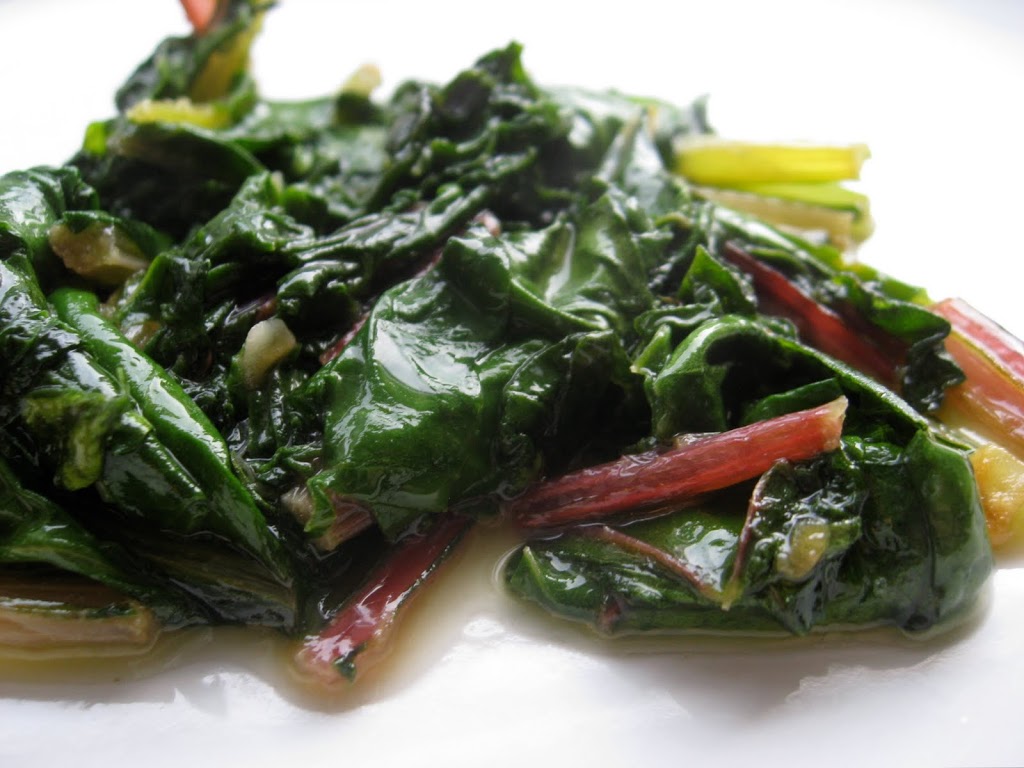
4. Veggies
This one was harder for me when my tummy was not well.  Now it easier.  I have lots of frozen veggies to use in soups.  I keep spinach on hand and use it in my fruit smoothies or pile it high with other veggies and make a salad.  I bought a butternut squash that I can’t wait to bake.  I’m lucky that I like vegetables, as I know many do not.  I have an aunt (Hi, Ellen!) that is sending a recipe for a cleansing soup that I’m sure will have lots of veggies in it.  My chopping board and I are ready, I think it would be great to have on hand for lunch.


5. Odwalla Superfood Green Drink
This was just a simple way for me to get some greens like wheat grass, barley grass, wheat spouts in when everything was crazy and I was too tired to think. It is high in Manganese and Potassium. I know there are other, better and cheaper ways of doing it, but while I was sick this was easiest.  I just drank a cup every morning.  It was one of the only juices that didn’t taste too sweet for me, and I drank it through a straw so I wouldn’t have to look at the crazy dark green color.  I have plans for getting my greens in other ways, I will share when I actually implement them.

6. Barlean’s Total Omega 3.6.9 Swirl
This product has fascinated me.  It was another super easy way to know I am getting my Omegas without having to think too much.  It was on sale at my health food store and the Orange Creme Swirl flavor sounded good.  It is made with Organic Flax Oil and Pure Borage Oil. There is no crazy taste, it is delish.  I take 1 Tbls a day.  It is very digestible, which was great for my sensitive stomach.  The lady that recommended it for me has no gall bladder and she said this product is the only one she can find that she is able to digest well.

7. Protein
All of the great meals we have been getting have made this one easy. I love chicken and one of my most favorite meals that was delivered was simple grilled chicken with an INCREDIBLE smoky bbq sauce.  I am working on getting more protein from non- meat sources, like lentils, beans and nuts.  In fact, today it is lentils and rice for lunch…yum!:)
 There were days when all I could get down was a protein bar, they came in handy, but are high in sugar, so not my favorite method of getting protein.
Eggs, cheese and yogurt are all high in protein.  I am a bit confused with what to do with these as my cancer type is estrogen fed and depending on what you believe, there are concerns with eggs and milk products and estrogen.  I won’t get into that because there are many different opinions out there, and I don’t want my comment section to become a debate 🙂 but it is something that I am processing…

8.  Fiber
This is pretty easy when I am eating all the fruits and vegetables that I should be.  We had some incredible flax seed rolls delivered with a meal that I am sure had a good amount of fiber in them.  I love dipping hearty breads in my soups.  I have been eating lots of oatmeal and nuts that have fiber, too.

9. Vitamins and Supplements
The only thing I have been doing so far is a multi-vitamin and 2,000 i.u of Vitamin D.  I am waiting to hear back from a blood test taken to check my Vit. D levels, I am a strong believer that Vitamin D is CRUCIAL to my healing.

I have a great plan for all my vitamins and supplements in the very near future.  I am going with the Shaklee brand, and will become a representative for them so I can get them at a good cost, and offer them to any of my blog readers if they are interested.  It was a process I was embracing before my cancer diagnosis, so it feels natural to continue on in that process. Here are the products from Shaklee that I have decided to take so far:

~Shaklee Vitalizer + Iron
~NurtiFeron
~CarotoMax

 There are a few others I would love, but we will see how the budget is doing and maybe add slowly.  I will go into more detail with these products and why I am taking them sometime soon.

I  will continue to let you know what I am adding and what I feel is working for me.  I know this stuff is not for everyone, but it is through others sharing their journey that I have found some answers, so I will share mine.

***If you are a meal provider for our family in the future, I don’t want you an ANY way to feel like it has to be organic and crazy healthy.  My breakfast, lunch and snacks are extremely healthy and I know now more than ever that LIVING and enjoying gifts is so very important, so know that I will enjoy yours. This post makes it sound like I am an”all organic, won’t- eat- anything- that- is -not- good -for me” person. Not true.  I am taking a balanced approach, so please do not feel pressure to bring an out- of- this- world, healthy meal.  We are so very thankful for whatever you provide, even if it is pizza or takeout (another one of my most favorite meals that was provided was a Chinese takeout feast!:))

Today’s food:
BreakfastOatmeal with Sucanat, cinnamon & a handful of frozen rasberries; yogurt
LunchSalmon burger from my health food store +lentil rice salad
DinnerChili, Spinach salad, and bread from the bread makerSnacks-Homemade apple pie from a friend, smoothies, fruits/veggies, crackers, etc. 

FUN/DIY/ Healthy Eating/ HOME/ Homemaking/ How-Tos/ RECIPES/ Simplifying

My “Laid Back Method’ To Making Simple Meal Plans

One of my favorite things to do is to go to the library and look in the “new release” section for interesting cookbooks.  There always seems to be one that catches my eye, (this week it is Everyday Cooking with Organic Produce, great cookbook!) and it keeps me up to date with what is happening with food.

Ever since I was little, I love to sit with a cookbook and read it like a regular book, starting at the front and working my way to the back.  I remember when I was about 10 years old being so excited to find Amy Vanderbilt’s cookbook at a garage sale for ten cents.  I bought it and devoured the insanely thick book from front to back!  When I was 11, I made an entire Thanksgiving meal with very little help.  I loved cooking!
 I think I got my love of cooking from both of my grandma’s.  I remember my Grandma Thelma having us over and making us little snacks, commenting on why they were good for us.  I remember her telling me why whole wheat bread was better than white– she knew back then what Doc Oz is trying to tell us now!!:)  She always had something on hand to feed us, and to this day, even if our visit is unannounced, she loves on us with some sort of bite to eat.  She makes the world’s best sunny- side- up egg and toast!  Love her..
My Grandma Marian, who is in heaven now, was also known for her love of cooking.  She had a strawberry patch in her back yard, and was the first to introduce me the amazing freshness of homemade strawberry jam.  I remember watching her grate a potato when I was young, and making us the best potato cakes for breakfast. On Valentines day, she would send homemade candies in the mail to us, all the way from Michigan to Nebraska.  A box delivered in the mail, full of homemade goodies from grandma, was one of my most favorite childhood memories.  Under all the newspaper stuffing were tiny little chocolate peanut butter cups, wrapped with such love and care.  Now that I’m old enough to know the work that was involved, I would so love to tell her how much that meant to me as a child.

The Start Of A Plan…

Back to cookbooks and meal plans… what I have been doing lately is while reading a cookbook, I keep some post its and a pen handy.  When I come upon a recipe that sounds appealing, I write the name of the book at the top of the post it, *and list the recipe title along with the page number.  I keep the post it (or two) stuck to the front of the library book. Then, on the day I am going grocery shopping, I find the book, look at the post it, and pick a few chosen recipes to make for the week. I look at each recipe to jot down what groceries I need to buy, which is the start of my grocery list.
When I make a recipe and decide it is a keeper, then it goes on this blog.  My recipe tab on this blog is slowly becoming something that I have always wanted, — recipes that I use regularly, organized and easy to find.  If it is a week that I don’t have a new cookbook to inspire me, or time to browse the web for new recipes, I just click on my recipe tab and use my tried and true recipes here on the blog.
*I use the same method while reading magazines.

Things I consider when meal planning:

Dinner-
I usually only plan for 4 meals a week.  We have Bible Club on Tuesday evenings where we are served dinner,  and on a couple Saturday nights a month we have a bunch of young men here at the house for a “video game club,” so we order pizza to feed everyone.  On Friday nights we have Family movie night and order Arby’s Roast Beef Sandwiches–5 for $5.95, baby!  We have spaghetti with this sauce at least once a week, because it is so simple and everyone loves it. So really, that only leaves about 3 meals that I have to plan for.  I try hard to make healthy meals on those evenings, especially when we are eating fast food (pizza and Arby’s) on the weekends!
Breakfast-
We keep it simple.  Oatmeal, whole wheat bagels, cereal, toast, eggs, and whole grain pancakes are our usual choices throughout the week.

Lunch-
I choose a soup recipe (one of his favorites) and make a big batch at the beginning of the week, to put into mason jars, (use 1/2 pint mason jars to freeze in individual portions) for my husbands work lunch.  I pack my girls lunch all though the school year, again keeping it simple.  Usually a sandwich, vegetable, fruit and crackers.  Sometimes they will get hot soup or noodles in a thermos if I’m extra motivated!
Snacks-
I usually find some great snack ideas when reading through my cookbooks, so I refer to the post its!  I talk about some healthy snack ideas in this post.
Use What I Have On Hand-
Before sitting down to write weekly meal list and grocery list, I do a quick check of my pantry and freezer/refrigerator.  I take a mental note of what we have on hand and do my best to plan meals around those items.
Flexibility-
I usually do not assign meals to different days of the week.  Instead, I have a list of meals that I keep on the refrigerator for the week, that I’ve bought groceries for.  I am too fickle with food to assign an exact day.  I have to see what “mood” I am in that day as far as what I want to cook and what sounds most appealing from the list.  Because of this fickleness, I don’t think I will ever be one who has super organized & printed calenders on the refrigerator, with assigned meals for each day of the month, but I’m at peace with that.  I make a grocery list every week, go to the grocery store once a week, and have at least 4-5 meals planned for the week.  Simple, laid back, and good enough.
This post is linked to:
Tip Junkie
The Trendy Treehouse
We Are That Family

Healthy Eating/ RECIPES/ Sides

Simple Summer Squash Recipe

One thing about blogging that continues to amaze me is how I can ask a question and within minutes receive answers from readers.  It is such a fun reminder that there really ARE people out there reading and they actually care enough to take a moment to talk to me!  That is just so fun.  

This is exactly how I got this recipe.  I wrote a post bragging and giddy about my garden harvest, and ended it with asking you all what to do with my overgrown summer squash.  I got quite a few great ideas, but the first commenter was Megan from Just The Scraps, and her simple preparation of summer squash really appealed to me. I tried it last night and I was so happy with how it turned out!   My 3 daughters and little niece all ate it and enjoyed it. Thank you so much, Megan, for commenting and sharing how you make summer squash.

This is more of a “method” then a recipe, or a “no recipe” recipe.

 Megan’s directions from her comment:
Try cutting the squash in bite sized pieces. Melt some butter in a pan and add some minced/chopped garlic. Stir in the squash and cover, so it can steam a bit. Stir occasionally until it reaches desired tenderness.
I sliced mine pretty thin and took out most of the seeds because my squash was overgrown and the seeds were large and tough.  It only cooked for about 5 minutes once I put the lid on, and was perfectly tender.
I added salt and pepper.  Simple!

Here is another suggestion from her:

Last night I made kabobs with chicken, sausage, and chunks of zucchini, on the grill. Sprinkled it all with some salt and pepper. DELISH!
This post is linked to:
Saturday Night Special @ Funky Junk

FAMILY/ HEALTH/ Healthy Eating/ How-Tos/ Natural Products/ RECIPES

Steps To Healthy Living

A few months ago I had the honor of doing a guest post on “The Mother Huddle.”  It was such an honor and I had great fun sharing my thoughts over at Destri’s blog.   Destri is a pretty special lady, one I consider a friend despite the fact that we have never met in person.

The guest post was titled “Steps I Have Taken To Bring A More Healthful Approach Into My Home.”

As the beginning of summer approaches, I am already feeling the pull of unhealthy choices when it comes to food.  BBQ’s, quick dinners at grandpa’s pool, lemonade full of HFCS, the ice cream truck…I don’t know about you, but for us summer brings a bunch more opportunities for healthful eating to go right out the window.  I do and will lighten up a bit during the summer when it comes to eating healthy, but I also want to keep in mind the good habits we have established and continue to pursue them.  Rereading the post I wrote for The Mother Huddle will help me do just that!

Steps I have taken to bring a more wholesome approach into my home:

We Follow These Rules:

  • Try to eat like our grandparents did, before convenience foods came about.
  • No high fructose corn syrup!  Studies show that this stuff causes confusion in the area of the brain that tells your body that you are full. It makes you crave more sweets! This is just one of many reasons to avoid it. Also, we found that it was triggering my youngest daughter’s asthma.  Since changing our eating habits, she is off all inhalers!  Yippee!!
  • No hydrogenated oils/trans fats and use only healthful oils (olive oil, coconut oil)
  • Think brown, not white (whole wheat flour, whole grain pasta, brown rice, 100% whole wheat breads, etc)
  • Stay away from foods if the ingredient list is long and full of words we can’t pronounce.
  • No more buying white sugar! We replaced it with natural sweeteners like maple syrup, honey, sucanat (rapadura), & stevia.

We Make Snacks Count By:

  • Making homemade treats containing ingredients that are beneficial to the body (we loveMudballs)
  • Having veggie fun! I cut up bright colored veggies into bite-sized pieces, fill a 6 cup muffin tin with a different vegetable in each cup, serve with toothpicks.  If I only have 4 types of vegetables, I’ll fill the 2 remaining cups with dip and toothpicks.
  • Eating fruit as our dessert.  I see my 3 girls (age 10, 9 and 7) eye the beautiful bowl of blueberries thawing on the table during dinner, excited to eat ‘em for dessert!  They also love frozen cherries, grapes, peaches, mangoes, melons, and pineapple.  We eat them all just slightly thawed.
  • Making homemade popcorn in the microwave using a brown paper lunch bag. My girls love this and do it themselves.  Big money saver!
  • Adding veggies to our fruit smoothies.  A large handful of fresh spinach disappears when blended into our sweet fruit smoothies.
  • Using leftover smoothies to make popsicles.  These are delish, and yes, they are the same smoothies that have spinach in them!  These type of real fruit/yogurt popsicles are so costly at the store.  Its amazing how inexpensive and easy it is to make your own!  If you don’t have molds, use paper cups and wooden craft sticks.
  • Staying away from empty calories–even treats can be beneficial to the body (dark chocolate, desserts with fruit/oats in them, ice cream topped with fresh fruit, whole wheat brownies)

We Are Going Greener:

  • We got rid of harsh chemical cleaners.  I use a vinegar and water spray for just about everything, and have simple recipes to make my own laundry detergent, dish washing detergent and liquid hand/body soap. (this saves us a TON of money, and I believe some of those chemicals contributed to my daughters past issues with asthma, so we are saving money on medical bills, too!)
  • We drink from reusable water bottles, keeping them in the refrigerator so they are cold and ready to drink.
  • We got rid of most plastic storage containers and use different sized mason jars instead.  I love how they look in my pantry, freezer and refrigerator.  They make it easy to see what is inside, and they look orderly.
  • If it comes in a package, I ask myself “Can I make this homemade?” It is almost always more healthful and saves on the packaging (pancake mix, granola bars)  I buy many ingredients from bulk bins and put them in mason jars when I get home.
Taking steps for more wholesome homes can be overwhelming, so be encouraged that these changes did not come overnight for us, nor do we do it all perfectly. We eat our share of junk food and sugar outside our 4 walls, (and even inside them on the weekends), so it ends up being about 80/20,
which I am comfortable with. It has been a step by step journey,
one I will never regret starting as I see such huge changes in the health of my family.

This post is linked to:
The Finer Things Friday @ The Finer Things
Home And Family Friday @ Home Is Where My Story Begins
Its A Hodgepodge Friday @ Its A Hodgepodge Life
Tips Me Tuesday @ The Tip Junkie
30 Minute Blog Challenge @ Steady Mom
Motivate Me Monday @ Keeping It Simple

Gardening/ Healthy Eating/ RECIPES/ Sides

Swiss Chard From My Garden

This photo was taken about a week 1/2 ago.  You would not believe the size of the swiss chard leaves now!  I have been very pleased with how fast and easy it is to grow swiss chard.  I’ve enjoyed it raw, cut up in a salad,(using the lettuce pictured above), and just recently I learned how to cook it.  

 I scoured the internet looking for ways to cook swiss chard.  I have heard stories of swiss chard tasting bitter once cooked, so I was skeptical that I would like it, much less my kids!
I found a recipe at Simply Recipes,  (recipe below). It caught my eye because it was simple and easy to prepare, plus the author had this to say about it:
” I never liked Swiss chard, until several years ago I had some that had been freshly picked from a friend’s garden. It was so sweet and buttery I couldn’t believe it was actually Swiss chard. It was then I learned that freshness was the key determinant to whether chard was delectable or detestable.”  


“Sweet” and “butter” is all I had to hear to get motivated to cook up these garden greens.  

I think swiss chard is such a beautiful vegetable!  The stalks come in different colors and the leaves are such an amazing bright green.   The stalks remind me of celery, but a bit more bitter.  I didn’t care for the stalks, but I liked looking at them!
These nine, good sized leaves cooked down to one palm sized serving of chard.  I was flabbergasted!  Guess I need to plant more next year!  Can you imagine the content of vitamins and antioxidants in that one palm full of cooked chard??  Impressive.
Nutritional Profile
Swiss chard is an excellent source of vitamin K, vitamin A, vitamin C, magnesium, manganese, potassium, iron, vitamin E and dietary fiber. It is a very good source of copper, calcium, vitamin B2, vitamin B6 and protein. In addition, Swiss chard is a good source of phosphorus, vitamin B1, zinc, folate, biotin, niacin and pantothenic acid.
Here is the palm full of the finished product.  I loved it.  It was mild, sweet and buttery.  I told my girls that I made it for me, but I would let them have a taste.  They skeptically tried a small bite, and within seconds I had 2 (my oldest one was not into the texture) little bird mouth hanging open for more bites. Now that excites me!

Funky Junk's Saturday Nite Special

Here is the recipe:


Swiss Chard Recipe

INGREDIENTS

  • 1 large bunch of fresh Swiss chard
  • 1 small clove garlic, sliced
  • 2 Tbsp olive oil
  • 2 Tbsp water
  • Pinch of dried crushed red pepper
  • 1 teaspoon butter
  • Salt

METHOD

1 Rinse out the Swiss chard leaves thoroughly. Remove the toughest third of the stalk, discard or save for another recipe (such as this Swiss chard ribs with cream and pasta). Roughly chop the leaves into inch-wide strips.
2 Heat a saucepan on a medium heat setting, add olive oil, a few small slices of garlic and the crushed red pepper. Sauté for about a minute. Add the chopped Swiss chard leaves. Cover. Check after about 5 minutes. If it looks dry, add a couple tablespoons of water. Flip the leaves over in the pan, so that what was on the bottom, is now on the top. Cover again. Check for doneness after another 5 minutes (remove a piece and taste it). Add salt to taste, and a small amount of butter. Remove the swiss chard to a serving dish.

This post is linked to:
Made It Monday @ The Persimmon Perch
Just Something I Whipped Up @ The Girl Creative
Making The World Cuter Monday @ Making The World Cuter
Tasty Tuesdays @ Balancing Beauty and Bedlam

HEALTH/ Healthy Eating/ HOME/ How-Tos/ RECIPES

What I Buy and Why-Bread

I always find it fascinating to peek into other peoples grocery carts, while waiting in line at the grocery store, to see what they are buying.  So often I have wanted to strike up a conversation and ask about a product I see, and ask why they like it and why they choose it over another.  I get the same feeling when I open up other people’s refrigerators, I love seeing what brands of foods they buy, and often get inspired to try something new.

I have learned so much about food by asking my friends what they buy, where they buy it, and why they like it.  These conversations inspired me to start writing some posts on the food items I buy and why.  Not only do I want to share with you what is working for us, but my hope is, that in the comments section, I will get to hear from you and what is working for you!

Bread
Our Everyday, Whole Wheat Bread (either of the 2 below:)
If I Want To Treat My Kids To “White” Bread:
When I Want To Splurge:
*Disclaimer-I was not paid or compensated in anyway to promote these products.
It is important to me that our bread does not contain High Fructose Corn Syrup. (Read why here and here)  I also think fiber is very important, so I try not to buy bread that contains less then 3 grams/slice.  The “Oatnut” bread is what my girls call “the yummy white bread.”  It is really good, but I do not buy it as often because it has less fiber in it and uses enriched flour (although unbleached:)) where as the 100% whole wheat breads uses whole wheat flour, which does not have to be enriched, because nothing was ever removed in the first place.  I like that!
 You can go here to read more of my thoughts on making grains count.
What brands of bread work for you?  Have you switched to 100% whole wheat bread?  If so, was it hard on your kids?
Top