Browsing Category

Organizing

HOME/ Homemaking/ Organizing/ Simplifying

Minimalizing My Living Room

Minimize Living Room

I minimized my living room today, and it really just took minutes.  My living room is not a room that I struggle with clutter, so it was pretty easy.  I will be working through the rest of my house and you WILL get to see clutter, just wait!

How to clean and minimize

Things To Have Close By When Minimalizing
1. Broom
2. Duster
3. Vacuum
4. Trash Bag
5. Bin for Giveaway
6. Bin for Things That Belong Elsewhere

Remember, even though we have cleaning supplies out, WE ARE NOT CLEANING.  We are minimalizing.  A purging of sorts.  We have to train our brains to ignore the dirt and only focus on minimizing the items that we no longer need, love or that need to be put elsewhere.  If we do this then cleaning will be a breeze.  We will get to cleaning eventually.

I DO have the broom, duster and vacuum nearby for the big nasty chunks.  You know, the dust bunnies that appear when you decided to move a bookshelf to another room or to get the layer of dust under knickknacks that are no longer wanted or loved.  It is just for a quick maintenance.  A fake clean if you will.  DO NOT GET OBSESSIVE and start cleaning.  That will come later.


I started at one end of the room and took the time to stop and think about each area and each item in there.

 Questions to Ask Yourself When Minimizing Items:


~Do I still love it?

~Is it being used?

~Would it make more sense somewhere else?  {Keep ‘like’ with ‘like’}.

~Am I keeping this out of guilt because someone gave it to me?  If so, get rid of it!

~Do I really need more than one or two of an item?

~Is this item worth the work of picking it up if out of place or dusting every week?

~Is this a sentimental object I could take a photo of as a keepsake instead of keeping the item?

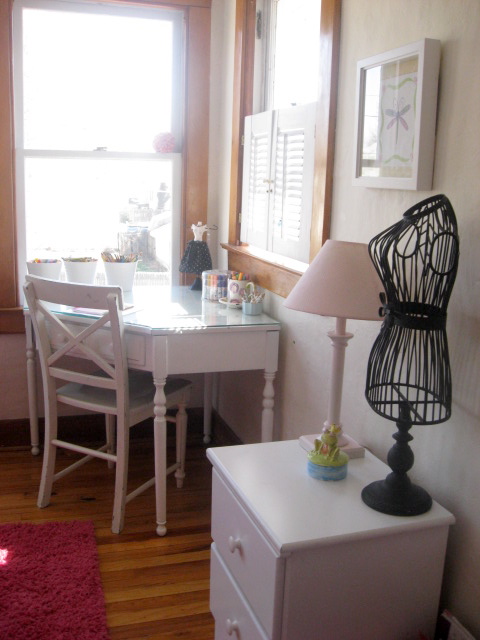
Another thing to do is get out of ruts.  Mix things up.  Don’t be afraid to move things around if it make more sense to put it elsewhere.  I purged the above magazine holder, then moved it to the other side of the room where a bookshelf that was just collecting clutter and dust was.  See below.

Before and After change in living room


I thought the idea of having games upstairs in the Living Room would motivate us to play them more.  It really didn’t.  Maybe a little bit during Christmas break, but not enough to keep this shelf in the Living Room.  It is a big dust collector.  I am going to practice the ‘like with like’ rule and put the games in the basement on shelves with all of our other games.  Same with the books.  They will go with our other books, all in one place.  No need to have books all over.  Keep them all in one place, except for the specific books you are activly reading.  Keep those where you are most likely to grab them and read them!

Organizing DVDs

This is our TV cabinet.  It has 3 drawers under the TV.  The top drawer was just a mess of items, most trash, lots of stuff that belonged elsewhere.  They went in the ‘belong elsewhere’ pile (I did not get out bins for this room because I knew there would not be much clutter. I just made piles on my rug, which you will see below.)

I will now use the top drawer to keep all of our library books in.  As you will see below, I need a specific place for this as I have paid way too many late fees and STILL found 2 BOOKS in that mess that are overdue.  Fail.

Be thinking of solutions to problems as you go.  If there are pens everywhere, look for a jar to put them all in.  If you are a coupon cutter, find a specific basket to keep your coupons & scissors in. Problem solving is a big part of decluttering and minimalizing.

Organizing movies in a drawer

The second drawer was pretty empty.  It is hard to get open so I left it empty.  The third drawer holds our DVD’s.  I will have my youngest go through and purge the ones she is too old for.  I will give them away to my niece & nephew.

Clutter in living room

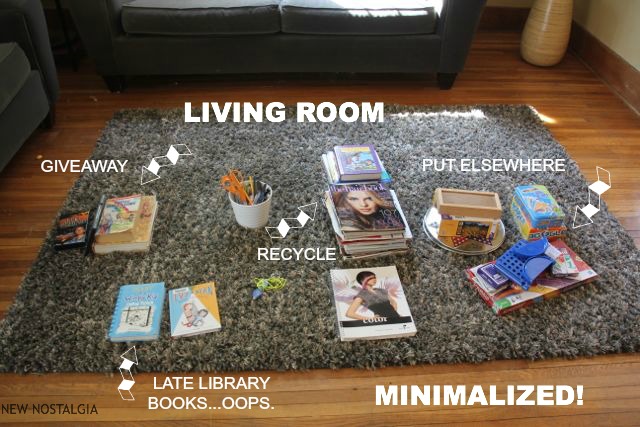
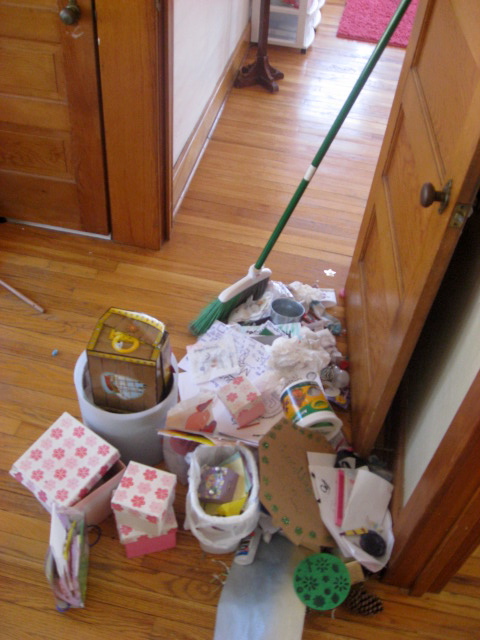
Here is what was purged from my Living Room.  Yay!  Makes me happy!!  The games will all go downstairs.  The magazines will be recycled.  The late books will get returned.  Books will be given to my sister’s younger kids or to Goodwill.  Ahhhh…FEELS SO GOOD!

Now I’m going to resist the urge to scrub my Living Room and move on.  Our Dining Room and Sunroom is up next!

…………..

Do you declutter before you spring clean? Or do you do it at the same time? I have tried that and failed so many times.  This time, decluttering is ALL I’m focusing on first.  Then cleaning will be easy.  I may even reward myself and hire someone to do the cleaning for me.  Just a one time splurge.  Maybe!

Got any more hints for minimalizing the Living Room?

Decorating/ HOME/ Homemaking/ Organizing/ Simplifying

8 Steps To Rescue A Room + Cleaning My Girls Room On Spring Break

This is a repost from the archives…one from almost exactly a year ago!  It is fun to read and see how God has answered my wonderings in the below post, with this team of people I introduced you to yesterday.  Pretty cool to see what can happen in a year AND I’m motivated to go clean up Lil’ Ones room again after reading this old post.  I might even take a before and after pic for you this time!

8 steps to rescue a room


Having my kids home for spring break has got me wondering…

…about this blog of mine. A hobby– turned passion– turned surprise income maker– now takes time.  I now have advertisers, sponsors and write occasional posts on products and get paid for it.  I find myself photographer, editor, writer, social media specialist, administrator, and receptionist all at the same time, and I LOVE IT! It has been a huge blessing, a surprise answer to prayer. We asked God about supplementing our income and what would be the best way to do that, and it seems like this blog is the answer. It brings me to tears when I think of the incredible gift I have been given, to spend time doing my passion hobby, and actually help the family income at the same time.  I have God and YOU ALL to thank for that.

But, as spring break is here, and kids are home, I find myself wondering how in the world am I going to do it all come summer break?  I have felt the pull the last 2 days, the pull between being a mom and being a blog writer.  My little ones win in this tug o’ war game.  I gladly give in.  For you see, I now know that the moments are so precious, and are not forever.  They pull, and I respond pulling them to me into arms that don’t ever want to let go.  Oh if I could freeze these precious moments!

Arms right now are empty, as I sit here in a few surprise quiet moments, as all 3 of my girls are at a friends house down the street.  Thank goodness for great neighbors, another answer to a prayer that we prayed.

Back to summer, I’m not sure how I will balance the two. I know so many of you do it, working mothers, and then those who are my heroes, single mothers.  But, I do know that my family must always come first, and I must notice and cling to those moments that so easily slip past when I am too focused on work.  I know my work is best when I am being the best mom and wife I can be.

I will probably sneak away to a coffee shop a couple evenings a week and take my laptop to the pool.

sPink girl's room

Another solution I have is bringing you into our days, sharing with you what we do, and keeping my posts simple. So today, you get to see what my youngest and I have been up to, and I will show you a glimpse of a fun little project we did yesterday with some of our neighbor kids.

Girl in pink chair
I received a phone call from Grandma last night, “Can I take you all out for breakfast in the morning?  Can I drop little ones birthday gift off at the house, too?”  So our morning started out with the blessing beautiful weather, an awesome breakfast and time with Grandma.  Grandma Sharon knew that my little one could really use her own comfy chair in her room, and after looking all over the city, she found the MOST special and comfy one.  Such a great gift!  
Girl watching tv in room
Corner desk in room
Pink and brown room
organizing markers and coloring

 My little ones room has been a mess, and I was hoping this would be the motivation she might need to get her room in order.  I was right.  As we were out to breakfast, little one asks, “Mom, do you think we could work on my room today, maybe rearrange it and find a special place for my new chair?”  Yay!  Because I didn’t over schedule our Spring Break, I was able to say “yes” and now her room looks great!  She expressed such gratitude to me for helping her with her room, which melted me.

clutter in room

 {Here is what was eliminated from her room, most of which was under the bed! Eyyy..}

………………..

8 Steps To Rescue a Room

1. Gather all clothes on that are not where they should be.  Sort dirty from clean.  Hang up/put away clean & take dirty to the laundry room.  If there are a lot of clothes to put away, grab a laundry basket and lay them neatly in there.  Do not get distracted by spending too much time doing this.  Once the room is clean, you can grab the basket and put clothes away.  You will be much more motivated once you see the beautiful, decluttered and clean room!

2. Grab a trash bag and keep it close to throw things away. I like to hang it on the door knob of the room I am cleaning. Look around the room and get the big stuff that you know is trash.  Getting clothes and trash out of the room will instantly make it feel cleaner and decluttered.

3. Make a pile outside of room that is for things found in the room that belong elsewhere.  Could use a laundry basket for this, to make the process of putting it all away easier.

4.  Make another pile outside of room for things you want to give away.  Bag it up and take to car after the room is finished.

5. Look around room and get rid of anything you don’t love.  Eliminate!  Clutter attracts clutter.

6. Keep like with like, and find a place for everything now that the room is only full of the things you love.  Everything needs a home.

7. Use a broom to get things out from under the bed.  You will find most is trash or things you want to get rid of.  If it was under the bed, it is usually not important enough to keep!

8. Now that everything is in its place, sweep, mop, vacuum, dust, wash the windows and wash the bedding.  This is all so much easier to do once the clutter is gone!

………………..

As always, when I get into one project, it seems like the rest of the house falls apart, so I will take some time this afternoon rescuing my house!  The weather is so amazing, I’m thinking it may be a great evening to pack a picnic and have Todd meet us at the park for dinner.  It is 81 degrees and sunny, with just a slight breeze.  Perfect!

Off I go to get to my rescuing, but before I do, here a quick peek at a super fun project we did yesterday.  I will have a “how-to” post coming soon!

Natural homemade lip balm

It was one of our most fun projects, the girls loved it, and I love that it is healthy for them–no chemicals!

Healthy Eating/ HOME/ How-Tos/ Organizing/ RECIPES

A Peek Inside Our Refrigerator & Using Mason Jars To Make It Pretty & Organized

glass bowls and mason jars holding fruit and vegetables inside a refrigerator

I posted this picture on New Nostalgia’s Facebook & Instagram, and it got quite a bit of attention! Who knew that an organized refrigerator using mason jars would be so interesting?!  promised a post that talked more about the picture and instead of ONE post, I will be writing TWO!

In this first post, I will talk about: 

1. How a pretty & organized refrigerator helps keep waste to a minimal
2. How I keep the refrigerator looking this way on a weekly basis
3. How glass is the key, so you can SEE!
4. How Mason jars are a great alternative to plastic
5. How I cut my veggies for successful consumption
6. How jars keep fruits and veggies fresher, longer
7. How jars keep my kids munching on veggies

In the second post  I will share:
A. What else is in the refrigerator that you may not be able to see.
B. What we eat. How foods in the pantry and freezer are key to creating well-rounded meals.
C. How only buying what you need for the week is key to an organized refrigerator.
D. Meals we ate that week
E. Snacks we ate that week
F. Lunches we ate that week
G. Breakfasts we ate that week
glass bowls and mason jars holding fruit and vegetables inside a refrigerator

So, on to points 1-7:

1. First, this is a new goal of mine…to have a pretty & organized refrigerator.  It has been well worth the extra thought and effort. Since I started using glass bowls and mason jars, it has been so much easier to see what is in there & find what we need.  We do not waste food like we used to, and I don’t buy things that I already have! Most importantly, I know my family is eating nourishing plant foods!

2. I have been trying to do my grocery shopping on Saturday or Sunday.  Even before I leave to grocery shop, I do a quick clean out of our refrigerator, taking note of what we have and what we need.  This way the refrigerator gets cleaned out once a week and never gets too bad.  It really only takes minutes, and is so well worth it!  It also only takes minutes to take fruit out of their bags once you get back from the store and put them into bowls.  The kids can do this for you!  Yes, slicing veggies and putting them in the jars takes more time, but not as much as you would think.

3. The glass bowls you see in there stay in there.  Most weeks they contain the same fruit, but the mango bowl sometimes has grapefruit instead.  The apple bowl sometimes has pears instead.  It all depends on the seasons, and what is on sale.  Glass is the key.  It allows the fruit to look like the art that it is and be on display!  I find what is on display gets eaten, so it works well.

4. Mason jars are a long time favorite of mine.  We do not have any disposable plastic storage containers, and my goal is to use all glass for food storage. I have a cabinet shelf that holds all 3 sizes of mason jars, and I keep their lids and rims all in a big bowl in a place that is easy to grab and reach.  We use them for dry food storage too, so I have quite a few of them.  They are so much better than stained plastic, and I love that they can go straight from the refrigerator to freezer, and from the freezer to the microwave (lid removed) to defrost if needed. The small 4oz jars are great for single servings of soup or chili.

Organized refrigerator

5. As you can see in the picture, I chop most of the veggies up ahead of time, at the beginning of the week. I am known for taking my big bamboo cutting board and sitting on the floor in front of the TV to do my chopping.  Oh yes!  The floor!! My cutting board is big enough to keep all food on it, so it works for me!  Most weeks I get to this.

If it is an extra busy week, I still make sure to take fruits out of their bags and display in bowls. Then the next time I make a salad (we eat them daily),  I take an extra few minutes to slice the veggies we use on the salad to store in the jars.  I use a mandolin for cucumbers, peppers, and carrots. It is one of my most used kitchen tools. It makes great thin slices for topping salads.

I also like to have carrot sticks and red pepper sticks to dip in hummus or put into lunch boxes, so I will save some to cut into sticks and put in a separate jar.  If I buy a bunch of onions, I will use my food processor to cut them into a dice size, store them in 1 cup jars, keep one out for the week to use in recipes and freeze the rest.  There are certain veggies I do not slice up.  These are usually ones I am planning on using in recipes, like squash.  I buy bags of broccoli already cut up into florets, and keep them in the bag, but if you buy it whole, mason jars are great for storing these, too.

6. I have been very surprised at how long our veggies stay fresh in mason jars. Even up to a week they do not get slimy. I do sometimes add a splash of water to sit at the bottom of the jars if the veggies start looking dried out at all. I will give it a little shimmy shake after adding the water, and they are good to go all week.

7. There is nothing better than finding an empty jar and knowing one of my girls were busy munching on cucumbers or carrot sticks.  Oh, how that makes this Mama happy! Now, the key to my girls munching on vegetables is not having a bunch of junk food snacks sitting around.

If healthy vegetables, fruits, and snacks are all you have in the house, they will eventually eat them. But if you have cakes, cookies and cupcakes, they will be much less likely to grab plant food snacks.

………………..
 
Make sure you look at part 2.
 
 
Do you have any tips for me?
What thoughts did this post spur on in your head?
I would love to know if you care to share!
HOME/ Homemaking/ Organizing/ Simplifying

Organize Your Measuring Cups and Spoons

Organize your measuring cups and spoons
This simple organization step I recently took might just be my favorite thing I’ve done so far in my kitchen!  I can’t tell you how great it is to have my measuring cups and spoons organized and hanging in plain site.  NO MORE digging around in drawers trying to find them!
measuring spoons

The first thing I did was buy small hooks.  I got mine from Target.  I knew if I was going to display my measuring cups and spoons out in plain sight, they would need to be nice looking, so I looked around for these while at Target, too.  Giada and her awesome brand of measuring cups and spoons is what I stumbled upon and fell for instantly.  I love the simplicity of them & I think they look quite sharp hanging under my cabinet in the kitchen.

measuring cups and spoons

I have VERY limited space in my kitchen.  Especially drawer space…remember this post? I only have 2 drawers….yes, I said TWO!  Oh, and a half size junk drawer…so 2 1/2! One is taken up by our silverware, so really that only leaves me one drawer for kitchen utensil storage.  Do you see why I need to get creative in efficient kitchen utensil storage?

reflection

Peek-a-boo!  I see you! Do you see me?

jar canisters
I honestly have found myself baking more often since organizing my measuring cups and spoons.  These 3 jar canisters that I keep out on my counter under the measuring cups and spoons hold whole wheat flour, unbleached white flour and organic cane sugar. It is amazing how handy it is to have the things you need in an easy to grab place! I also have baking powder, baking soda, salt and yeast in mason jars, in a nearby handy location.   I’ve been doing so much baking, especially this Whole Wheat Bread from the bread machine and these Whole Wheat Honey Banana Muffins,  that both my flour canisters were empty on photo day!  
Amazing what a little organization can do!

organized kitchen

Books/ HOME/ Homemaking/ Organizing

Pulling Yourself Together: Implementing a Cleaning Routine that Sticks

I’m super excited to tell you all about this awesome ebook I just finished reading.  I have been in bed most of the day, not feeling quite myself.  It DID give me time to catch up on reading, and after reading Clean Mama’s ebook I am SUPER eager to get up out of this bed and take steps to PULL MYSELF TOGETHER!

I don’t know about you, but once the New Year hits, I am always ready to pack up all the Christmas decorations and get my organization on!  This year, I really enjoyed the holidays, to the point where I really ignored this house. Now it is such a mess that I feel a bit overwhelmed with where to start…or should I say…”felt” overwhelmed.  After reading Clean Mama’s new ebook, I have the tools I need to tackle this house and pull it together!  I will be taking photos and sharing my organization progress with you on the blog.  Can’t wait for you all to see my nasty ‘before’ pictures!

Do you want to join me? Then keep reading, this is step one! Clean Mama makes it so simple and easy, and will give us you the motivation, just as it did me.   Let me introduce you to Clean Mama’s new ebook…

pulling-yourself-togetherbook-cover1
What’s included in
Pulling Yourself Together: Implementing a Cleaning Routine that Sticks?
  • tools to de-clutter and organize your home in the midst of a busy life
  • methods to implement a cleaning routine that really works for you
  • strategies to continue with a perfected cleaning routine
  • 5 chapters with step by step methods for jump starting your de-cluttering and starting (or perfecting) your cleaning routine
031
6 printable guides are included to help you through each step of the process:
6-printables-guides-pic
De-Clutter Worksheet
Weekly Cleaning Routine Checklist
Week at a Glance
Blank Week at a Glance
Rotating Cleaning Schedule
Blank Rotating Cleaning Schedule
Clutter and chaos taking over your life? Ready to start pulling yourself together? Hop on over to the Clean Mama blog to learn more about Pulling Yourself Together: Implementing a Cleaning Routine that Sticks.  Click here to visit Clean Mama – Clean Mama Printables. and to purchase your copy today!
pulling-yourself-togetherbook-cover1

*This post may contain affiliate links.

HOME/ Organizing/ Simplifying

How I Put Away My Christmas Decorations

Putting away Christmas Decorations
No matter how much I love my Christmas decorations, I am always ready to put them away once Christmas day is over.  I think I anticipate the New Year coming, which automatically gets me in the mood to declutter and organize!  I also can’t stand how hard it is to dust my home with a bunch of Christmas chotskies sitting around.  
putting away christmas decorations
Today was the day to get it all put away.  I decided to quickly grab all decorations from every room, put them in a central location, (my dining room table) and bring the storage bins to said location. This made it very easy to see what I had, what I wanted to keep or get rid of, and easy to put into bins because I could see the size and shape of everything that needed stored.
Once I gathered all Christmas decorations from every room, I started to dismantle my tree.  I actually have 2 trees.  One in the living room that is considered our ‘pretty’ tree–this is the one I attacked today.  Our other tree is a family tree downstairs, and that one we will dismantle as a family, as it is full of Hallmark ornaments that each need put back into its cozy box, one by one.  That is a big, time consuming job, so I will let my family help me with that one tomorrow. 
I took the ribbon off my tree and rolled it around the spool it came on.  I took down all the decorations and Christmas balls. I rolled the lights up onto the handy plastic roller they came on.  My Colsie girl helped me take the branches down and put them back into the Christmas tree box.

storing Christmas ornaments

I have kept the original containers of most of my Christmas balls which has been great for protecting and storing them.  Our homemade marble Christmas balls are like new, 3 years later!

Putting away my Christmas Ornaments

For the few that do not have a container, I use Christmas bins that come with cardboard dividers.  These work GREAT for ornaments or smaller, breakable decorations –like candle holders.

I put all smaller decor away in this fashion, wrapping some in tissue paper if delicate.  I started with small and worked my way into my larger pieces, using 3 red Christmas bins.  I used our 3 fluffy stockings in between breakables, and tissue paper for the rest.

I got rid of decorations I did not use this year–2 bags worth!  I went from 6 Christmas bins down to 4.  Not bad, huh?

It felt so good to move furniture back to their pre-Christmas spaces, after dusting and vacuuming, of course.  I did leave out a few winter type decorations.  A couple small winter trees, a snowflake candle holder, and that big, crazy silver twig thing you see in the middle of my table.  I love the texture of it and I think it looks wintry.

1.  Collect all Christmas decorations from every room, put them in a central location.  I used my dining room table.

2. Take ornaments off the tree

3. Take lights off the tree

4. Take tree down and box it

5. Sweep up loose pin needles.

6. Bring all Christmas storage bins to central location

7. Decide what to get rid of.  Don’t keep everything!  Only keep what you love.

8. Wind lights up. Store.  Mine came with a handy dandy plastic wheel to roll them on.  I have also used washed out Christmas popcorn tins as light storage in the past.

9. Wind Christmas ribbon up if used to decorate the tree.  I kept the spool it came on and used that.

10. Put Christmas balls back into original container, or use a bin that has cardboard separators.
11. Store small decorations in bins with separators.  If you don’t have them, wrap in newspaper or tissue paper and store in a bin.

12. Work from smallest items to largest.  At least this worked for me.  It was nice to get all the little chotskies out of the way and then work the large pieces into bins, almost like a puzzle!

13. Leave out some ‘winter’ type decor if desired.  Just a bit.  Leave room in one of your Christmas bins to store this once spring comes.

14. Sweep, vacuum and dust!

15. Light a candle, get a cup of chai, and enjoy the uncluttered atmosphere of your home!

______

It is ok to break it up into days.  If you have lights and decorations up outside, do them another day.  I saved my basement tree for another day.  Small steps are better than procrastinating until spring!!

HOME/ Kids/Family/ Organizing

The Ultimate Disney World Packing List and Finding Peace on a Family Vacation

Looking for the Ultimate Disney Packing List?

Find it Here


Disney Guide{my husband lives and breathes Disney.  Here is is favorite Disney planning guid.}


Guess who is in Florida about to visit Mickey?  ME. Me. MEEE!  Our long awaited family vacation has finally arrived.  My Todd has been busy for over a year planning this trip.  Our girls, ages 13, 11 & 9 are ALMOST too old for princesses, so we needed to get ourselves to Disney asap!

Before we hit the theme parks, we are taking a couple days to just chill out at St. Pete’s Beach.  It has been wonderful so far.  This is our girls very first time to fly and to see the ocean, so seeing them experience such fun things has really been special.

What is most special is the fact that I am here with my family.  We started talking about this trip shortly after I was diagnosed, and I so desperately wanted to make it through my cancer.  Honestly, I did not let myself get excited about this trip until just a few days before, when I was packing and was using the super handy list above.  I was afraid to let myself get excited.  So many unexpected things happened after my diagnosis, so many twists and turns of my journey, enough to show me that you never know when “the other shoe will drop.”  I am starting to get used to living life with that feeling.  All survivors have to, it is part of the fight–knowing that life can change drastically at any moment and learning to find peace within that feeling.

Well, in sunny Florida, peace is pretty easy to find.  I know I will be finding it tomorrow afternoon, as the resort we are staying at has a few hammocks hanging over white sands with the ocean as a soundtrack, waves on repeat.  Ahhh….peace.

Top