Browsing Category

Homemaking

HEALTH/ HOME/ Homemaking

My Slow & Steady Approach To Essential Oils

organic essential oils  

I am slowly but surely getting super addicted to essential oils.  I know I’m a bit late to the game, but I was skeptical and just didn’t want one more thing to have to spend money on.

But then I started talking to women.

Women who were raving about replacing items in their medicine cabinet with oils, who were adding it to their homemade cleaners to KILL mold & mildew, & who were diffusing it into their homes to create an atmosphere and actually CHANGE the mood of their homes, and who were rubbing them on husbands sore ankles for instant pain relief!

These were women, friends & even family members that I trust…so I started listening!


organic lemon essential oil

Slow & Steady Approach to Essential Oils

My approach to essential oils is slow & steady.  The buying a lot of high-quality oils at once is inexpensive, so I have decided to go slow and do it in an affordable way.

I’m excited to slowly but surely share with you my journey.

So far, I have bought and used Tea Tree Oil Lemon Oil,Lavender Oil. 

I use Tea Tree Oil in my Epsom salt mix to take detox baths. 

I also have also used lemon essential oil in my homemade glass cleaner which gives it a lovely cheerful scent and influences my mood while I clean.

Aroma Soft Essential Oil Diffuser -- best diffuser!

My Favorite Essential Oil Diffuser

My favorite and most recent purchase for essential oils was an AromaSoft Ultra Sonic Essential Oil Diffuser.  This diffuser is budget friendly and after trying several different brands and types, this is the one I love.It is awesome!

An oil diffuser is a wonderful way to get the therapeutic scent of oil into a larger space. This one fills up my whole living room and dining room.

You fill the diffuser with water, add a few drops of your favorite essential oil or blend a few scents together (so fun…I love Peppermint and Lemon together!) and enjoy the scent in your home.

It is so great to know the scent is healthy and good for my family to breathe…unlike many scented candles out there that are full of chemicals and allergens!

So far my favorite oils are citrus essential oils —Lemon, Grapefruit & Lime— as they are great for uplifting the mood and good for any season.

With 4 females in the house and 3 of them being teens and preteens, a good mood lifter is always appreciated!

I am now researching an oil to diffuse for dry membranes.  I am on a new medication that causes my sinuses to become so dry!

The dry winter air of the Midwest sure does not help.

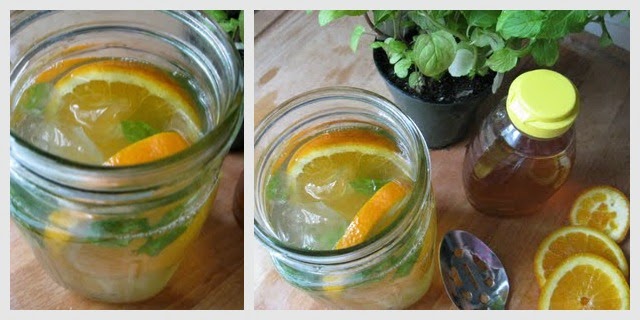
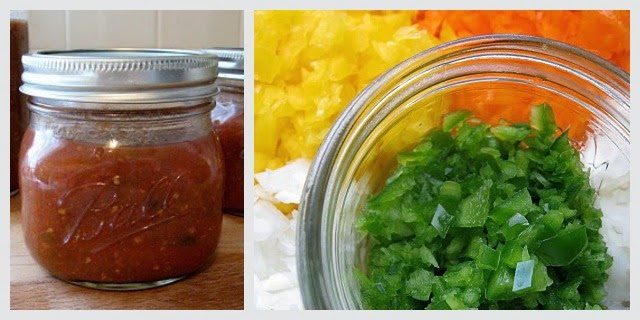
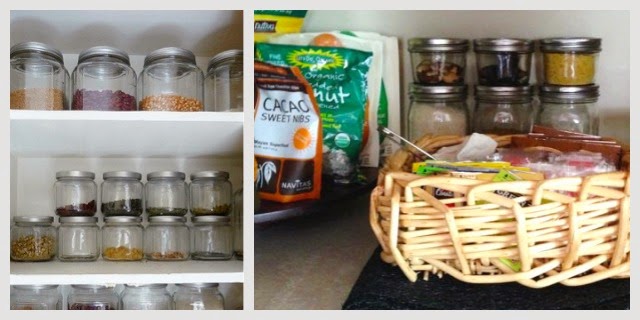
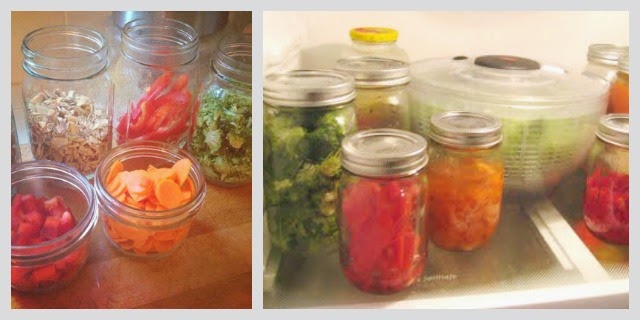
I am looking into some Peppermint Oil and Oregano Oil to put onto cotton balls into a mason jar and inhale to soothe.  This will be a fun mixture to attack my poor sinuses.  I will let you know how that goes.


What Brand Of Essential Oils Do I Use?

As far as what brand I decided to go with…well…that was a big and long and drawn out decision.

I did a bunch of reading and got more and more discouraged with the competitiveness of the different oil companies.

Many comments I have read about different companies from one company representative to another were just plain not nice!

I believe there are numerous good companies out there selling oils, large and small, but I personally prefer to go with a company that is smaller & does not rely on pyramid- type sales.

This is a very personal decision, and it truly is an individual decision.  If you use a larger company, please know that is fine too & that I am just happy that everyone is pursuing health in alternative and healthful ways.

Despite the numerous great companies out there, there ARE companies out there with very cheaply made, diluted and impure oils, and I did not want to be throwing my money away!

It was important to me to choose a brand I can be confident in and believe in.


lemon and frankenscense organic essential oils

Rocky Mountain Oils Essential Oils It is!

Rocky Mountian Oils is the company I decided to go with. Their offer oils that are all organic & pesticide-free, wild-crafted (if available), a wonderful company with great smelling oils for really reasonable prices.

They source their essential oils from reputable distillers that they know personally and trust.

They also allow me to link their products here, and if you make a purchase after clicking through to their site to mine, I will earn a commission, but your price remains the same.

If you are an essential oils lover or just intrigued by them and want to support New Nostalgia in this way, please know I am so very appreciative of your support and the funds will go back into New Nostalgia to make it an even better place for us all.

bottles of essential oils

Want to try a sampler kit?  

………………..

Update:

I now have the BEST tool for those just starting out–25 Essential Oil Blends Recipe Cards are formula cards to keep right at your fingertips and use over and over again.

With this set, you will receive 25 different essential oil blend formulas, all that are made from just 10 different affordable oils, 4 of which are the most common oils that most people have on hand – lemon, peppermint, lavender, and tea tree.

Examples of blends: Clean Air, Relaxation, Focus, Wake, Good Day, Sinus Relief & more.

Buy them here at New Nostalgia Shop.

How about you?

Have you tried essential oils?  Do you want to?

If so, what is your favorite way to use them?

………..

Decorating/ HOME/ Homemaking/ Sponsored

Deconstructed Chevron Wall

This is a Sponsored post written by me on behalf of FrogTape for SocialSpark. All opinions are 100% mine.

DECONSTRUCTED-CHEVRON-COVER

Our home office is pretty small–I like to call it cozy. Because of this, I have wanted to bring interest into the room without adding clutter. The best way to do this was with a fun, deconstructed chevron wall treatment using paint. I have had this project in my brain for a while now, but procrastinated because the texture in our office walls freaked me out a bit. I wanted a large, geometrical design, and I knew I needed to use tape to get the lines I desired.

We all know tape on textured walls usually means disaster, but this is no longer the case, thanks to Textured Surface by FrogTape® for textured surfaces. I knew this would work beautifully for our office walls, because I had already done this Chalkboard Paint Treatment on my daughters textured walls using Textured Surface by FrogTape®  That project was so easy that I no longer could procrastinate on getting this fun deconstructed chevron paint treatment out of my brain and onto my walls.

Textured Surface by FrogTape® is a pretty impressive product.  The kit comes with a tape roll (it is orange), and a bottle of Liquid PaintBlock® Edge Sealer.  I also had FrogTape® Multi-Surface on hand (it is green) to tape all the wood trim and around the doors and windows of our office.

FROG-TAPE-PAINT-TREATMENT

So let me tell you why I decided on a deconstructed chevron.  I am a big fan of the chevron pattern, but the traditional pattern was just a bit too proper and structured for me.  I’m also feeling a bit ‘over-it’ –ya know?  It is EVERYWHERE!  I wanted the same geometric, clean lined feel of chevron, but without the trendiness of chevron.  I also loved that this deconstructed version would require NO measuring.  Both the vertical lines and the horizontal lines are spaced out however your little heart desires.  The only thing that needed to be exact was the vertical lines needing to be straight up and down.  I used a laser level to do this, which made it super easy.

IMG_8910

1. I started by using FrogTape® Mulit-Surface (green) to tape off all trim, windows and doors.

2. I decided how close together I wanted the vertical lines, then used a laser level to mark them, then used FrogTape® Textured Surface to tape them.  I was purposeful about not having them all the same distance from each other.

3. I then started in on taping off the horizontal lines.  This was very easy and really mindless.  I turned up the music and enjoyed the process, which took about 40 minutes to complete all the taping.

IMG_8921

4. I used a damp cloth to simply wipe each line of tape per instructions that came with the kit.  The instructions are very clear and easy follow.

5. I then unscrewed the lid to the Liquid PaintBlock® Edge Sealer and added the brush lid provided in the kit.  I gave it a good shimmy-shake, and used it to paint along each edge of tape. It seems like a tedious task with all of the tape I used, but it went fast and was easy.  The pic above is after using the Liquid PaintBlock® Edge Sealer.

This step is what makes Textured Surface by FrogTape so impressive.  It is treated with patented PaintBlock® Technology, a super absorbent polymer that reacts with the water in latex paint and instantly gels to form a micro-barrier that seals the edges of the tape, which helps prevent paint bleed.  It really works! I have seen it work on walls with much more texture than my walls have.  It is really a great product for getting that sharp line that looks so professional.

IMG_8916

6.  I then stirred my paint, and started with outlining all along the edge of the wall, just as you would when painting a normal wall.

IMG_8922

This went very fast and I was getting giddy excited to peel off that tape!

IMG_8927

7. As soon as I finished painting, I started removing the tape.  This needs to be done before the paint dries.  My WORD it was so much fun to pull and see the stripes reveal themselves and the wall come to life.

FROG-TAPE-PAINT-TREATMENT-2

I was super happy with the paint color, it is exactly the stormy blue/grey that I was wanting.  I was also super happy with how amazingly sharp the lines were.  Isn’t it impressive?  I love the fun pattern the paint made on the vertical strips of tape.

office-before

Here is a picture of our home office before the paint paint treatment. Boring & bland!

IMG_8936

And here is the after.  I decluttered and minimalized our desk top and the wall.  Less is best.

IMG_8940

I found a fun clock screen saver.  No need to have a clock on the wall. I see it as one more thing to dust, and who wants more to dust?  Not me.

IMG_8945

The paint color looks great in all light, even at dusk.  I’m glad I left the rest of the walls white.  If I would have done the treatment on every wall it would have closed the office in and made it look even smaller.

IMG_8935

I added this precious chair that was just given to me by my sweet Grandma.  It was my Great Grandmother’s Grandmothers’ chair.  I wrote some thoughts about the chair here.  I sit in it and have some prayer time most mornings after my kids go off to school.  There is a small square table out of the frame to the right of the chair, perfect for holding my mug of coffee.

See that small wall to the left of the door?  I have yet to decide if I should put the same deconstructed chevron paint treatment there.  I decided not to because it is not flush with the door…it comes out about a foot.  What do you think?  Leave it or treat it with paint?

DECONSTRUCTED-CHEVRON

{for your pinning pleasure}

 Do you have a textured wall you have wanted to paint? Do you have a vision for it yet?   I say get the Textured Surface by FrogTape® and do it!  It can be found at participating Lowes & Walmart stores, and can be found in all Menards across the United States.  For inspiration,  follow the FrogTape Textured Surface board on Pinterest.

I never dreamed this small home office would become a favorite place of mine to sit in our home.  It is amazing what some paint and great tape can do!

Visit Sponsor's Site

HOME/ Homemaking/ Organizing

A Revolutionary Dish Rack

“This shop is part of a social shopper marketing insight campaign with Pollinate Media Group® and Rubbermaid, but all my opinions are my own. #pmedia #RMDishRack  http://my-disclosur.es/OBsstV

Revolutionary-Dish-Rack

I’ve never wanted a dish rack sitting out on my counter top, which is why I would call the Rubbermaid dish rack ‘revolutionary’ because my mind is now changed.  I know, it sounds dramatic, but seriously, this rack is pretty & looks great in my kitchen.  No more nasty stained, flimsy plastic dish racks that are not even close to sturdy enough for expensive cookware, flatware and pots that need hand washed.  No more eyesores sitting out on the counter top, and no more risking your most loved dishes being ruined by piling them in the sink or sticking them in the dishwasher.

Rubbermaid-Dishrack-2
This rack is sleek and made with much thought.  There are no sides on the rack so it can hold large platters and cookie sheets.  It is perfect for bar ware and good enough to be a holding spot for your precious china as  it air dries or as you hand dry each piece yourself.  The silverware container is removable, so if not needed, removing  it provides even more space for plates, pan & platters.  It also makes it very easy to clean.  I especially love the wide rows, they are all the perfectly spaced with the back two rows giving even more room for pans.  It resists mold and mildew with Microban, which is an antimicrobial protection product.

Rubbermaid-Dish-Rack-Target-2

The Rubbermaid Dish Rack was so pretty that while I was at Target I had to buy 2 of them.  I was able to get one for 15% because I am a Target Cartwheel card holder & they were having a special offer. Are you familiar with Cartwheel?  I simply downloaded the app to my phone and whip it out during check out for them to scan.  I’ve been amazed by the savings through Cartwheel.

So what did I do with my second Rubbermaid Dish Rack?  

I used it to organize my daughters art supplies!  The minute I saw that it did not have sides, I knew it would be the perfect thing to organize supplies & hold canvases, frames, mats and finished projects.  The removable plastic container for utensils is perfect for her paintbrushes, pencils and markers.  She loved it and it is modern & cool enough for my 13-year-old to be ok with having it in her room.

RUBBERMAID-RACK-ART-SUPPLIES
One more idea I had for the Rubbermaid Dish Rack was to use it when we eat buffet style.  It would look great sitting on a buffet table holding plates in between the rows, and flatware in the utensil section.  The little foot up front is a perfect place to lay a pile of napkins.  I would even take it outside to set up for a buffet style picnic!  

As for storing the rack when not in use, I plan on adding a hook in my pantry to hang it.  Again, it is pretty enough that I don’t mind looking at it and don’t feel like I need to hide it away.  I want it out in the open, easy to grab.

So how would you use the rack?  Has poorly made dish racks kept you from using one?  What do you think of this Rubbermaid dish rack?

Decorating/ Homemaking/ Sponsored

Using A Rug To Transform A Room

This is a Sponsored post written by me on behalf of Kalaty Rug Corp for SocialSpark. All opinions are 100% mine.
Rug
Our home has a lot of hardwood floors, which we love, but without a cozy rug they can be cold during our Midwest winters.  I love using the cold as an excuse to buy beautiful rugs.  Rugs can add an instant feel of warmth, transforming the room from cold to cozy.

Rugs are also a great way to bring style & beauty into a room.  I personally tend to go with grey tones (surprise!) but I also love a rug that can give a fun pop of color.

The rugs in this post all come from Kalaty.com. Kalaty is known for their amazing handmade (and oftentimes hand knotted) rugs. It is a great company and their designs are so beautiful and innovative.  I appreciate the different styles of rugs they offer, all super tasteful and well made.

I am wanting a new rug for my bedroom.  My bedroom is decorated in whites, greys and soft baby blue.  Above is a mood board I created that shows the style and feel I am wanting for our bedroom.  I am almost there…but we are missing a cozy rug. I think about this every morning when I get out of bed and my feet hit the cold wood floor!

Look how the rug just pulls everything else together in the photo above. Do you see the New and the Nostalgia in the collage?  I love putting old items with new modern items, it is so much fun! Rugs are a great way to get inspired when it comes to designing a room.

Pictured below is another favorite of mine. I am so in love with the ombre effect on this NOVA rug from Kalaty, Very pretty.

I’ve learned the hard way that well-made rug is so very important.  There will be wear and tear on a rug everyday, and it will have a vacuum ran over it at least a few times a month.  There is nothing more disheartening than buying a beautiful rug, only for it to become drab, pilled, and unwoven within months.  I now know that rugs are an investment, and well worth buying high quality and well-made.

 photo 1003cf1b-426b-4bf7-a7d7-3a0810943495_zps3c75e680.jpg
 
  photo RS-GR670_zps67d61130.jpg

Do you know your rug style?  Are you more contemporary or traditional?  Not sure?  Visit Kalaty.com and browse through the rugs.  They are searchable by collection, size, style, color & weave.  Leave a comment and tell me which rug is your fav.  


Want more?

Visit Sponsor's Site

HOME/ Homemaking/ Organizing/ Simplifying

How To Rescue A Bedroom

My bedroom recently got a bit out of control.  Life has been more busy than normal. It seems like I would be home to eat, change & sleep– but then off to the next thing.  Seasons of life are like that.  I am always happy when margins are reestablished and life gives a break to rescue the mess left scattered in the path of busyness.

My bedroom is a place I work hard at maintaining a peaceful & romantic environment.  It is the place I relax, recharge and connect with my Love, and that is really hard to do in a mess!

Last night I decided to get busy and rescue our room.  It surprised me how little time it took despite the mess it had become.  Here are the steps I followed to rescue our poor room!

1.) Turn on all the lights & open the blinds/curtains.
It is always best to work in a nice, lit environment.

2.) Turn on music.
I’m a Spotify girl.

3.) Gather dishes.
Put outside of room in a basket designated for ‘things that belong elsewhere.’
Yep, I said dishes.  I know I’m not the only one who snacks in bed or has a water cup or tea cup next to my bed.

4.) Gather obvious trash.
This step is important.  Get the trash out!

5.) Clear off and make the bed.
Just put whatever is on the bed on the floor.  Don’t get caught up in putting things away yet.  This will trip you up and slow you down.  Just clear off the bed and make it.  You will need the cleared off space for organizing the rest of the room.

6.) Gather all clothes.  Sort dirty from clean.
This is always what makes up the bulk of my messy room.  Clothes.  I have a basket in my room for dirty clothes but this weekend it was taken downstairs so dirty clothes got thrown.  I can also get lazy with hanging up my clean clothes when life gets busy.

7.) Fold clean clothes.  Make a pile of clean clothes to hang up.

Do this on your cleared off & made bed.

8.) Gather hangers from the floor or closet and put them on the bed with clothes to hang up.

9.) Hang up clean clothes & put into closet.  Put away folded clothes into drawers.

10.) Gather any towels you might have found while gathering clothes.  
Put them in the dirty basket, or if clean, put them in the basket of things that belong somewhere else.

 11.) Gather all shoes.  Put them away.

12.) Shut drawers and doors.
This is a given, but open drawers and closet doors make a room look messy!

{Side note} While I was cleaning my room, I was typing the steps I was taking into my phone in order to share them with you in this post.  I must have been typing too fast, as I am chuckling to myself. Instead of ‘shut’ I typed a swear word that sounds like shut. Whoopsies! Paired with the word ‘drawers’ it hit me quite funny.  I’m in a coffee shop with the giggles.  {SMH.  So inappro-pro…as my middle school girl would say}

13.) Gather all small things and put them in their place.
We started with the obvious and large–trash, clothes, shoes, hangers, towels, make bed. It is starting to look good in here, huh?  Now on to all the little things that can make clutter.

……………………

Here are the small things that I gathered & put away.

earrings — I organize mine in a large open egg carton.  I keep it in my top dresser drawer.
money/change — Goes in the egg carton or in my purse for coffee refills at my fav coffee shop.
bobby pins — In a container along with elastic hair bands, in my top dresser drawer.
jewelry — I hang up necklaces.  All the rest is in my top dresser drawer.
vitamins — I have them in a basket and keep them in my dresser drawer.  I take mine at night.

makeup — The small mirror in the pics above is actually a cabinet where I keep my makeup.
books — only keep what you are currently reading in the bedroom.  Gather them into a basket.
lotion — I keep this in my mirror cabinet along with body spray & beauty products that I use daily.
pens — I have them on my dresser in a small vase.

fingernail files — I keep them on my dresser in a DIY glittered vase.
tv remote — goes in our nightstand drawer
extra phone charger & cord — goes in nightstand drawer
curling iron — goes in my mirrored cabinet
lint brush — I keep this in a small bin on a shelf in husbands closet, along with shoe polish, and our iron/ironing board.  I rarely iron, but if I do, I like to do it in our bedroom.

14.) Dust.
I use a feather duster.  Easy breezy.

15.) Sweep/Vacuum.

16.) Light candles.

I love candle light in my room.  It is instant calming atmosphere & created a romantic vibe.

17.) Put meaningful photos front and center.
The above was taken on our honeymoon cruise almost 18 years ago!

18.) Change music to something chill.

19.) Put on your p.j.’s & relax!
Even if it is not evening…you deserve it!

———–

The key to an easy pick up and keeping a clean room is to have a place for everything.  Notice what is making up the mess.  Ask yourself what objects you want in your room.  Only keep the things that are used, and have a designated place for them.

I love how I feel in a hotel room–where things are minimal, but you have everything you need.  I try to recreate that feeling in our own bedroom.

———–

How does your bedroom look right now?  Is it an easy or hard room to keep clean?
Leave a comment or come join the conversation at New Nostalgia Facebook Page.

Want more inspiration?  Here are 14 Ways To Organize A Bedroom.


HOME/ Homemaking/ Organizing/ Simplifying

14 Office Spring Organization Ideas

 
Home Office Organization {source–A Bowl Full Of Lemons}

Paper Organization {source–A Bowl Full Of Lemons}

Simplified Filing Station {source–Clean Mama}

How To Organize Paper  {source–Ask Anna}

 DIY Furniture Makeover {source–BHG}
Office Cord Storage {source–Clean Mama}


Simplify & Organize Personal Files {source–Simply Fabulous Living}
Marker Organization {source–My C.A.S.E. Studies}
DIY Cord Organization {source–Living Lurcurto}
Paper & Art Display {source–Clean Scentsible}
Organization Station {source–B@H}
Marker Organization {source–My C.A.S.E. Studies}

 How Long Should I Keep It For? {source–Clean Mama}

 ————-
I am so eager to start implementing some of these great ideas in our home office.  
I also plan on making our home office a beautiful space & organizing our family photos & videos.
I will share my inspiration for both of those things in some upcoming posts!
————
Have you started your spring cleaning/organizing yet?

FUN/DIY/ HOME/ Homemaking/ Organizing/ Simplifying

9 Ways To Use Jars To Spring Organize And Spring Clean

“This shop is part of a social shopper marketing insight campaign with Pollinate Media Group® and Cooking Light and Real Simple, but all my opinions are my own.  #pmedia #FreshandFab http://my-disclosur.es/OBsstV

If you have been reading New Nostalgia, then you know I have a love affair with mason jars.  Why do I love them?  So many reasons!
~They come in many sizes
~They are inexpensive
~They are not plastic
~They are simplistic in design
~They are glass, which does not keep me guessing on what and how much is inside of them!
~They have a gazillion different uses!
I think the understated mason jar is just perfect, and are the perfect example of something from yesterday that can simplify today, which goes right along with the title of this blog, New Nostalgia.
I was recently super inspired by Real Simple magazine & a picture I saw in it. They used my beloved mason jars to organize, but made them even better by using chalkboard stick-on labels.  I think the nostalgia of chalk goes great with the nostalgia of mason jars, and together they make such an appealing look!  Those labels would be the perfect purchase to keep my motivation up to organize, which is perfect as spring is coming and I have got the urge to get everything in its place and spring clean!
Are you a fan of Real Simple magazine?  How about Cooking Light magazine?  They are 2 of my personal favorite magazines, and right now if you buy the April issues of both magazines at Target, you will receive a $5.00 Target gift card from the cashier while supplies last. I got mine and I was giddy excited to get home, relax and read my new magazines!
Here are 9 ways that I’m already using mason jars to make life a bit more simple & organized:
1. Use them as drinking glasses.This Iced Tangerine Mint Green Tea look so beautiful in them!  I also love just simple lemon water in them, and I use them almost daily for green smoothies!

2. Store craft supplies.

Mason jars are great for storing craft supplies, especially DIY Scented Gel Paints!  I like to use the small size jars to round up small craft supplies –like googly eyes and buttons.

3. Use for DIY gifting.

Jars are the perfect container for a large batch of DIY homemade gifts. They keep great in storage to grab and gift when in need!  I love having this Peppermint Stick Hot Cocoa Mix on hand during the holiday months.

4. Use to store leftover foods.

I personally despise stained plastic containers, and REALLY do not like searching for the right lid for the container!  If you use mason jars, there are only 2 lid sizes.  I throw all my lids and rings for the lids in a big bowl for storage.  No more stained plastic.  No more searching for the right lid.

5. Use for food storage in the pantry.

I love the look of jars in the pantry.  Small jars are great for herbs.  Larger jars are great for grains.  They stack nicely and look so pretty!

6. Use for food storage in the freezer.I use jars to freeze leftovers or my some of my favorite large-batch recipes, like this Strawberry Freezer Jam or my favorite Pepper Onion Relish. The smaller pint size jars are great for stacking and fitting a lot of food in a small freezer.

7. Use them to organize your healthy eating and motivate you to eat more plants!

Turn your refrigerator into a work of art where you family will want to come, snack on a rainbow of fruits and vegetables, and get excited about it!  I don’t know about you, but when my veggies are prepped and staring at me through the glass of the jar, it makes me grab and eat!  Jars also make your veggies super portable.  On the go in a rush?  Grab a jar and go!

8. Use for utensil storage.

I love keeping my wooden clips in a mason jar.  I also keep straws in open jars to grab quick for smoothies.

9. Organize your salad ingredients.

Use them to create an at-home salad bar that stays fresh and beautiful for days in the refrigerator!  You can easily put a ready-to-eat layered salad in a jar that will keep for days — just make sure you put the salad dressing at the bottom.  When I have all my salad toppings in jars and ready to go, it makes my goal of eating a big, leafy green salad at least once a day very do-able.  Don’t forget to grab the jars of slivered nuts, dried cranberries & sesame sticks in the pantry to sprinkle on top and make your salad on to look forward to!

_________

I hope these images of beautiful magazines and beautiful jars motivate you to do some of your own spring organizing and cleaning.  Remember to spring clean your bodies by eating good foods, too!

Don’t forget to grab your April copies of Cooking Light and Real Simple, and your free $5.00 gift card.

Happy Spring!

{Don’t forget to Pin It!}


Top