Browsing Category

RECIPES

RECIPES/ Sides

Acorn Squash And Sweet Potato Soup

I’m sitting here eating a bowl of soup, taking occasional bites of an apple, and feeling quite proud of myself!  I just created a recipe that is…da bomb!  Well, ok, sort of created a recipe.

I wanted to try an Acorn and Sweet Potato Soup recipe that sounded and looked so good, but I had been warned by my friend Katie that the original recipe was a bit bland.  She suggested a few additions to make it better, I used some of them but forgot what she had told me while at the store, so I ended up adding different ingredients.  So, I guess you could say I created a third of a recipe, but hey, that counts for something, right?  I’m still proud because it is goooood!

*the ingredients I added to the original recipe are highlighted

Acorn Squash & Sweet Potato Soup
1 large sweet potato
1 medium acorn squash
2 tbls olive oil
6 cloves garlic
3 3/4 cups low-sodium chicken broth
1/2 c. light cream (I used whole milk)
1 shallot, chopped
1 1/2 tsp. smoked paprika  (if you have not tried smoked paprika, you must!)
1 1/2 tbls. pure maple syrup (adjust depending on how sweet your potato is)
1 tsp cinnamon
1/4 tsp nutmeg (I used whole nutmeg, ran it over my microplane about 4 times-ish)
1/4 tsp cayenne pepper
pat of butter
salt and pepper to taste

Preheat oven to 375 degrees.
Cut sweet potato and squash in half lengthwise.  Scoop out squash seeds and brush cut sides with oil.  Place squash and sweet potato halves cut-side down in a shallow roasting pan.  Add unpeeled garlic cloves around the vegetables after tossing them in a bit of the oil.  Roast for 40 minutes until tender.

(I baked a couple of extra potatoes for my lunch.  Had not added the garlic cloves, yet:))
When cool, scoop out insides of the squash and sweet potato, leaving the skins behind.  Peel garlic and add soft insides and scooped squash/sweet potato to a large saucepan.  Add chicken broth and shallot and season with salt and pepper.  Stir well.  Bring to a boil, then reduce heat and simmer, for about 30 minutes, stirring occasionally.

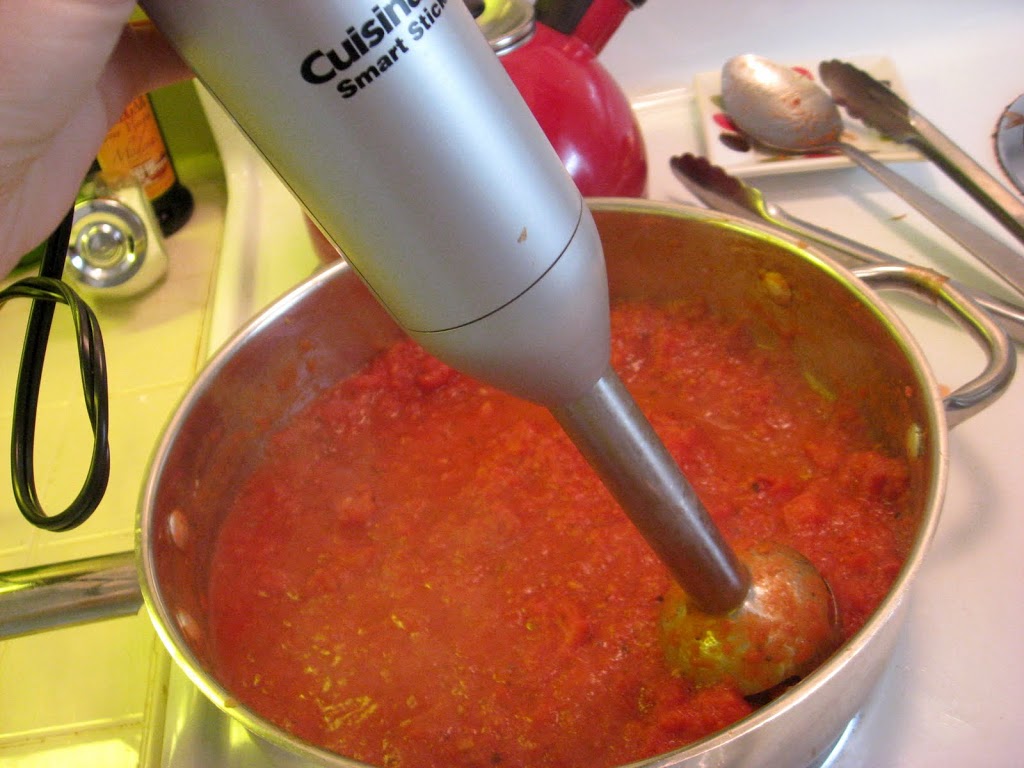
Remove from heat.  Add remaining ingredients, except for the milk and pat of butter.  Process with the hand blender until smooth (if you do not have a hand blender, cool slightly and transfer to a food processor or blender, working in batches as to not overflow machine.

Return soup to pan and stir in milk and butter.  Check seasoning.  Adjust salt, pepper and cayenne as desired.

It is not as complicated as it sounds.  You could roast your veggies earlier in the day, scoop and set in refrigerator until dinner time.  Throwing together the rest of the soup is a breeze.  I recommend either eating it with apple slices, cooked apples as a side, or with a mug of apple cider.  I did both apple slices and apple cider, and it really complimented the soup.  Maybe some diced apple as a garnish to add texture and crunch to the soup?

In a jar, ready for my husband to take to work for lunch.

I wanted my soup to have a sweet and savory taste to it with a kick, and that is what I got.  My friend Katie added roasted red peppers, Italian seasoning,  smoked paprika and a pat of butter and said her husband loved it.  Her version sounds great, too- it would be more of a smokey, savory soup.  I will for sure have to try it her way for a change.  She is a vegetarian and told me that she uses smoked paprika in lieu of ham or bacon in recipes.  I love that tip, you get the smokiness, but not the calories or the cost of the meat.  She mentioned a vegetarian quiche recipe that uses smoked paprika instead of bacon..yum.  Sounds like a recipe I need to blog about, so I will get it from her or maybe she could do a guest post!!:)

Happy Fall!

Brunch/ RECIPES

Refrigerator Buttermilk Bran Muffins

This is a great recipe.  I got it from a friend, and I now keep a batch in my refrigerator most of the time.  I double the recipe and it stays fresh in the refrigerator for at least a couple of weeks.  My family really like these muffins, and I love that I can just throw some in the oven in the morning.  I like how the aroma of baking muffins help my girls get themselves out of bed!  Whatever they do not eat in the morning, they finish off as an after school snack, I have even stuck them in their lunches.

I like to sprinkle the top of the muffins with dried cranberries before baking.  They add a bit of sweetness and make them pretty.  They are very moist and very good!

Refrigerator Buttermilk Bran Muffins

2 cups Bran Cereal
1 cup Boiling Water
3/4 cup Sugar
1/3 cup Oil
1/2 cup Unsweetened Applesauce
2 Eggs
2 cups Buttermilk
11/2 cups White Flour
3/4 cup Wheat Flour
1/4 cup Wheat Germ
21/2 tsp. Baking Soda
1/2 tsp Salt

In a small bowl, pour boiling water over the bran cereal.  In a large bowl, blend sugar, applesauce and oil.  Add eggs and beat well.  Combine flour, baking soda and salt in a separate bowl.  Add dry ingredients to the sugar mixture alternately with buttermilk.  Stir in  bran.  Spoon into well-greased muffin pans (or tins lined with muffin papers until 2/3 full).  Bake at 375 degrees for 15-20 minutes.  Batter will keep in refrigerator for at least a couple of weeks.  Stir well before baking refrigerated batter.

RECIPES/ Sides

Homemade Chicken Soup

I made Chicken Soup today and it is GOOD!  It is amazing what a good stock can do to a soup, homemade stock has such deep flavor compared to stock from a can.  You can read more about the benefits of stock and how to make it here.

We woke up to the smell of chicken due to the chicken bone stock that had been getting happy all night in my crock pot.  This morning, I strained the stock, this time I threw away all the veggies and bones, but I have read that you can make stock from the same chicken bones 2-3 times, so I will try that next time. The veggies were very spent and I was too lazy to pick through the bones to rescue them (sometimes I do, then I use my hand blender to blend them into the stock) so they got dumped with the bones.

I started my soup with a bit of olive oil and a pat of butter in the bottom of a soup pot.  Adding the butter along with the olive oil gives the soup another layer of flavor, and also allows you to turn up the heat for sauteing the veggies.  If you were to use just olive oil, you would have to keep the heat at medium due to the low smoking point of olive oil.  Adding butter solves this problem. (a tip I leaned from good ol’ Rachel Ray)

I threw in some chopped onion and 2 chopped garlic cloves.  I let the onions get nice and soft over med-high heat, about 5-7 minutes.

Meanwhile, I chopped 3 carrots and 2 stalks celery, and then added them to the pot.

I let them cook a bit to draw out their flavors, about 5 minutes, while I chopped 5 potatoes (1 too many, use 4 instead).

Added potatoes and  11/2 cups cooked chicken to the pot.  You can read here how I cooked my chicken.

Added chicken stock (about 6 cups), 11/2-2 tsp thyme, 1 tsp poultry seasoning, 1 bay leaf, salt and pepper to taste.  If the soup is too thick, add more stock.

Stir and simmer 40-60 minutes, stirring every once in awhile.  Could add all to crock pot and cook on low 4-6 hrs or on high for 2-3 hrs.

Sometimes I substitute whole wheat pasta for the potato, depending what I have on hand. My kids prefer the pasta, but will eat both.  I also usually add some frozen peas or corn.  Enjoy!

How-Tos/ Meals/ RECIPES/ Sides

Rotisserie Chicken In The Crock Pot/Healthy Chicken Stock

My oldest girl is home from school with a fever today.  I’m going to make her some homemade chicken noodle soup, but the poor thing will have to wait for a day.  Today I am making Rotisserie Chicken in the crockpot, that will stretch to 3 meals, one of them being Homemade Chicken Soup.

What I like about this recipe is how easy it is, how cheap it is, and how you can use the bones to make a super healthy, full of nutrients and minerals, homemade chicken stock.  If I am going to take the time to make homemade chicken soup, I want to know that it really is going to make a difference in the health of my family.

I have learned that the key to the most healthful soup is not only the veggies in the soup but the chicken stock itself.  Don’t throw away those chicken bones!  By cooking the heck out of those bones, you are extracting the gelatin, which is a nutritious source of protein, as well as collagen, calcium, minerals and amino acids.

I had no idea until recently that bone stock was such a big deal! It strengthens the gastrointestinal tract and the immune system, plus it takes the flavor and texture of your soup and savory dishes to a whole new level.

Chefs worldwide and through the centuries have sought out this marrow bone stock as a very important ingredient for soups, sauces, and pilafs.

The stocks you can buy at the store do contain gelatin but is thinned down with water so the gelatin content is very low.  They have to make up the flavor somehow, so they use additives: salt, yeast extracts, and MSG.


Knowing what I know now, I am going to be much more purposeful about saving bones and making my own stock, especially if I can make a whole chicken stretch over a few meals.  My plan for the chicken sitting in my crockpot right now, is to eat some of the Rotisserie-Style Chicken with rice and veggies tonight, then I will cook my (chicken :))bones in the crockpot overnight, to make stock for my chicken noodle soup (stock, some of the chicken meat, potatoes, carrots, onion, peas, noodles, and seasonings) and whatever chicken is left will go into chicken fajitas!  (I use this recipe on my sister’s blog, but instead of grilled chicken, I use shredded chicken. The seasoning I use is a garlic and pepper grill seasoning called Misty’s, it is sold here in Nebraska, but you can order it online


Rotisserie Chicken In The Crockpot

(recipe from A Year Of Slow Cooking)

–1 whole chicken, skinned (4-5 pounds)

–2 tsp kosher salt (if you’d like it as salty as the ones in the store, add another 1 tsp.)
–1 tsp paprika
–1 tsp onion powder
–1/2 tsp dried thyme
–1 tsp Italian seasoning
–1/2 tsp cayenne pepper
–1/2 tsp black pepper
–pinch of chili pepper (probably not necessary)

–4 whole garlic cloves (optional)
–1 yellow onion, quartered (optional)

The Directions.

I used a 6-quart crockpot for a 5-pound bird. It fit nicely.


In a bowl, combine all of the dried spices. Rub the spice mixture all over the bird, inside and out. Plop the bird breast-side down into the crockpot.

If desired, shove 4 whole garlic cloves and a quartered onion inside the bird.

Do not add water.

Cover and cook on high for 4-5 hours, or on low for 8. The meat is done when it is fully cooked and has reached desired tenderness. The longer you cook it, the more tender the meat.


***Update:  I just made chicken in my crockpot today but was in a rush so instead of the above seasonings, I just dumped Old Bay Seasoning all over the chicken and added some pepper.  It really tasted good, it is a great alternative for those days you just don’t feel like measuring!

Bone Stock
Chicken bones or carcass
Water to cover (about 6 cups)
1 tsp vinegar for every 4 cups of water (helps extract the good stuff from the bones)
Optional:
onion, cut in large chunks
2 carrots, cut in large chunks
2 stalks celery, cut in large chunks
2 cloves garlic
2 bay leaves
1 T. Italian seasoning
Dump all into the crockpot.  Cover and cook 8-10 hours.  (I do overnight)  Remove from heat and cool completely.  Strain the stock.  Pour into jars or freezer bags in manageable portions.  If using ziplock, lay on a cookie sheet to freeze flat, they will be much easier to fit into your freezer.  I have also seen people freeze their stock in ice cube trays and dump the cubes into a large ziplock.


There is no salt added to this recipe, but the stock will need salt for flavor.  When I use it in my recipes, I will taste and salt as needed.  The overall sodium content will be much lower than store bought broths/stocks.  


I’m happy to know that there will be healthy, homemade stock in my freezer, so the next time one of my little boos get sick, I will be able to make the soup that same day!

Click here for how-to make the above Chicken Soup.

Drinks/ RECIPES

Smoothies- Green Smoothies

Don’t be afraid!  They are super duper delish, and a great way to get a big chunk of your daily fruits and veggies in one drink!  In fact, if I have one of these smoothies in the morning, and make sure I eat a salad full of veggies with my dinner,  I know I have had ALL my fruits and veggies for the day.
I can’t tell you how much energy I get from drinking green smoothies.  I really notice it when I am able to drink one a day for multiple days.  We have had to cut our grocery bill down a bit, so lately I have only made smoothies once or twice a week, and I consider them a treat. I love them!

 You have to admit, it really is a beautiful color, don’t you think?
This one has fresh pineapple, frozen banana, frozen cantaloupe, grapes and strawberries, a whole peeled orange, spinach and water.  The fresh pineapple adds so much sweetness, the orange adds a little tang, and the spinach you can barely taste, if at all.

I follow the directions given on the blog Happy Foody.  This is a great video of  step by step instructions.

How To Make a Green Smoothie from Sara Janssen on Vimeo.

My girls get very excited when I am making these.  They especially love when I make popsicles out of them.  Its been so funny when their little friends come over to play and we pull out the green smoothies.  When in drink form, kids seem to get a bit freaked out, but when made into a popsicle, they just can’t gobble them up fast enough and end up begging for more.  I guess they are used to seeing popsicles in bright colors??  My girls love them, and when I ask what my girls want for snack, I often get asked, “Mom, do you have all the stuff to make green smoothies?”  Ahh. I love hearing that question. What a great feeling to feed them super foods that they love!

Brunch/ Frugal/ HOME/ RECIPES/ Seasonal

Easy One Bowl Pumpkin Bread/Muffins

I have made this Easy One Bowl Pumpkin Bread/Muffin recipe TWICE this week and I really love it.   It is a “dump all ingredients into one bowl in no certain order and stir” recipe, so it takes minutes to whip up.  It is super moist, makes the house smell like fall, and fills up little tummy’s when they need a snack.  Another great thing about this recipe is that it has a few different options to make the original recipe healthier.  Love that!
*For the healthier version, keep reading.

Easy One Bowl Pumpkin Bread/Muffins

1 ½ c. sugar                                        ½ t. cinnamon
2 eggs                                                     ½ t. nutmeg
¼ t. baking powder                           1 2/3 c. flour
1 t. baking soda                                  ½ c. oil
¾ t. salt                                                ½ c. cold water
½ t. cloves                                          1 c. pumpkin (about half a 15 oz can)
Mix all ingredients together in one bowl. Put in greased loaf pan or muffin tin.  Bake at 325 degrees.
  • Bread (one loaf) = 75-90 minutes
  • 12 Muffins = 45 minutes
  • 24 Mini muffins = 25 minutes

——————–

Cost:  about $1.50 !!!  
I was at my neighborhood natural market this weekend and they were selling freshly baked pumpkin bread for $7.99 a loaf!  That’s just craziness!!  They were skimpy little loaves, too.  I walked away smiling to myself, thinking about how I can go home and whip up a generous loaf of my own pumpkin bread that would be just as healthy as theirs!
——————–

Easy Ways to Make It Healthy:

  1. Level one: decrease the sugar by 1/4 or even 1/2 cup (1 c. sugar total) or use honey
  2. Level two:  use half whole wheat flour
  3. Level three:  make the “oil” melted butter or applesauce

One Bowl Pumpkin Muffins Healthy Remake

3/4 cup honey                                     ½ t. cinnamon
2 eggs                                                    ½ t. nutmeg
¼ t. baking powder                           1 2/3 c. whole wheat flour
1 t. baking soda                                  ½ c. coconut oil
¾ t. salt                                                1/4 c.water
½ t. cloves                                          1 c. pumpkin (about half a 15 oz can)
1 Tbs molasses
Mix all ingredients together in one bowl. Put in greased loaf pan or muffin tin.  Bake at 325 degrees.
Baking Change: Only bake muffins for 30 minutes – honey browns faster!
——————–
Both recipes call for only a half a can of pumpkin.  I wondered what to do with the other half, until I saw how quickly my family ate up the first loaf.  I made a second loaf the very next day.  You could double the recipe and freeze a loaf.  I knew we would be home quite a bit this weekend and I love to have something yummy baking in the oven, so I made the loaves on separate days.
 Tip: Make sure your spices are not dated and tired.  I could not believe the difference in my 2 loaves, the first one I made with spices I know have been in my cupboard since last fall, and although the texture was awesome, I wondered, “if the spices were super fresh, would taste any different?”
For the second loaf, I went to my market where they sell spices in bulk (you can help yourself to whatever amount you need and they charge you by weight).  DO THIS IF YOU CAN, the second loaf was amazing!  I love the buy spices in the bulk section option!

 I have been buying a small amount for whatever recipes I am going to make in the next week or two.  I did this for 2 recipes that I make all the time, chili and chicken curry, and both recipes tasted like they had a makeover, when all I did was buy super fresh spices.  It is very economical, and so very worth it!

Meals/ RECIPES

Simple 5 Minute Tomato Sauce

I love, love, love this recipe.  I found it at the beginning of summer, and have been making it every week. I do not miss the overpriced, way too sweet, pre-made jar sauces AT ALL! I love that this is not much more work than opening a jar, but makes the house smell like I have been cooking all day!

I found the recipe here at 101 Cookbooks.  She writes an excellent post about this simple sauce.  She explains that this is not the sauce you are looking for if you are wanting a meat-filled hearty sauce.  This is a fresh, light, pure tomato sauce, and IT IS GOOD!

I usually buy whole -grain pasta because it is full of fiber, protein, and iron,(the brand I used in the pictures below has 7 grams of protein and 6 grams of fiber in a 2oz size serving) which is very important when eating a meat-free meal, and it keeps my family full much longer than the white stuff.

There is nothing worse than kids begging for food a half hour after dinner! Ugh!  My BIGGEST pet peeve is when I am just finishing up the dinner dishes and I have little ones asking for food because they are HUNGRY!

I use this recipe when we make homemade pizza, it is so fresh and yummy. I grew herbs this summer and the pizza we made with fresh mozzarella and this sauce and shreds of fresh basil….mmm… to die for.

I have also made pasta dishes with this sauce and added a splash of heavy cream at the end with some peas and parmesan cheese, and turned it into a whole different, super creamy, luxurious dish.

The last time I made this sauce, I accidentally bought a can of diced tomatoes, so that is why I got out the hand blender, my family does not like chunks!

I make a few other changes to the recipe.   I go easy on the red pepper flakes, as my girls don’t like spicy.

If I have lemons on hand, I’ll use them, but if I don’t I’ll add a splash of lemon juice from the bottle, it is amazing how just a touch of acid really brightens up the flavor. If I do use zest, I find the zest of a whole lemon is a bit too much lemon flavor for me, so I half it.  I also add about a Tbls of sugar if my tomatoes are too tangy.

Depending on how much water the tomatoes have in them, you may need to simmer the sauce down a bit if it looks a little watery, which turns the 5-minute sauce into a 10-minute sauce- no big deal.

I make sure I keep an eye out for canned, crushed tomatoes on sale and stock up when they are.  As she says in the recipe below, the brand of tomatoes is VERY important.  There is a huge difference in taste, so go for the good brands.  I think the same goes for the olive oil, buy the best you can afford, the more expensive Italian brands are so worth the extra money because they are sweet and have no aftertaste.
Give this sauce a try!  It may become your go-to, always- have- the- ingredients- on- hand, simple meal as it is ours!

           Five Minute Tomato Sauce

I’m very particular about the tomatoes I use in this sauce. Look for canned crushed tomatoes, some cans you will come across will say “with added puree” – this is also fine. I avoid diced tomatoes, pass on pureed, and skip whole tomatoes as well. Avoid the crushed tomatoes with added herbs, seasonings, etc. You want pure crushed tomatoes if possible. I also look for organic crushed tomatoes which can be tricky, I often come across the Muir Glen brand, it has added basil in it – that one is actually fine. The San Marzano crushed tomatoes are great as well. Any leftover sauce keeps well in the refrigerator for three or four days.


1/4 cup extra virgin olive oil
1 1/2 teaspoons crushed red pepper flakes
1/2 teaspoon fine grain sea salt
3 medium cloves of garlic, finely chopped
1 28-ounce can crushed red tomatoes
zest of one lemon

Combine the olive oil, red pepper flakes, sea salt, and garlic in a cold saucepan. Stir while you heat the saucepan over medium-high heat, saute just 45 seconds or so until everything is fragrant – you don’t want the garlic to brown. Stir in the tomatoes and heat to a gentle simmer, this takes just a couple minutes. Remove from heat and carefully take a taste (you don’t want to burn your tongue)…If the sauce needs more salt add it now. Stir in the lemon zest reserving a bit to sprinkle on top of your pasta.

Makes about a quart of tomato sauce.

 
Top