Browsing Category

RECIPES

Gardening/ Healthy Eating/ RECIPES/ Sides

Swiss Chard From My Garden

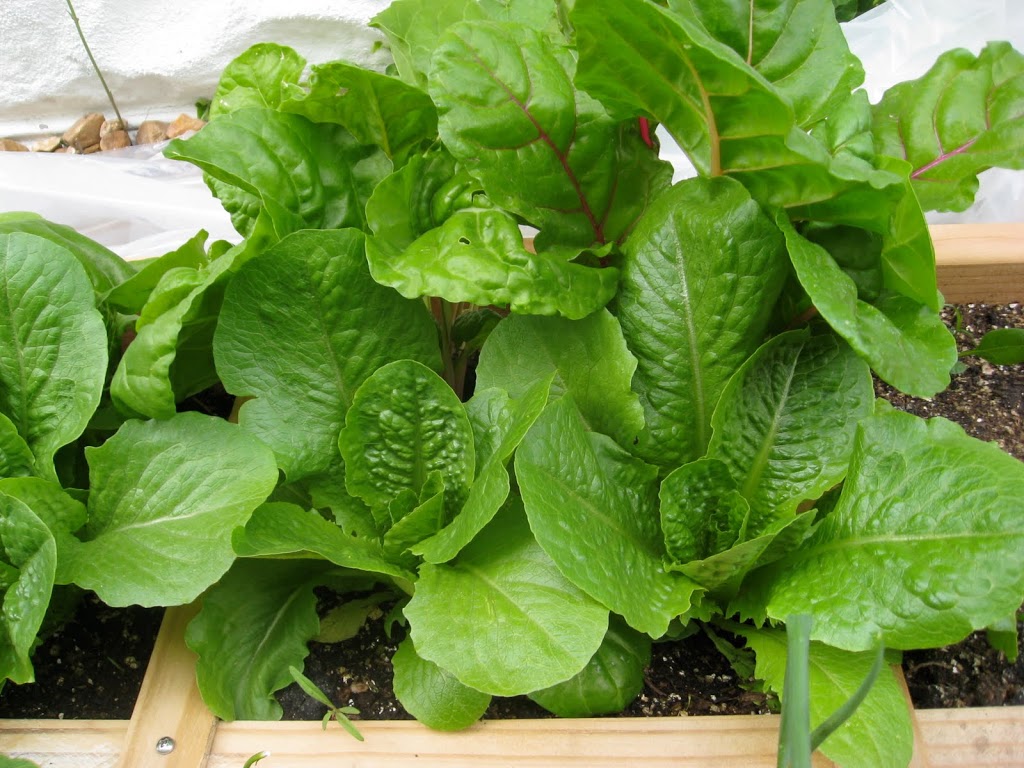
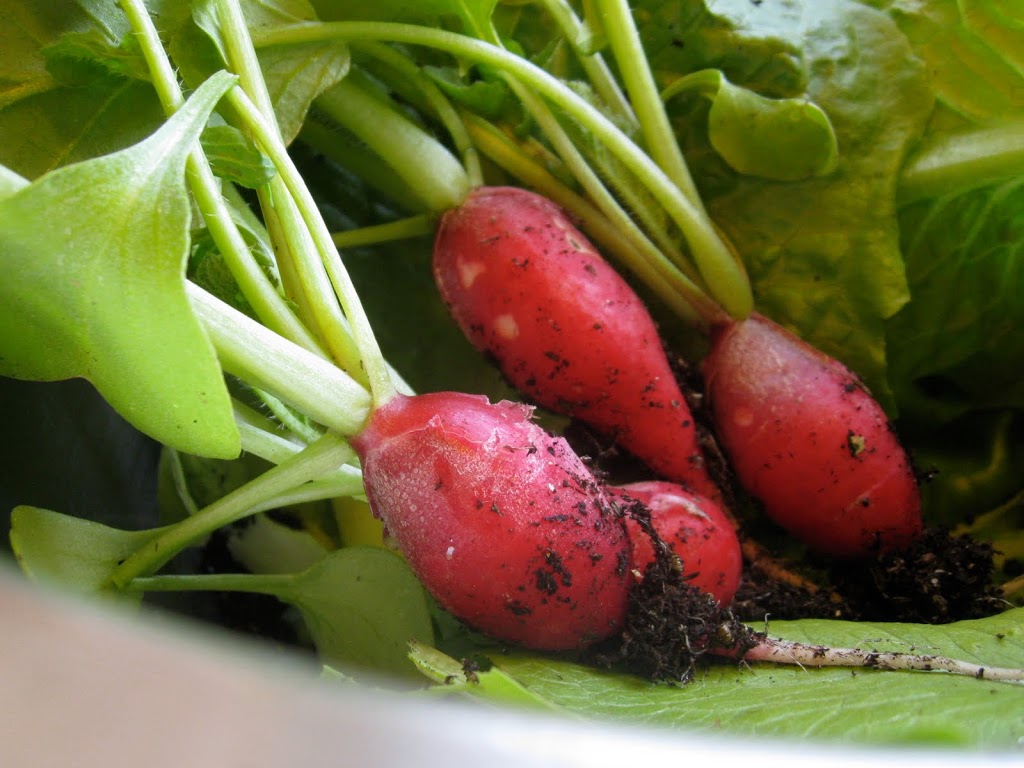
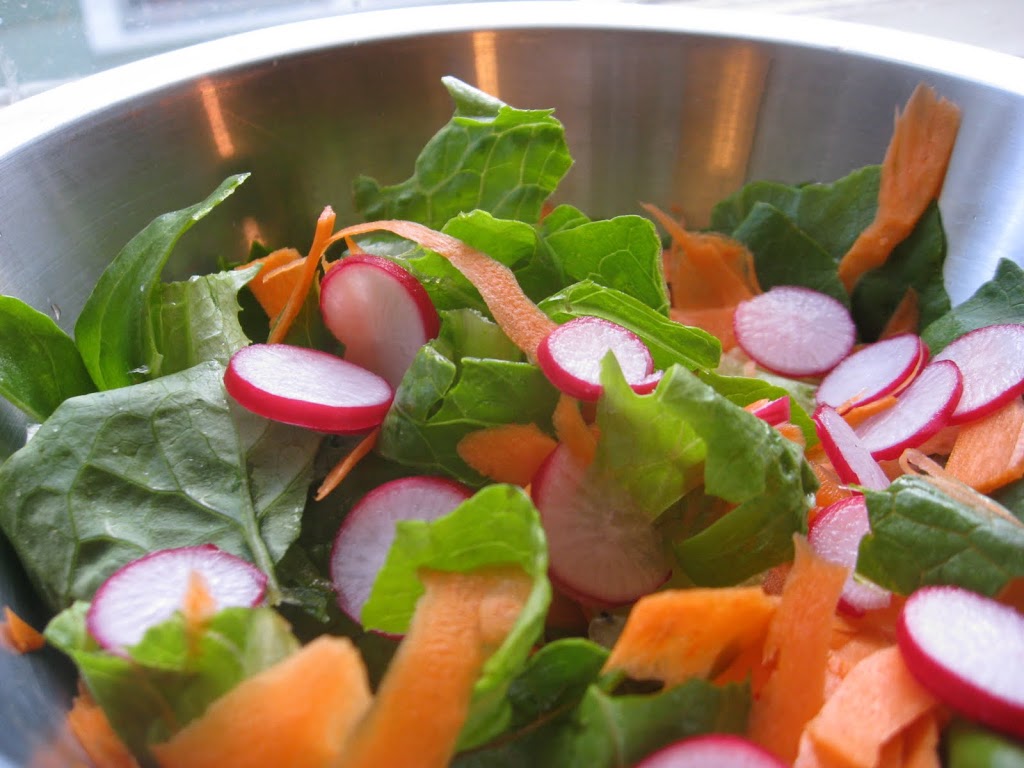
This photo was taken about a week 1/2 ago.  You would not believe the size of the swiss chard leaves now!  I have been very pleased with how fast and easy it is to grow swiss chard.  I’ve enjoyed it raw, cut up in a salad,(using the lettuce pictured above), and just recently I learned how to cook it.  

 I scoured the internet looking for ways to cook swiss chard.  I have heard stories of swiss chard tasting bitter once cooked, so I was skeptical that I would like it, much less my kids!
I found a recipe at Simply Recipes,  (recipe below). It caught my eye because it was simple and easy to prepare, plus the author had this to say about it:
” I never liked Swiss chard, until several years ago I had some that had been freshly picked from a friend’s garden. It was so sweet and buttery I couldn’t believe it was actually Swiss chard. It was then I learned that freshness was the key determinant to whether chard was delectable or detestable.”  


“Sweet” and “butter” is all I had to hear to get motivated to cook up these garden greens.  

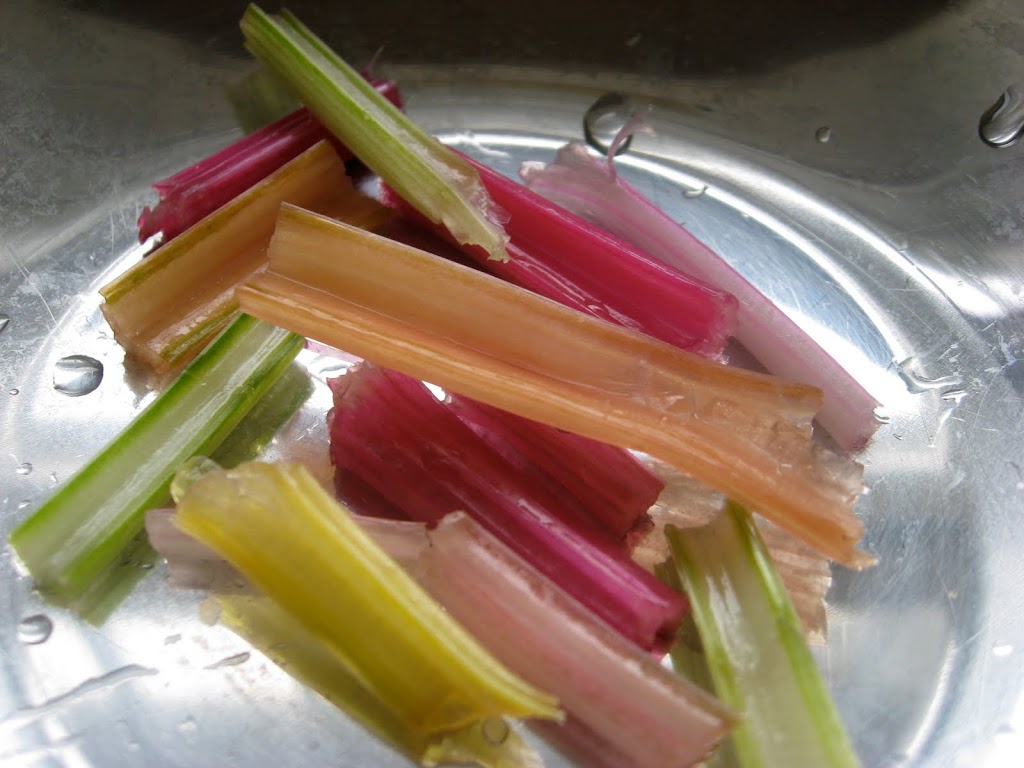
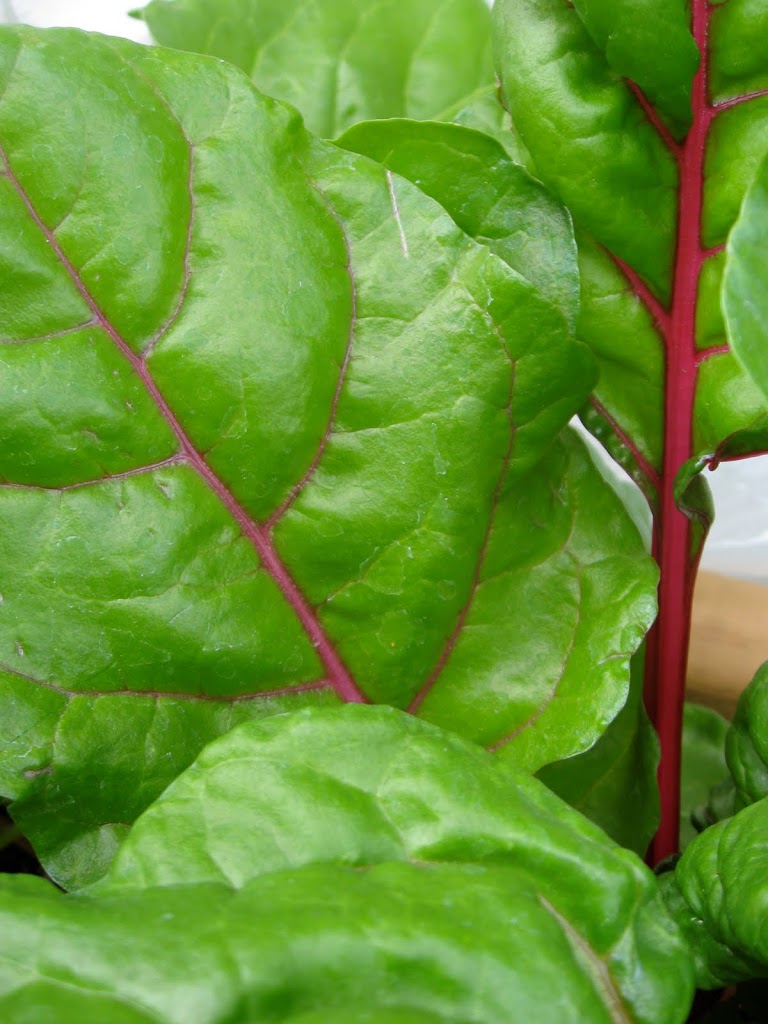
I think swiss chard is such a beautiful vegetable!  The stalks come in different colors and the leaves are such an amazing bright green.   The stalks remind me of celery, but a bit more bitter.  I didn’t care for the stalks, but I liked looking at them!
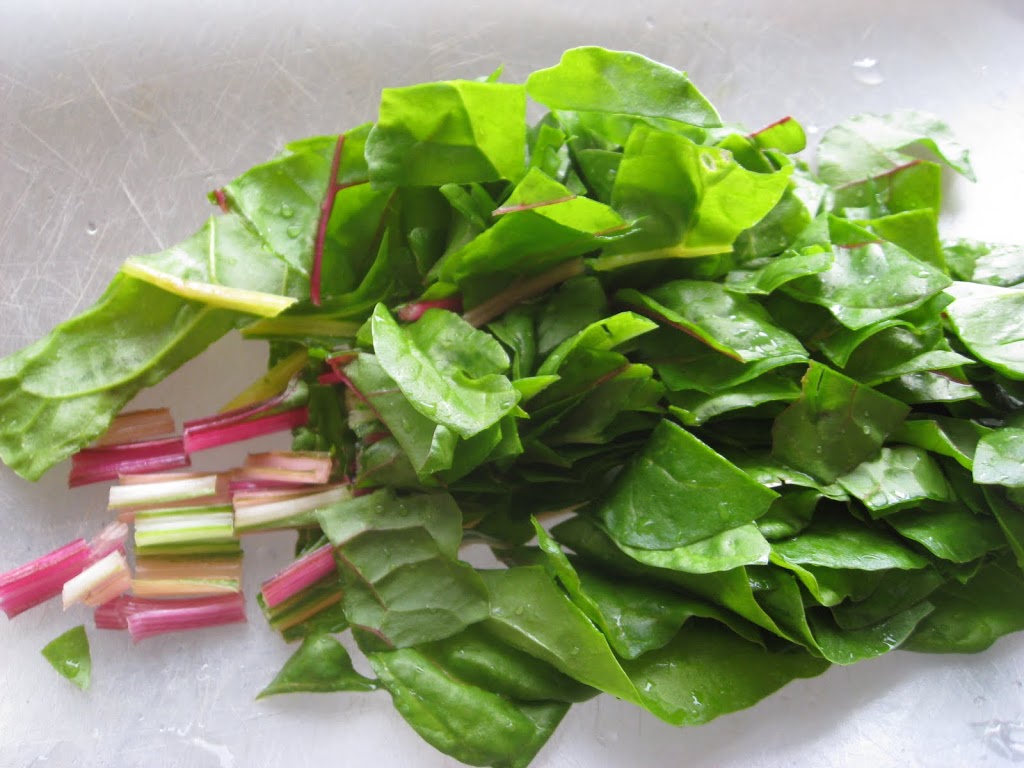
These nine, good sized leaves cooked down to one palm sized serving of chard.  I was flabbergasted!  Guess I need to plant more next year!  Can you imagine the content of vitamins and antioxidants in that one palm full of cooked chard??  Impressive.
Nutritional Profile
Swiss chard is an excellent source of vitamin K, vitamin A, vitamin C, magnesium, manganese, potassium, iron, vitamin E and dietary fiber. It is a very good source of copper, calcium, vitamin B2, vitamin B6 and protein. In addition, Swiss chard is a good source of phosphorus, vitamin B1, zinc, folate, biotin, niacin and pantothenic acid.
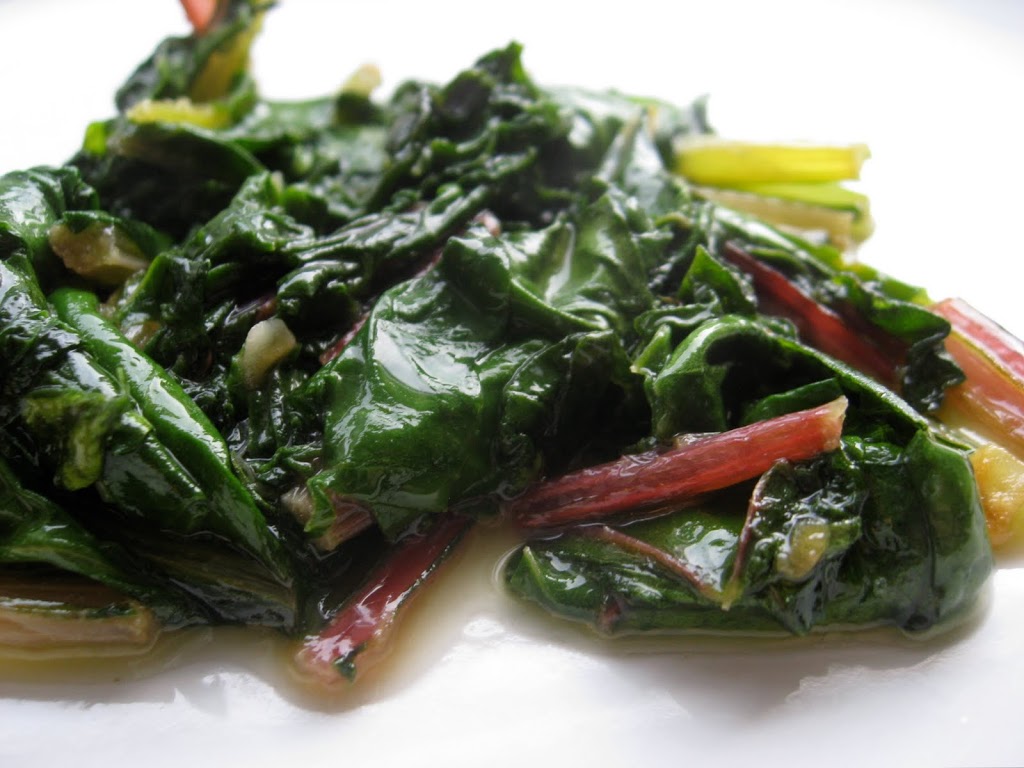
Here is the palm full of the finished product.  I loved it.  It was mild, sweet and buttery.  I told my girls that I made it for me, but I would let them have a taste.  They skeptically tried a small bite, and within seconds I had 2 (my oldest one was not into the texture) little bird mouth hanging open for more bites. Now that excites me!

Funky Junk's Saturday Nite Special

Here is the recipe:


Swiss Chard Recipe

INGREDIENTS

  • 1 large bunch of fresh Swiss chard
  • 1 small clove garlic, sliced
  • 2 Tbsp olive oil
  • 2 Tbsp water
  • Pinch of dried crushed red pepper
  • 1 teaspoon butter
  • Salt

METHOD

1 Rinse out the Swiss chard leaves thoroughly. Remove the toughest third of the stalk, discard or save for another recipe (such as this Swiss chard ribs with cream and pasta). Roughly chop the leaves into inch-wide strips.
2 Heat a saucepan on a medium heat setting, add olive oil, a few small slices of garlic and the crushed red pepper. Sauté for about a minute. Add the chopped Swiss chard leaves. Cover. Check after about 5 minutes. If it looks dry, add a couple tablespoons of water. Flip the leaves over in the pan, so that what was on the bottom, is now on the top. Cover again. Check for doneness after another 5 minutes (remove a piece and taste it). Add salt to taste, and a small amount of butter. Remove the swiss chard to a serving dish.

This post is linked to:
Made It Monday @ The Persimmon Perch
Just Something I Whipped Up @ The Girl Creative
Making The World Cuter Monday @ Making The World Cuter
Tasty Tuesdays @ Balancing Beauty and Bedlam

FUN/DIY/ Homemade Gifts/ RECIPES/ Sides

Onion Pepper Relish Recipe


I am a huge fan of Harry & David’s Onion Pepper Relish, (just not a fan of the price!) so when I saw a recipe for it at Skip To My Lou, I knew I had to try it!  Oh boy, am I glad I did.  I could not believe how similar it tasted to Harry & David’s, I actually think it is slightly better!  It is sweet relish with a bit of a spicy bite.  I served it to a group of my girlfriends last night and it got rave reviews!

Onion Pepper Relish
36 oz canned diced tomatoes, drained (I used 2 1/2  14.5 oz cans)
3 bell peppers, seeds and ribs removed (I used one green, one yellow, and one orange)
3 cups sugar (I used pure cane sugar called Rapadura, it keeps your blood sugar levels from spiking!)
1 Tablespoon salt
1/2 teaspoon crushed red pepper flakes
3 jalapeno peppers, seeds and ribs removed
11/2 medium onions
1 cup white vinegar
1 small box powdered pectin (1.75 oz, found in canning supplies of most stores)

Chop all vegetables.  This is the hardest part of the whole recipe, the rest is a breeze.  A food processor makes the chopping go much quicker.

Mix everything together, except for pectin, in a large pot.  Bring to a boil, then reduce heat and simmer for about one hour.  Add the pectin and let boil for 1 minute.

Pour relish into half pint jars, leaving about 1/2 inch room.  Store in refrigerator for up to 2 weeks, or freeze for up to 2 months. Or, if you are into canning, this would be the ideal recipe!

I love to serve it dumped over a block of cream cheese surrounded by pita chips or crackers.  You can also mix the cream cheese and relish together to make a creamy dip.

This would make a great gift, just attach a tag with serving directions on it.

Funky Junk's Saturday Nite Special
giveaways
This post is linked to:
Show Off Your Stuff @ Fireflies & Jellybeans
Make It From Scratch
Its A Hodgepodge Friday @ Its a HodgePodge LIfe
Frugal Friday @ The Shabby Nest
Designs By Gollum
Food On Fridays @Ann Kroeker. Writer.
RECIPES/ Sweets

Easy Homemade Chocolate Sauce For Ice Cream


I’ve given this away as a gift and made it 3 times for my own family.  It is one of those recipes that I  know I will be in the family for a very long time–it is SOOO good.

It is quick, it uses ingredients we usually have on hand, and it tastes WAY better than store bought chocolate sauce.  When I served it to my husband, he just kept grunting and saying “MMM”& “YUM” as he scraped his bowl clean.

I’m surprised he didn’t get his face in it and lick it clean!  Yes, it is that good.

Here is the recipe, it is from recipebzaar.com.  It was recommended by another blog, but I can’t remember which one, which I’m feeling pretty bad about because they deserve a big thanks from me!


Lee Lee’s Famous Chocolate Sauce For Ice Cream
2 min/1 minute prep time

Serves 4-6

1/2 cup sugar (I use whole cane sugar -rapadura)
2 Tablespoon Cocoa
1/8 tsp Salt
1 1/2-2 Tablespoon Butter
1/4 cup water (more or less, as needed to make a stir-able consistency)
1/4 tsp vanilla extract (can’t beat 100% pure vanilla extract!)

1. Combine sugar, cocoa, and salt in a small saucepan.
2. Add enough water to make stir-able consistency.
3. Add butter to cocoa mixture.
4. Bring to a boil over medium-high heat, stirring constantly.
5. Allow to boil for 1 minute, stirring.
6. Remove from heat.
7. Add vanilla.
8. Serve warm over ice cream.

Gardening/ RECIPES/ Sides

Growing Radishes

We had a yummy salad last night, made with lettuce, swiss chard, and radish from our square foot garden.  I can’t believe I’m actually succeeding at growing food!  My girls little fingers planted the radish seeds and it was their little hands that pulled the radishes from the soil last night, so they were pretty excited to eat them. I’ve never been able to get them to eat radishes, but their curiosity got the best of them and they gobbled them up! (as long as they were drenched in dressing:))

Radishes are not at all hard to grow.  They like cooler temperatures (below 75 degrees), so they were one of the first vegetables we planted.  They can be started 4-6 weeks before the last frost date.  Plant the seeds 1/2 inch deep, 2-3 inches apart (I fit 16 in a square foot of my garden.)  They germinate quickly, (3-10 days), and mature quickly (20-40 days.)  They can be grown in containers due to their shallow root systems.  They are super easy, and a great way to start out our gardening season!
This post is linked to:

HEALTH/ Healthy Eating/ HOME/ How-Tos/ RECIPES

What I Buy and Why-Bread

I always find it fascinating to peek into other peoples grocery carts, while waiting in line at the grocery store, to see what they are buying.  So often I have wanted to strike up a conversation and ask about a product I see, and ask why they like it and why they choose it over another.  I get the same feeling when I open up other people’s refrigerators, I love seeing what brands of foods they buy, and often get inspired to try something new.

I have learned so much about food by asking my friends what they buy, where they buy it, and why they like it.  These conversations inspired me to start writing some posts on the food items I buy and why.  Not only do I want to share with you what is working for us, but my hope is, that in the comments section, I will get to hear from you and what is working for you!

Bread
Our Everyday, Whole Wheat Bread (either of the 2 below:)
If I Want To Treat My Kids To “White” Bread:
When I Want To Splurge:
*Disclaimer-I was not paid or compensated in anyway to promote these products.
It is important to me that our bread does not contain High Fructose Corn Syrup. (Read why here and here)  I also think fiber is very important, so I try not to buy bread that contains less then 3 grams/slice.  The “Oatnut” bread is what my girls call “the yummy white bread.”  It is really good, but I do not buy it as often because it has less fiber in it and uses enriched flour (although unbleached:)) where as the 100% whole wheat breads uses whole wheat flour, which does not have to be enriched, because nothing was ever removed in the first place.  I like that!
 You can go here to read more of my thoughts on making grains count.
What brands of bread work for you?  Have you switched to 100% whole wheat bread?  If so, was it hard on your kids?
RECIPES/ Sides

Easy Cheesy Mini Bagels

Sara Lee sells Whole Wheat Mini Bagels with NO high fructose corn syrup..yippee! 

 I made spaghetti for dinner tonight.   I am one who just can’t eat spaghetti without some time of bread to dip in the sauce, but I had no time to make bread.  I had these mini bagels on hand, so I:

~spread on some butter
~sprinkled with garlic salt
~sprinkled with cheese
~put ’em under the broiler until golden and melty!


As I was dipping them in the sauce, I thought
about how easy it would be to make Homemade
Bagel Bite Mini Pizzas.  I could make a bunch
ahead of time and freeze them, then just pop them
in the oven when needed.  With fiber from the
bagels and protein from the cheese, it would make
a pretty filling and healthy snack.  I’m sure that
will be a future post!:)

Meals/ RECIPES

Portable Chicken Tacos

My daughter’s soccer games are on Monday nights, usually around 5:30/6:00.  Dinner can be tricky!  These chicken tacos were a great solution to eating on the go–so easy to prepare!  I came up with the recipe, and I’ll admit, I’m kinda impressed with myself:)

I had cooked, shredded chicken in the freezer which was made using this process. I froze it in a ziplock bag with about 1/2 cup of chicken broth.  I add the broth to keep the chicken flavorful during the freezing process.  When I use this method, I can never tell that the chicken has been frozen, and freezing it flat in a ziplock makes thawing a snap.  I  also use mason jars, but it takes longer to thaw in them.

I dumped the chicken out into a pan, broth and all.  Then I added chili powder and taco seasoning (I make mine homemade, using this recipe), and 3 oz. cream cheese.  This is just enough to make the chicken creamy and give it a rich flavor.  Salt & pepper and some fresh herbs, and Voila! Seasoned chicken for tacos!  This would be great in enchiladas, too.

Fresh Herbs and Lettuce From My Garden!  So exciting!!

We were running late, rushing around to find jackets and long-sleeved shirts as the weather went from sunny and warm, to windy, chilly and stormy.  I knew it was either make dinner portable or show up way too late, so I took a tortilla, added the chicken and some cheese, then heated in the microwave for about 25 seconds or until the cheese melted.  I ripped squares of foil, rolled the tacos up like a burrito and then rolled them in the foil.  I put the lettuce and tomato I had prepared into a ziplock, threw everything into a bag, and off we went to soccer.

My girls would rather not have the lettuce and tomato on their tacos, so they were very happy to eat their tacos in the car without the toppings.  Todd and I ate ours at the soccer field, where I snapped this picture before I scarfed the rest down.  The angle is a bit weird, but it was in my lap and I felt very WEIRD snapping photos of my food at a soccer game, so it was a quick pic!  Sorry if the bite out of it is unappetizing!;)

The family loved these.  I will be making them often!

Portable Chicken Tacos
2 cups shredded cooked chicken
1/2 cup chicken broth
1 tsp chili powder
1 tsp taco seasoning (or to taste)
3 oz. cream cheese
Salt & Pepper (to taste)
Fresh Parsely and Chives (optional)

Whole Wheat Tortillas
Shredded Cheese
Lettuce
Tomato
(whatever toppings you like)

Heat chicken, broth, seasonings, cream cheese, salt and pepper in pan on med. heat for about 5-10 minutes, stirring to incorporate the cream cheese as it melts.  Remove from heat and add fresh herbs (optional)

Make you tacos using the method described above if you need a portable dinner.  If not, serve chicken on the tortillas, add toppings of choice and enjoy!

Top