Browsing Category

Sides

RECIPES/ Sides

Homemade Pretzels

I found this homemade pretzel recipe at Heavenly Homemakers and I have been wanting to make ’em for awhile now!  The perfect time came, no school because of a snowstorm!

Let me tell you, this recipe did NOT disappoint.  It is sooooooooo good.

Making the dough was easy, the girls loved kneading the dough, but the actual shaping into pretzels was a bit too labor intensive for me.  Maybe I got used to the ease of playdoh when we practiced while the dough was rising.  Or maybe I’m just lazy.   When I realized how skinny we had to make the dough ropes (our first batch were so funny and ugly and fat!) I thought it was too much work. (or maybe I wanted it to go faster knowing we needed to finish up so we could go get our picture taken with Santa!) Next time, I am going to make the dough, roll into ropes, and cut into 4 inch pretzel rods/sticks.  This will be easier because we won’t have to work so hard at getting the ropes thin.  Thick ropes make bloated pretzels, fyi!

These are AMAZING still warm from the oven, and even good the next day heated in the microwave.
I am going to keep dough in the shape of pretzel rods in my freezer, so whenever we get the craving we can just pop them in the oven.

Heavenly Homemakers did a wonderful, step by step tutorial, so I didn’t, but I took some pictures of the process.
Everyone took a turn kneading the dough. That was fun!

Time to rise!
  
Pretty dough, isn’t it?

Practicing our pretzel shapes with playdoh while the dough was rising

They were quite pleased with themselves.

I was so ready for a pretzel I almost ate these

Ahahhahaha!  Our first ugly, way- too- fat, but still tastes great batch of pretzels.

That is better.
FUN/DIY/ RECIPES/ Sides

At Home Salad Bar

I love salad bars.  REALLY, I do!  There is just nothing like a good salad full of fresh veggies and lots of yummy toppings.  I love the variety and all the bright beautiful colors.
Salads are really a great way to get those servings of vegetables in each day.  I try hard to have a salad with every family dinner, and I often make one for myself at lunchtime.  If I have some soup on hand, I will make a smaller salad, but if not, I load up the entire plate and top with pasta or chicken to make it more filling.

One of my favorite things in my kitchen is my Salad Spinner.  It is so much more economical to buy a head of green leafy lettuce or romaine, than buying the pre-packaged stuff.  It takes no time at all to give it a rinse and a spin…in fact, it is so easy that my 6 year old is the official salad spinner in this house.  She begs me to be the one to wash the lettuce, break it into pieces and pack it into the spinner.  She has so much fun watching the lettuce twirl, and has become quite the salad- eater since owning the job as the “Bowman family salad spinner.”  She even asks for seconds now, which is a miracle since not too long ago she spent a nice chunk of our dinners fussing about having to eat her salad.  I have found that if we pass the toppings around the dinner table and let the girls help themselves, (I put out a plate with a variety of chopped vegetables and fruit) they are much more likely to eat it.  I tell them they have to have at least 3 different colors on their salads, and since they are artistically minded, it often turns into make a “pretty salad” time.  I am proud to say (after much doubt that I ever would) that they are all 3 salad eaters.  Yippee!

**Look at all that water!
I love this salad spinner because it spins and stores.  There is alway lettuce washed and ready to go for sandwiches or to break up for tacos.  It is amazing how long the lettuce will stay fresh in the spinner, ours never gets wilted before we eat it.  I buy a head of lettuce every week so we always have it on hand.
I am much more likely to eat a salad if I know it is in my refrigerator ready for me to throw it together.  I have put my lovely mason jars to good use, and fill them up with chopped vegetables, which has made my refrigerator transform into my very own at home salad bar.  It also makes throwing together a plate of toppings at dinner time a breeze.
**please excuse the green tinge of these pictures.  I’ve got to remember to turn off my under the cabinet lighting before snapping photos!!

As far as dry toppings, sunflower seeds are very healthful and give good crunch.  I also love a sprinkling dried cranberries.  I often make my own croutons by keeping the ends of homemade bread (throw them into freezer in a ziplock until read to use), cube them, drizzle with olive oil and sprinkle with garlic salt or what ever seasoning you like.  Toast in oven just a few minutes until golden.
As a substitute for croutons, I will take crackers (like Wheat-Thins) and break up a handful and sprinkle it on my salad.  I learned that little trick by watching my bro-in-law.  (the same bro-in-law that taught me to put Baked Lays Potato Chips in my Subway sandwich:))  I guess we both like an added little crunch! We almost always have a box of crackers on hand, so I do this often.

Other toppings I like to add are grated cheese, hard boiled eggs, (these make great snacks- I try to always have some in the refrigerator, my girls love them and are now even making their own egg salad for sandwiches!) whole wheat pasta, (another thing I try to have on hand in the refrigerator, which we use up especially on the weekends, my girls help themselves to it for lunch and sprinkle with parm. cheese) and fresh fruit–chopped apples, clementines, grapes, strawberries, etc.

I try to keep dressings simple.  Todd and I just drizzle ours with a good quality olive oil and a good quality balsamic vinegar.  It really is delicious AS LONG as you buy the good stuff.
My girls love the spray dressings that are out by Wish-Bone, Wish-Bone Salad Spritzers, particularly the Red Wine Mist.  It is full of red wine vinegar and they love that tang.  I have tried to make my own homemade, but have bombed twice.  I even tried filling the Wish-Bone bottle up with my homemade dressing, but it didn’t fool them!
Oh well.

I love seeing my family eat their salad! I have found between drinking our green smoothies and eating salads, that it is very easy to get our fruits and vegetables in.  It takes a little rinsing and chopping up front, but the health benefits for my family make it very worth it!

**make sure you buy the green stuff!  Romaine lettuce and Green Leafy lettuce have seven to eight times as much beta-carotene, and two to four times the calcium, and twice the amount of potassium as iceberg lettuce.  Spinach is another green that is amazingly good for you, so throw some of that in, too.  As a general rule, the darker green the leaves, the more nutritious the salad green.

***This post is linked to Tempt My Tummy Tuesday.
                                        The Inspired Room

FUN/DIY/ RECIPES/ Sides

Makes Me Happy- Clementines!

Clementines make me very happy.  Even the name is happy!  There are many reasons why:

~they are pretty, such a beautiful bright, shiny orange.
~they are so easy to peel that even little child fingers can do it
~they are usually seedless
~they are the perfect snack size
~they have almost 100% of the vitamin C one needs in a day
~they taste good cold or at room temp
~they are perfect for bagged lunch
~they are a very healthy snack
~they take care of my sweet tooth
~they are fun to juggle with

Clementines are known as the “seedless tangerine.”  California clementines are available from mid-November until January; this availability is why they are referred to in some areas as “Christmas Oranges”

I think they would be perfect stocking stuffers!

Meals/ RECIPES/ Sides

Popcorn Chicken & Roasted Red Potatoes

This recipe is inspired by one I found at Heavenly Homemakers.  When I  made it for my girls, they argued over who would get to eat the last one and have begged me to make it again.  My husband Todd and I both enjoyed it, too. The Roasted Red Potatoes go perfectly with the chicken.  You can bake them at the same time, but potatoes bake a bit longer so put them in first!

Healthy Homemade Popcorn Chicken

3-4 Large Chicken Breasts (I use Smart Chicken brand)
3/4 Cup Whole Wheat Flour
1/2 tsp Salt
1/2 tsp Garlic Powder
1/2 tsp All-Purpose Grill Seasoning (like Misty’s)
Butter

In a shallow dish (like a glass pie plate), mix flour and seasonings.  Cut Chicken into bite-sized pieces (use kitchen shears)  Toss chicken into seasoned flour mixture to coat well.

Cover 9×13 inch pan with foil (easy clean-up).  Smear a thick layer of butter on bottom of the pan.  Place coated chicken pieces in pan, spreading out to a single layer.

Bake 350 degrees for 10 minutes, stir, then bake another 10 minutes.

Serve with your choice of dipping sauce (ketchup, ranch, honey, bbq, sweet and sour)

Roasted Red Potatoes
1 lb. Red Potatoes, Quartered
2-3 Tbls Olive Oil
Salt and Pepper
Herbs or seasoning

Place quartered potatoes in 11×7 inch pan in a single layer.  Drizzle with olive oil (enough to coat when tossed) Toss.
Sprinkle with salt and pepper.  Toss.
Add fresh herbs (rosemary is great) or Lawry’s seasoning or Grill Seasoning.  Toss.
Arrange back into a single layer and bake at 350 degrees, 35-45 minutes, until tender.

This Post Is Linked To:
Just Something I Whipped Up @ The Girl Creative
Anything Related @ All Thingz Related
RECIPES/ Sides

Acorn Squash And Sweet Potato Soup

I’m sitting here eating a bowl of soup, taking occasional bites of an apple, and feeling quite proud of myself!  I just created a recipe that is…da bomb!  Well, ok, sort of created a recipe.

I wanted to try an Acorn and Sweet Potato Soup recipe that sounded and looked so good, but I had been warned by my friend Katie that the original recipe was a bit bland.  She suggested a few additions to make it better, I used some of them but forgot what she had told me while at the store, so I ended up adding different ingredients.  So, I guess you could say I created a third of a recipe, but hey, that counts for something, right?  I’m still proud because it is goooood!

*the ingredients I added to the original recipe are highlighted

Acorn Squash & Sweet Potato Soup
1 large sweet potato
1 medium acorn squash
2 tbls olive oil
6 cloves garlic
3 3/4 cups low-sodium chicken broth
1/2 c. light cream (I used whole milk)
1 shallot, chopped
1 1/2 tsp. smoked paprika  (if you have not tried smoked paprika, you must!)
1 1/2 tbls. pure maple syrup (adjust depending on how sweet your potato is)
1 tsp cinnamon
1/4 tsp nutmeg (I used whole nutmeg, ran it over my microplane about 4 times-ish)
1/4 tsp cayenne pepper
pat of butter
salt and pepper to taste

Preheat oven to 375 degrees.
Cut sweet potato and squash in half lengthwise.  Scoop out squash seeds and brush cut sides with oil.  Place squash and sweet potato halves cut-side down in a shallow roasting pan.  Add unpeeled garlic cloves around the vegetables after tossing them in a bit of the oil.  Roast for 40 minutes until tender.

(I baked a couple of extra potatoes for my lunch.  Had not added the garlic cloves, yet:))
When cool, scoop out insides of the squash and sweet potato, leaving the skins behind.  Peel garlic and add soft insides and scooped squash/sweet potato to a large saucepan.  Add chicken broth and shallot and season with salt and pepper.  Stir well.  Bring to a boil, then reduce heat and simmer, for about 30 minutes, stirring occasionally.

Remove from heat.  Add remaining ingredients, except for the milk and pat of butter.  Process with the hand blender until smooth (if you do not have a hand blender, cool slightly and transfer to a food processor or blender, working in batches as to not overflow machine.

Return soup to pan and stir in milk and butter.  Check seasoning.  Adjust salt, pepper and cayenne as desired.

It is not as complicated as it sounds.  You could roast your veggies earlier in the day, scoop and set in refrigerator until dinner time.  Throwing together the rest of the soup is a breeze.  I recommend either eating it with apple slices, cooked apples as a side, or with a mug of apple cider.  I did both apple slices and apple cider, and it really complimented the soup.  Maybe some diced apple as a garnish to add texture and crunch to the soup?

In a jar, ready for my husband to take to work for lunch.

I wanted my soup to have a sweet and savory taste to it with a kick, and that is what I got.  My friend Katie added roasted red peppers, Italian seasoning,  smoked paprika and a pat of butter and said her husband loved it.  Her version sounds great, too- it would be more of a smokey, savory soup.  I will for sure have to try it her way for a change.  She is a vegetarian and told me that she uses smoked paprika in lieu of ham or bacon in recipes.  I love that tip, you get the smokiness, but not the calories or the cost of the meat.  She mentioned a vegetarian quiche recipe that uses smoked paprika instead of bacon..yum.  Sounds like a recipe I need to blog about, so I will get it from her or maybe she could do a guest post!!:)

Happy Fall!

RECIPES/ Sides

Homemade Chicken Soup

I made Chicken Soup today and it is GOOD!  It is amazing what a good stock can do to a soup, homemade stock has such deep flavor compared to stock from a can.  You can read more about the benefits of stock and how to make it here.

We woke up to the smell of chicken due to the chicken bone stock that had been getting happy all night in my crock pot.  This morning, I strained the stock, this time I threw away all the veggies and bones, but I have read that you can make stock from the same chicken bones 2-3 times, so I will try that next time. The veggies were very spent and I was too lazy to pick through the bones to rescue them (sometimes I do, then I use my hand blender to blend them into the stock) so they got dumped with the bones.

I started my soup with a bit of olive oil and a pat of butter in the bottom of a soup pot.  Adding the butter along with the olive oil gives the soup another layer of flavor, and also allows you to turn up the heat for sauteing the veggies.  If you were to use just olive oil, you would have to keep the heat at medium due to the low smoking point of olive oil.  Adding butter solves this problem. (a tip I leaned from good ol’ Rachel Ray)

I threw in some chopped onion and 2 chopped garlic cloves.  I let the onions get nice and soft over med-high heat, about 5-7 minutes.

Meanwhile, I chopped 3 carrots and 2 stalks celery, and then added them to the pot.

I let them cook a bit to draw out their flavors, about 5 minutes, while I chopped 5 potatoes (1 too many, use 4 instead).

Added potatoes and  11/2 cups cooked chicken to the pot.  You can read here how I cooked my chicken.

Added chicken stock (about 6 cups), 11/2-2 tsp thyme, 1 tsp poultry seasoning, 1 bay leaf, salt and pepper to taste.  If the soup is too thick, add more stock.

Stir and simmer 40-60 minutes, stirring every once in awhile.  Could add all to crock pot and cook on low 4-6 hrs or on high for 2-3 hrs.

Sometimes I substitute whole wheat pasta for the potato, depending what I have on hand. My kids prefer the pasta, but will eat both.  I also usually add some frozen peas or corn.  Enjoy!

How-Tos/ Meals/ RECIPES/ Sides

Rotisserie Chicken In The Crock Pot/Healthy Chicken Stock

My oldest girl is home from school with a fever today.  I’m going to make her some homemade chicken noodle soup, but the poor thing will have to wait for a day.  Today I am making Rotisserie Chicken in the crockpot, that will stretch to 3 meals, one of them being Homemade Chicken Soup.

What I like about this recipe is how easy it is, how cheap it is, and how you can use the bones to make a super healthy, full of nutrients and minerals, homemade chicken stock.  If I am going to take the time to make homemade chicken soup, I want to know that it really is going to make a difference in the health of my family.

I have learned that the key to the most healthful soup is not only the veggies in the soup but the chicken stock itself.  Don’t throw away those chicken bones!  By cooking the heck out of those bones, you are extracting the gelatin, which is a nutritious source of protein, as well as collagen, calcium, minerals and amino acids.

I had no idea until recently that bone stock was such a big deal! It strengthens the gastrointestinal tract and the immune system, plus it takes the flavor and texture of your soup and savory dishes to a whole new level.

Chefs worldwide and through the centuries have sought out this marrow bone stock as a very important ingredient for soups, sauces, and pilafs.

The stocks you can buy at the store do contain gelatin but is thinned down with water so the gelatin content is very low.  They have to make up the flavor somehow, so they use additives: salt, yeast extracts, and MSG.


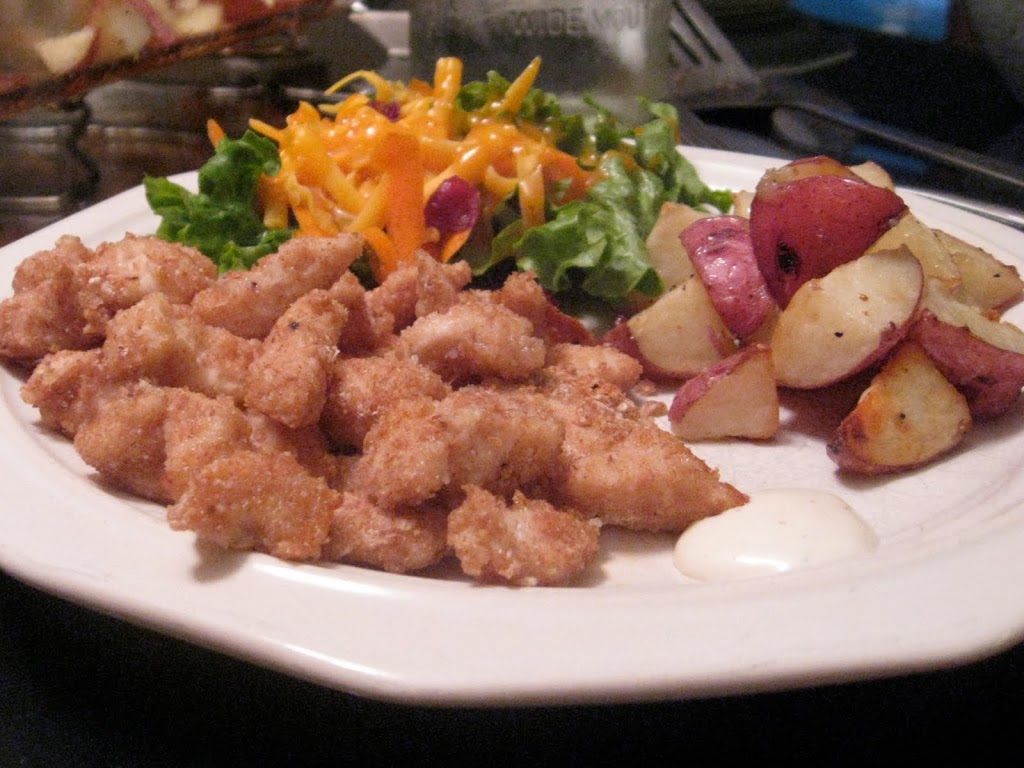
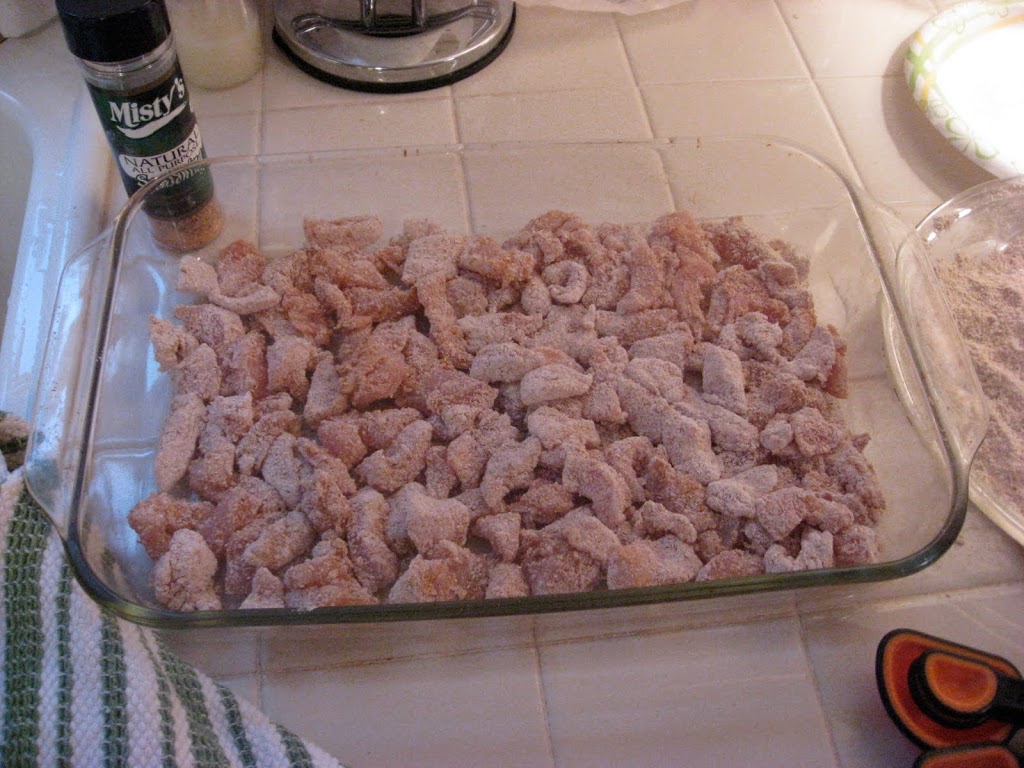
Knowing what I know now, I am going to be much more purposeful about saving bones and making my own stock, especially if I can make a whole chicken stretch over a few meals.  My plan for the chicken sitting in my crockpot right now, is to eat some of the Rotisserie-Style Chicken with rice and veggies tonight, then I will cook my (chicken :))bones in the crockpot overnight, to make stock for my chicken noodle soup (stock, some of the chicken meat, potatoes, carrots, onion, peas, noodles, and seasonings) and whatever chicken is left will go into chicken fajitas!  (I use this recipe on my sister’s blog, but instead of grilled chicken, I use shredded chicken. The seasoning I use is a garlic and pepper grill seasoning called Misty’s, it is sold here in Nebraska, but you can order it online


Rotisserie Chicken In The Crockpot

(recipe from A Year Of Slow Cooking)

–1 whole chicken, skinned (4-5 pounds)

–2 tsp kosher salt (if you’d like it as salty as the ones in the store, add another 1 tsp.)
–1 tsp paprika
–1 tsp onion powder
–1/2 tsp dried thyme
–1 tsp Italian seasoning
–1/2 tsp cayenne pepper
–1/2 tsp black pepper
–pinch of chili pepper (probably not necessary)

–4 whole garlic cloves (optional)
–1 yellow onion, quartered (optional)

The Directions.

I used a 6-quart crockpot for a 5-pound bird. It fit nicely.


In a bowl, combine all of the dried spices. Rub the spice mixture all over the bird, inside and out. Plop the bird breast-side down into the crockpot.

If desired, shove 4 whole garlic cloves and a quartered onion inside the bird.

Do not add water.

Cover and cook on high for 4-5 hours, or on low for 8. The meat is done when it is fully cooked and has reached desired tenderness. The longer you cook it, the more tender the meat.


***Update:  I just made chicken in my crockpot today but was in a rush so instead of the above seasonings, I just dumped Old Bay Seasoning all over the chicken and added some pepper.  It really tasted good, it is a great alternative for those days you just don’t feel like measuring!
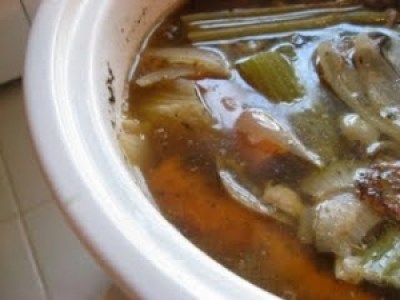
Bone Stock
Chicken bones or carcass
Water to cover (about 6 cups)
1 tsp vinegar for every 4 cups of water (helps extract the good stuff from the bones)
Optional:
onion, cut in large chunks
2 carrots, cut in large chunks
2 stalks celery, cut in large chunks
2 cloves garlic
2 bay leaves
1 T. Italian seasoning
Dump all into the crockpot.  Cover and cook 8-10 hours.  (I do overnight)  Remove from heat and cool completely.  Strain the stock.  Pour into jars or freezer bags in manageable portions.  If using ziplock, lay on a cookie sheet to freeze flat, they will be much easier to fit into your freezer.  I have also seen people freeze their stock in ice cube trays and dump the cubes into a large ziplock.


There is no salt added to this recipe, but the stock will need salt for flavor.  When I use it in my recipes, I will taste and salt as needed.  The overall sodium content will be much lower than store bought broths/stocks.  


I’m happy to know that there will be healthy, homemade stock in my freezer, so the next time one of my little boos get sick, I will be able to make the soup that same day!

Click here for how-to make the above Chicken Soup.

Top