Browsing Category

Homemaking

Decorating/ HOME/ Homemaking/ Organizing/ Simplifying

8 Steps To Rescue A Room + Cleaning My Girls Room On Spring Break

This is a repost from the archives…one from almost exactly a year ago!  It is fun to read and see how God has answered my wonderings in the below post, with this team of people I introduced you to yesterday.  Pretty cool to see what can happen in a year AND I’m motivated to go clean up Lil’ Ones room again after reading this old post.  I might even take a before and after pic for you this time!

8 steps to rescue a room


Having my kids home for spring break has got me wondering…

…about this blog of mine. A hobby– turned passion– turned surprise income maker– now takes time.  I now have advertisers, sponsors and write occasional posts on products and get paid for it.  I find myself photographer, editor, writer, social media specialist, administrator, and receptionist all at the same time, and I LOVE IT! It has been a huge blessing, a surprise answer to prayer. We asked God about supplementing our income and what would be the best way to do that, and it seems like this blog is the answer. It brings me to tears when I think of the incredible gift I have been given, to spend time doing my passion hobby, and actually help the family income at the same time.  I have God and YOU ALL to thank for that.

But, as spring break is here, and kids are home, I find myself wondering how in the world am I going to do it all come summer break?  I have felt the pull the last 2 days, the pull between being a mom and being a blog writer.  My little ones win in this tug o’ war game.  I gladly give in.  For you see, I now know that the moments are so precious, and are not forever.  They pull, and I respond pulling them to me into arms that don’t ever want to let go.  Oh if I could freeze these precious moments!

Arms right now are empty, as I sit here in a few surprise quiet moments, as all 3 of my girls are at a friends house down the street.  Thank goodness for great neighbors, another answer to a prayer that we prayed.

Back to summer, I’m not sure how I will balance the two. I know so many of you do it, working mothers, and then those who are my heroes, single mothers.  But, I do know that my family must always come first, and I must notice and cling to those moments that so easily slip past when I am too focused on work.  I know my work is best when I am being the best mom and wife I can be.

I will probably sneak away to a coffee shop a couple evenings a week and take my laptop to the pool.

sPink girl's room

Another solution I have is bringing you into our days, sharing with you what we do, and keeping my posts simple. So today, you get to see what my youngest and I have been up to, and I will show you a glimpse of a fun little project we did yesterday with some of our neighbor kids.

Girl in pink chair
I received a phone call from Grandma last night, “Can I take you all out for breakfast in the morning?  Can I drop little ones birthday gift off at the house, too?”  So our morning started out with the blessing beautiful weather, an awesome breakfast and time with Grandma.  Grandma Sharon knew that my little one could really use her own comfy chair in her room, and after looking all over the city, she found the MOST special and comfy one.  Such a great gift!  
Girl watching tv in room
Corner desk in room
Pink and brown room
organizing markers and coloring

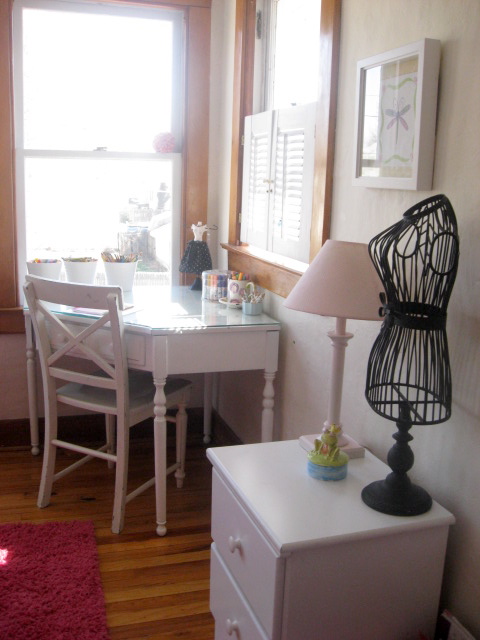
 My little ones room has been a mess, and I was hoping this would be the motivation she might need to get her room in order.  I was right.  As we were out to breakfast, little one asks, “Mom, do you think we could work on my room today, maybe rearrange it and find a special place for my new chair?”  Yay!  Because I didn’t over schedule our Spring Break, I was able to say “yes” and now her room looks great!  She expressed such gratitude to me for helping her with her room, which melted me.

clutter in room

 {Here is what was eliminated from her room, most of which was under the bed! Eyyy..}

………………..

8 Steps To Rescue a Room

1. Gather all clothes on that are not where they should be.  Sort dirty from clean.  Hang up/put away clean & take dirty to the laundry room.  If there are a lot of clothes to put away, grab a laundry basket and lay them neatly in there.  Do not get distracted by spending too much time doing this.  Once the room is clean, you can grab the basket and put clothes away.  You will be much more motivated once you see the beautiful, decluttered and clean room!

2. Grab a trash bag and keep it close to throw things away. I like to hang it on the door knob of the room I am cleaning. Look around the room and get the big stuff that you know is trash.  Getting clothes and trash out of the room will instantly make it feel cleaner and decluttered.

3. Make a pile outside of room that is for things found in the room that belong elsewhere.  Could use a laundry basket for this, to make the process of putting it all away easier.

4.  Make another pile outside of room for things you want to give away.  Bag it up and take to car after the room is finished.

5. Look around room and get rid of anything you don’t love.  Eliminate!  Clutter attracts clutter.

6. Keep like with like, and find a place for everything now that the room is only full of the things you love.  Everything needs a home.

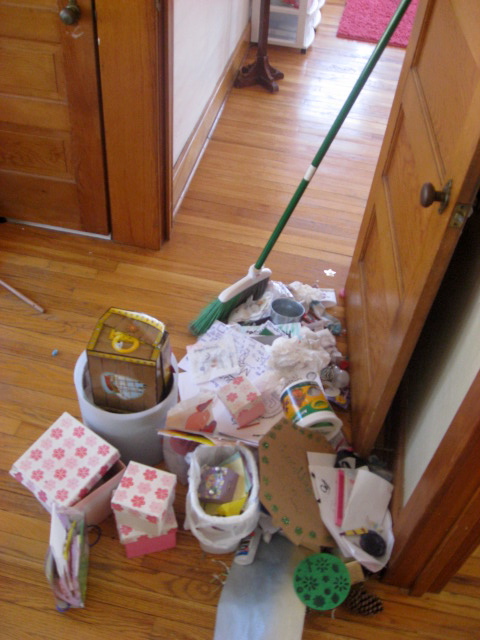
7. Use a broom to get things out from under the bed.  You will find most is trash or things you want to get rid of.  If it was under the bed, it is usually not important enough to keep!

8. Now that everything is in its place, sweep, mop, vacuum, dust, wash the windows and wash the bedding.  This is all so much easier to do once the clutter is gone!

………………..

As always, when I get into one project, it seems like the rest of the house falls apart, so I will take some time this afternoon rescuing my house!  The weather is so amazing, I’m thinking it may be a great evening to pack a picnic and have Todd meet us at the park for dinner.  It is 81 degrees and sunny, with just a slight breeze.  Perfect!

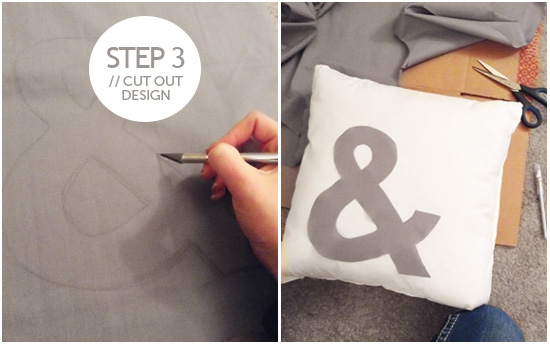
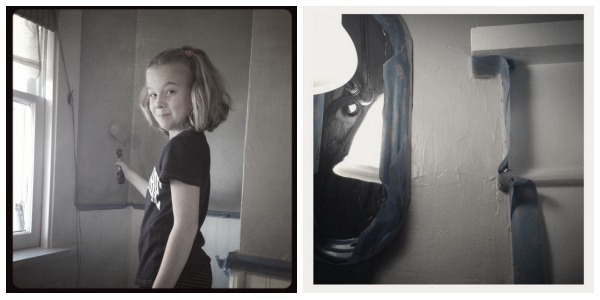
Off I go to get to my rescuing, but before I do, here a quick peek at a super fun project we did yesterday.  I will have a “how-to” post coming soon!

Natural homemade lip balm

It was one of our most fun projects, the girls loved it, and I love that it is healthy for them–no chemicals!

DIY/Crafts/ FUN/DIY/ HOME/ Homemaking

DIY Type / Ampersand Pillow

We are thrilled to be welcoming  Laurie Cosgrove as new Art & DIY Contributer here at New Nostalgia.  Laurie will be here one Saturday a month sharing her love for the arts.
Laurie is a graphic artist and the author of Beauty Divine Design where she posts on everything from design trends and tutorials to her random daily life. She has such a way with beauty, and her taste is divine!  

Laurie also is the founder of Beauty Divine Design company which focuses on providing photographers with design templates.  Click here to visit her shop.

You can follow Beauty Divine Design here: {Facebook} {Twitter} {Pinterest}


Laurie Cosgrove
Laurie Cosgrove
Art & DIY Contributer

{you will have to click through to her site to see her whole face (and her cutie little family).  She is a beauty, and she just so happens to be my baby sister.  I love her so, and so will you!}

DIY pillow


Hi everyone! I am excited to be joining the New Nostalgia team & look forward to getting artsy & creating beauty with all of you.
For a long time, my excuses for not putting effort into my home decor were “I don’t have the money” or “My crafting skills stink!” But more and more I’m realizing that I don’t have to spend $50 on one item from Pottery Barn and I CAN make things myself.  I’m even beginning to like things a little imperfect and surprising instead of having that cookie-cutter catalog look in my house.
Having something cute in your house is fun.  Having something cute + “yours” in your house makes it feel more like home.  
One of the projects I recently tried was this DIY No-Sew Type Pillow.  Being a graphic designer, I’ve been swooning over every decor item on Pinterest featuring typography.  I was starting to feel like I couldn’t really call myself a designer without at least ONE ampersand in my house!  So a DIY project was in order and this is what I came up with!

Instructions:
1. Gather Materials // Get all of your supplies together in one place (preferably with good music or a movie on.  I parked it in front of Downton Abby).  You definitely do not have to buy the pillow and fabric brand new.  My pillow is from the clearance aisle at Walmart and my fabric was an old pillow case.
You will need:

~Colored fabric
~Toss Pillow or pillow cover
~Pencil
~x-acto knife
~Cutting surface/cardboard box
~Fabric tape
~Candle
~Printed stencil*
2. Trace Design // Using a pencil (lightly) trace the design on the back side of your fabric.  If you’re using a stencil, make sure to flip it backwards.  If you’re going to free-hand it like I did you might want to draw on the front of your fabric and cut just inside the pencil line.
3. Cut Out Design // Lay out your colored fabric over a cutting surface – I just used a cardboard box on the floor.  Using your X-acto knife (or really sharp scissors) cut your design out of the fabric.

Ampersand pillow

4. Seal Edges // You might notice some fraying around the edges of your fabric.  Too fix it, hold your design close to the heat of a candle and slowly turn it so that all of the edges start to harden. (not too close!! It will catch on fire and you’ll have to start again- not fun!)
5. Attach to Pillow // Once your design is fully sealed, you can position it where you want it on the pillow or cover.  If your design is pretty simple and your pillow isn’t going to get a lot of wear, you can use fabric tape to attach it to your pillow.  if you think it’s going to get tossed around a lot (or regularly trampled by your children) you can pin it in place and sew a basic stitch around the outside of your design to attach it to the pillow.
6. Place It // Give yourself a high-five now that it’s done! You can even run over it lightly with an iron to finish and then give the pillow a chop to fluff it up again.  Put it somewhere that makes you smile (and Instagram that baby ASAP).

Ampersand pillow

*By the way, you can replace the ampersand design with something else- like a monogram of a silhouette design (deer head silhouettes are fun!). Make it something you really love.  You can use my pages below or create your own.  Have fun!

ampersand stencil

deer head stencil
HOME/ Homemaking/ Organizing/ Simplifying

Organize Your Measuring Cups and Spoons

Organize your measuring cups and spoons
This simple organization step I recently took might just be my favorite thing I’ve done so far in my kitchen!  I can’t tell you how great it is to have my measuring cups and spoons organized and hanging in plain site.  NO MORE digging around in drawers trying to find them!
measuring spoons

The first thing I did was buy small hooks.  I got mine from Target.  I knew if I was going to display my measuring cups and spoons out in plain sight, they would need to be nice looking, so I looked around for these while at Target, too.  Giada and her awesome brand of measuring cups and spoons is what I stumbled upon and fell for instantly.  I love the simplicity of them & I think they look quite sharp hanging under my cabinet in the kitchen.

measuring cups and spoons

I have VERY limited space in my kitchen.  Especially drawer space…remember this post? I only have 2 drawers….yes, I said TWO!  Oh, and a half size junk drawer…so 2 1/2! One is taken up by our silverware, so really that only leaves me one drawer for kitchen utensil storage.  Do you see why I need to get creative in efficient kitchen utensil storage?

reflection

Peek-a-boo!  I see you! Do you see me?

jar canisters
I honestly have found myself baking more often since organizing my measuring cups and spoons.  These 3 jar canisters that I keep out on my counter under the measuring cups and spoons hold whole wheat flour, unbleached white flour and organic cane sugar. It is amazing how handy it is to have the things you need in an easy to grab place! I also have baking powder, baking soda, salt and yeast in mason jars, in a nearby handy location.   I’ve been doing so much baking, especially this Whole Wheat Bread from the bread machine and these Whole Wheat Honey Banana Muffins,  that both my flour canisters were empty on photo day!  
Amazing what a little organization can do!

organized kitchen

Books/ HOME/ Homemaking/ Organizing

Pulling Yourself Together: Implementing a Cleaning Routine that Sticks

I’m super excited to tell you all about this awesome ebook I just finished reading.  I have been in bed most of the day, not feeling quite myself.  It DID give me time to catch up on reading, and after reading Clean Mama’s ebook I am SUPER eager to get up out of this bed and take steps to PULL MYSELF TOGETHER!

I don’t know about you, but once the New Year hits, I am always ready to pack up all the Christmas decorations and get my organization on!  This year, I really enjoyed the holidays, to the point where I really ignored this house. Now it is such a mess that I feel a bit overwhelmed with where to start…or should I say…”felt” overwhelmed.  After reading Clean Mama’s new ebook, I have the tools I need to tackle this house and pull it together!  I will be taking photos and sharing my organization progress with you on the blog.  Can’t wait for you all to see my nasty ‘before’ pictures!

Do you want to join me? Then keep reading, this is step one! Clean Mama makes it so simple and easy, and will give us you the motivation, just as it did me.   Let me introduce you to Clean Mama’s new ebook…

pulling-yourself-togetherbook-cover1
What’s included in
Pulling Yourself Together: Implementing a Cleaning Routine that Sticks?
  • tools to de-clutter and organize your home in the midst of a busy life
  • methods to implement a cleaning routine that really works for you
  • strategies to continue with a perfected cleaning routine
  • 5 chapters with step by step methods for jump starting your de-cluttering and starting (or perfecting) your cleaning routine
031
6 printable guides are included to help you through each step of the process:
6-printables-guides-pic
De-Clutter Worksheet
Weekly Cleaning Routine Checklist
Week at a Glance
Blank Week at a Glance
Rotating Cleaning Schedule
Blank Rotating Cleaning Schedule
Clutter and chaos taking over your life? Ready to start pulling yourself together? Hop on over to the Clean Mama blog to learn more about Pulling Yourself Together: Implementing a Cleaning Routine that Sticks.  Click here to visit Clean Mama – Clean Mama Printables. and to purchase your copy today!
pulling-yourself-togetherbook-cover1

*This post may contain affiliate links.

Decorating/ Frugal/ FUN/DIY/ HOME/ Homemaking

My Bathroom Makeover Makes Me Happy!

I really can’t believe I finally got this done.  I sure wish  I took ‘before’ pictures!  I’ve wanted a grey bathroom for awhile now.  The paint color I had before was an awful brown/green color – blech!- and my shower curtain was small vertical stripes, in rusts & golds and greens, which I’ve had for over 12 years.  This was a much needed & big change!
Besides wanting to get rid of the prior green/brown paint color, what motivated me to do this was the never-ending loads of towels I was doing with 3 girls in my house!  We had one towel bar for 5 people–not good.  Not anymore.  Each girl has their own hook and their own color of towel.  If their towel is not put back o the hook and they need one, they drip dry…no joke!  This Mama is serious about cutting down on laundry!  There are 2 more hooks on the back of the bathroom door for Mom & Dad’s towels.  Our towels are white.  Nice, fluffy, spa-like white.  Ahhh. It has worked beautifully and I don’t know why I have not done this sooner!
I also was motivated by really wanting a new shower curtain.  I had the old one for over 12 years, so it was time!  I love this simple, horizontal striped shower curtain.
I added a few minimal holiday touches.  A little touch of sparkle.  I always have a candle in there, even when it is not Christmastime.
I think every room needs a touch of natural green, and these succulents on the back of the ‘throne’ were just the thing.  They are super low maintenance.  The clock was given to me by a friend–when I stand in front of my mirror, the time is reflected which is super helpful on late mornings.

The black display boxes on the wall have been a great addition to our bathroom.  Ball jars hold cotton & q-tips.  I have room deodorant spray on the top shelf, another candle, a Christmas tin for pretty storage, & shelves for wash clothes.  I LOVE having a space for an extra roll of toilet paper.  It is noticeable when the shelf is empty, and I can refill it when I notice it.  Sure beats hearing “MOM, I NEED SOME TP!!” which was the case WAY too often before.  I got a great deal on these shelves on black Friday…they were only 9 dollars!
I really, really like our new rug.  It feels so lovely on our feet & covers a crack in our tile which used to drive me nuts!
I had a very willing little helper.  It only took about 2 hours to paint the bathroom…one hour per day/coat.  Easy!  Why oh WHY do I procrastinate.  It feels so, so good to have this done.
//
Paint-Sherwin Williams Intellectual Grey ($40)
Towels-Bed Bath & Beyond ($8 each)
Shower Curtain-West Elm ($40)
Black Shelves-Shopko ($9)
Hooks-Target ($7 each)
Rug-Target ($20)
Washcloths-Target ($5)
Clock-gift (free)
Planters-garage sale ($3)
Plants-Walgreens ($5 each)
= about $175.00  
Not bad for a bathroom makeover!  I love my new bathroom.  I kinda want to go just sit in it now… 
🙂
SponsoredTweets referral badge
HEALTH/ HOME/ Homemaking/ Natural Products

Clean A White Sink Without Bleach

How to Clean a White Sink Without Bleach–A guest post from Kendra at Our Homemade Happiness

When we first moved into our apartment, I thought the white sink was a beautiful piece in our all-white kitchen. Little did I know, white kitchen sinks do not stay white and beautiful very long. I used to think Soft Scrub with Bleach was the only way to keep my white sink white. I’ve since figured out a couple easy ways to keep my sink white without toxic chemicals.

A simple scrub made with baking soda and dish soap works great. First, I dry my sink because baking soda will dissolve on a wet sink. Then I sprinkle a little baking soda in my sink, add a couple drops of dish soap, and scrub with a scrubber until it comes clean. Sarah over at Nature’s Nurture uses salt and baking soda to scrub her sink, so add some salt if baking soda/dish soap isn’t cutting it. I also use this baking soda scrub and a scrub brush to clean my textured bathtub. 

If there are still some stubborn stains that won’t come off, I add a few drops of tea tree oil, hydrogen peroxide, or lemon juice to the baking soda scrub to whiten the sink. Then I scrub a little more. You may need to let the tea tree oil, hydrogen peroxide, or lemon juice sit on the stain for a bit depending on how bad it is. 

If I’m in a hurry, I use a Magic Eraser instead of the baking soda scrub. I know, I know, it’s not “green,” but I like that it doesn’t have cleaners in it. It’s the scrubber’s texture that gets stains off. It really does seem magical since stains and marks come off so quickly. It works on bathtubs, walls, floors, and appliances too. I buy a generic version at Walmart for $.72/scrubber, but you can also find them on Amazon for about $1/scrubber. On Pinterest today, I found this pin about a generic version on ebay that’s way cheaper. Coolness! 

These methods also work on stainless steel sinks. How do you keep your kitchen sink clean without harsh chemicals? 

//
So Happy You Are Here
Hi, I’m Kendra!  I blog about all things homemade, especially cleaners, skincare, and healthy eating.  I started my blog, Our Homemade Happiness, after my husband suffered from mono symptoms for over two years and his blood results showed some liver disease.  Since the liver is responsible for filtering out chemicals and toxins from the bloodstream, I started to realize how many chemicals are in everything we buy, from processed food to household cleaners, lotion, and even air freshener.  I’ve become inspired to rid my home of as many chemicals as I can, one product at a time, and blog about it along the way.
HOME/ Homemaking/ Organizing/ Simplifying

Eat That Frog-Don’t Procrastinate!


This is a guest post by professional organizer Susan Stewart of Perfectly Placed.

Have you heard the saying that if the first thing you do when you wake up each morning is eat a live frog, nothing worse can happen for the rest of the day?

Brian Tracy, author of Eat That Frog, writes that your “frog” should be your most difficult task on your To Do list—the one you are most likely to procrastinate on. If you eat that first, it will give you energy and momentum for the rest of the day. If you don’t, and that frog stays on your list, you’ll spend all kinds of time doing unimportant tasks while you try to avoid eating it. Not only does avoiding your frog waste time, but as you you are busy distracting yourself with a more pleasurable task, thoughts of your frog keep creeping back all day long, bringing stress along with it. By the end of the day the frog is still there and you are mentally exhausted. 
I remember when I first came across these amazing thoughts by Brian Tracy. They resonated so deeply with me! You may think that a professional organizer doesn’t ever procrastinate, but of course I do! We all try to avoid things that are difficult, boring or scary. Those are the things that tend to be the frogs. Knowing this, knowing I’m not alone, and knowing I have a choice in it, has brought me freedom and that’s why I’m sharing it with you. I want YOU to experience the freedom of eating the frog too.

When I get up in the morning, I look over my to do list and pick 2 or 3 things that I know are my frogs for the day. When I admit they are frogs and confront them first thing, it is amazing how that affects my day! I have more energy, get more done and feel much more in control. I feel proud of myself when I eat those frogs!

My question to you is this- what are your frogs today and what will you do about them? The only way to get rid of them is to eat them. Will you eat them first or will you let them sit there all day, hoping they’ll hop away? The choice is up to you. I encourage you to eat them first and enjoy the freedom and success you’ll feel when they’re gone. By the way, I just finished eating mine.
P.S. Sign up here to receive 10 Time Management Secrets Every Woman Should Know
Top