Browsing Tag:

diy

DIY/Crafts/ Frugal/ FUN/DIY/ HEALTH/ HOME/ Homemaking/ How-Tos/ Natural Products/ RECIPES

DIY Daily Sink Scrub

DIY Daily Sink Scrub for Shiny Sinks


This DIY Daily Sink Scrub could easily be called twice a day sink scrub because I use it at least twice a day— if not every chance I get! I can’t tell you the satisfaction I feel making such a simple, inexpensive but effective DIY cleaning product. Yes, satisfaction, and JOY!

I know, it is a stretch to use the word joy with a cleaning product but this sink scrub makes me so happy. I’ve learned that scent is a very powerful way to experience emotions, especially when the scent is essential oil –pure and from nature!

Sprinkle on DIY Daily Sink Scrub

DIY DAILY SINK SCRUB – JUST TWO INGREDIENTS

DIY Daily Sink Scrub has just two ingredients—baking soda and essential oil. The essential oil not only makes it a powerhouse when it comes to disinfecting and cleaning your sink but can also be a powerhouse when it comes to affecting your mood!

Continue Reading…

DIY/Crafts/ FUN/DIY/ HEALTH/ HOME/ Natural Products/ Organizing

The Best DIY Glass + Mirror Cleaning Spray

The BEST DIY Glass Cleaner

This DIY Glass + Mirror Cleaning Spray is my most used DIY Cleaner. I have been using this particular recipe for a couple of weeks now and don’t know how I ever lived without it!

We own 2 glass top tables, one in the kitchen and one in the dining room. I use this spray several times a day to clean those off after use. Because of this, we go through glass cleaner quickly so I wanted a spray that not only worked but was inexpensive to make.

I also wanted a cleaner with ingredients that would not trigger my daughter’s asthma. Regular glass cleaner from the store with all of its harsh ingredients has been a major trigger for her asthma, and since I am spraying the product in my home every day all throughout the day, I want to know what is in it and that it will not make her react.

Thanks to Clean Mama and her new book, Simply Clean, I found this DIY Glass + Mirror Cleaner Spray recipe and it has already made me a very happy lady. It uses just 4 ingredients!

DIY Glass + Mirror Cleaning Spray

  • 2 cups water
  • 2 tablespoons rubbing alcohol
  • 2 tablespoons vinegar
  • 5 drops essential oil

The rubbing alcohol causes the cleaner to dry quickly, which eliminates streaks. Brilliant!

bottle of essential oil

Rocky Mountain Oils To Scent Your Glass Cleaner

The essential oil is optional in this recipe, but I highly recommend it. It is there to add scent, which is wonderful! I use Rocky Mountain Oils and their Lemon Oil is a favorite of mine to use in this glass spray… it is wonderful. It smells amazingly refreshing!

I also love peppermint as a scent for this oil. Did you know that Peppermint Oil is often used for focus & alertness? It helps awaken the senses. No wonder I love using this spray with peppermint oil, especially when I need to wake up in the morning when wiping breakfast crumbs off my glass tables. Love it!


DIY-Glass-Mirror-Cleaning-Spray

I bought these awesome glass spray bottles on Amazon, and I truly believe they make cleaning a little bit more fun! They had high reviews and did not disappoint. They have both spray and stream options and are very good quality. I love that they are beautiful and functional. They come 2 to a package and chalkboard labels are included!

I picked up the above cleaning caddy at Target. If you would rather order on Amazon, I am crushing over this galvanized carry-all container.  I have mine sitting out on my counter. Until I clean out under my sink to make room for my cleaning caddy, it is just fine sitting in all its glory on my counter. It sure makes it easy to grab a cleaner and get to work!

I used washi tape and a sharpie to label each bottle. It is easy to remove but has enough staying power to stay on until I’m ready to switch the labels out. The Sharpie is smear proof, which is important.

I keep my squeegee, eraser sponge and a scraper/scrub brush in the caddy along with some other DIY cleaners that I will be sharing with you in upcoming posts!


Keeping A Clean Home Printable

Keeping-A-Clean-Home-640px

Make sure you are subscribed so you don’t miss future posts by signing up for my email list to have new posts delivered right to your inbox!

If you sign up, you can download and print this handy “Keeping a Clean Home” printable checklist which divides tasks into Everyday, Once a Week, Once a Month, Once a Season, and Once a Year. This checklist allows me to focus in, know exactly where I am at and what needs to be done.


What about you?

Do you make your own cleaners? Have experienced the amazing-ness of essential oils yet?

If so, what brand do you use?

Beauty/ FUN/DIY

How To Get Beachy Waves With A Curling Wand

How To Get Beachy Waves With A Curling Wand

I am a cosmetologist, and even though it has been years since I worked in a salon, I still love messing around with hair and trying new styles and techniques. I’ve often been asked how to get the beachy waves that I wear, and thought I’d share my techniques and favorite curling wand with you.

A curling wand is the key to easy beachy waves. I use the Infiniti Pro by Conair Tourmaline Ceramic Curling Wand and love it. If you click on the link, it will take you to Amazon, where they show a couple of videos of how to use the wand. I also show 2 of my favorite videos below, one for beachy waves in long hair, one for short hair.

This curling wand gives spiral curls that start wider and taper to smaller (like an inverted triangle) which I prefer compared to the uniform curls of a non-tapered wand. It keeps the curl from starting too tight up high by your scalp, as long as you hold the wand with the tip pointing down. I like that I can hold the hair around the wand longer for a tighter curl, or can pull on the curl after releasing it from the wand to make it more of a wave. I also love that this particular wand allows you to adjust the heat.

I think wands are much easier to use than curling irons, especially once you learn the proper way to use them. Keep reading for lots of tips, tricks and 2 videos.


How To Get Beachy Waves With A Curling Wand

~Comb out your tangles.

~Section hair. Use a clip or hair tie, leave a 1-inch section at the bottom, and clip the rest on top of your head.

~Use a 1-inch curling wand and take 1-inch sections of hair.

~Curl sections around the face away from the face, but alternate the rest—away than toward, away than toward.

~Leave your ends out of the wand (about an inch or two) for a beachy look.

~If your hair does not hold curl well, spray with hairspray (Kenra 25 is my FAV) as you go to give the hair some ‘tackiness.’

~Let curls cool before messing with them in any way. Important! This sets the curl and makes it hold.

~Work around the whole head using 1-inch alternating sections, leaving the ends out.

~When finished with your whole head and after letting curls cool, use fingers to piece out and break up the curls.

~Use backcombing on last 2 layers if you need extra volume. (see video below for technique and volume root tease spray.)

~Smooth any flyaways and finish entire head with a flexible-hold hairspray.


Top 2 Tips for Beachy Waves:

{these are key for a modern, beachy look!}

Curl away from the face around the face.

Leave 1-2 inches of your ends straight.


Keep reading for videos of the technique. Take note the 2 products she uses in the first video. They are easy- to- find drugstore products. I especially like the root lift spray and teasing technique at the crown for those of you who need volume.

Sidenote: notice her eyebrows. I love that thicker eyebrows have come back into style. No more over-tweezed skinny eyebrows! Her brows are a bit more structured than I do, but I still like them! I’ve been filling mine in and will share the brow products I use in an upcoming post.

Have shorter hair? I don’t want to leave you out. Here is a video tutorial for you!

Notice, she uses a large curling iron, but the same technique for beachy waves. You can use a curling wand in place of a curling iron. She uses sectioning, curls away from face around the face, and a leaves bit of her ends out for that beachy waves look! Also, look at her eyebrows. Nice and filled in! Love.

——-

So there you have it! Beachy waves for all lengths of hair. I just adore the undone easy look of the waves and especially love that it looks even better on the 2nd day.

If you try it out, let me know how it goes!

Decorating/ DIY/Crafts/ FUN/DIY/ HOME/ Homemade Gifts

DIY Himmeli | IF: Gathering Decorations

DIY HIMMELI

A DIY Himmeli made from straws is one of my favorite DIY project so far. I made them last year to decorate tables for our local IF: Gathering, and find myself re-imagining how they can be used again for this year’s IF: Gathering.

I have loved using them in my home all throughout the year to add geometric shape and shimmer to my home decor. I even used them as our main Christmas tree decoration this year–it was beautiful!

DIY Himmeli Christmas Tree Decoration

What is a himmeli?

The himmeli is a traditional Finnish holiday decoration made out of straw, and it remains popular today.

They can be simple or complicated, depending on your preference. Traditional himmeli’s are breathtakingly beautiful! I kept mine simple, made from plastic straws, wire and gold spray paint. I made about 25 of them last February. Although it took some time to create them, it was a simple process and I have benefited from their beauty all year!

DIY Himmeli Straw Decoration

DIY Himmeli

The above  DIY himmeli video is what I watched to make mine. I used 22 gauge wire instead of string. I tried both and wire was so much easier to work with!

IMG_8459

I used regular plastic bendy straws and Rust-Oleum Metallic Gold Spray Paint  to give them a metal-like finish. I made all different sizes. This year I am going to spray the himmeli with Copper Metallic spray paint, as some have chipped over the year and copper will go better with the branding of this year’s IF: Gathering.

shareables-5


The branding this year for IF: Gathering 2017 is so beautiful with lots of fun geometric shapes and great colors as the picture above shows. The rest of the photos on this post are from the decorations I did last year, and I am thankful that much of it can be reused this year with just a bit of tweaking as it fits so well.

IF Gathering Decorations

IF Gathering Decorations DIY Himmali


What is the IF: Gathering?

The mission of IF is to gather, equip, and unleash women to live out their purpose. We will gather around tables, food and conversation and will be equipped through teachings and panels discussions. We will be unleashed by being given an opportunity to support ministries and encouraged to step out in our own lives.

“At IF:Gathering 2017, we’ll look at one of the most influential generations that have ever lived — the early church. The way God moved through them was simple and pure. We believe they are the model we need right now. Our dream is that we would experience the power of God as He does big things through simple acts of faith.” —IF: Gathering


If_ Local

What is IF: Local?

IF: Local is where women gather in homes, neighborhoods, churches or event centers. We gather together and over the weekend watch a 2-day livestream.of the main IF: Gathering in Austin, Texas. The simulcast provides great structure, but also flexibility so that we can gather around tables of food, enjoy conversation and meeting together. There are thousands of other IF:Locals from across the U.S. and internationally. This blows me away! Check to see if there is one by you, and if you live near Lincoln, Nebraska, come to ours!

The tables we sit at are an example of what I get to decorate each year.  I love creating beauty and atmosphere for women to come as they are and enjoy the gathering. It is a gift to be involved with it each year.

IF Gathering Decorations DIY Himmali

Our local fee is ONLY $10 if you sign up online. Don’t know anyone going? You will find wonderful women friends gathered around tables with a spot open for you, and I will be there so seek me out!  Have ‘littles’ at home and can’t give up an entire weekend?  Then just come gather on Friday, or just Saturday.  Come as you are, when you can.


IF:Lincoln Event Information:

This schedule is subject to small changes. All times are Central Standard.

Join us at City Impact for IF: Lincoln! We are super excited to have this opportunity again and will be providing more opportunities to interact around the table and hear from local Lincoln ladies.

Friday 5 PM- 9:30 PM. IF goes live at 6, so come with plenty of time to sign in, grab dinner, and meet a new friend.

Saturday 8:30 AM – 5:30 PM. Join us for breakfast and a day full of IF! Lunch is on your own- perhaps with your table mates.

The local fee is $10 to cover our local costs.

Contact the host if you have any questions. Email Lynnette Hendrickson at nette6132@yahoo.com

Register Here –>

https://register.ifgathering.com/event/iflincoln

Let Us Know You Are Coming at our Facebook Event Page –>

https://www.facebook.com/events/1124761690935730/

Join us on Facebook–>

https://www.facebook.com/iflincoln

Follow  on Instagram —>

https://www.instagram.com/iflincoln/

—————–

Don’t live in the Lincoln Area? Don’t despair, for there are gatherings happening all over the world.  Click here to learn how to find one happening around your area!

—————–

DIY/Crafts/ Frugal/ HEALTH/ How-Tos/ Natural Products

DIY Ring Cleaner Avoid Ring Finger Rash

DIY Ring Cleaner

Oh how I love my wedding ring that was chosen so carefully 20 years ago by my Todd, and oh how happy I am that this DIY Ring Cleaner works! I recently started getting a rash under my ring and it was driving me crazy! It was just underneath the area that my diamond sits and it was red, dry and had itchy little bumps. I had a feeling it was from gunk that had collected under my ring, as on each side of my diamond on the underneath part there are hollow areas in my wedding band. It is the perfect area for grime to accumulate. I was right. After using this DIY Ring Cleaner, I have been rash free.

DIY Wedding Ring Cleaner

diy ring cleaner using vinegar and hydrogen peroxide

I wanted to make my own cleaner for several reasons:

  1. I didn’t want to go run an extra errand to pick up store-bought cleaner
  2. I didn’t want to use harsh chemicals
  3. I didn’t want to store it
  4. I didn’t want to spend the money

Continue Reading…

Beauty/ FUN/DIY

DIY Pedicure Routine With Help From A Professional & Amopé

AMORE-PIN

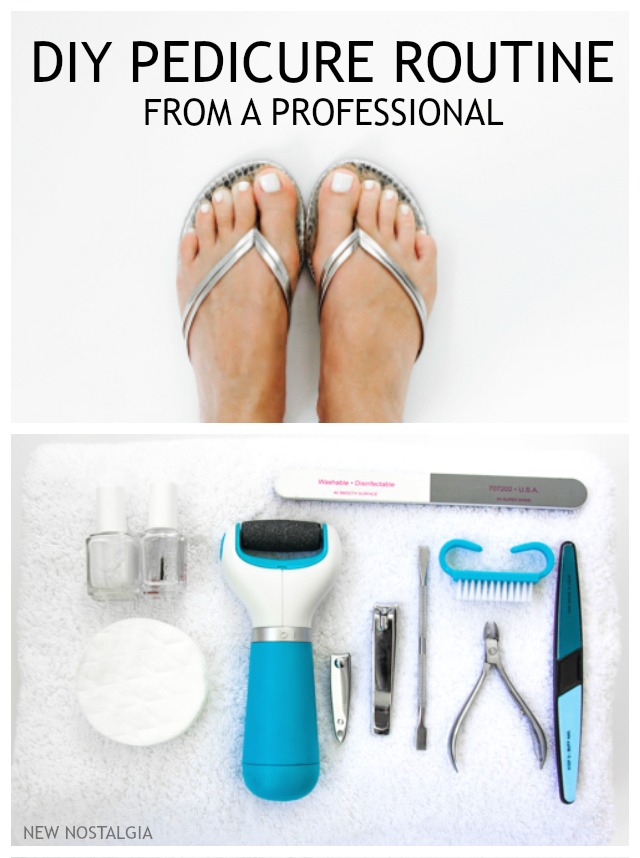
Thanks to my cosmetology license, I can share with you the exact steps I used to give pedicures as a professional in a salon. This DIY Pedicure Routine can be a lifesaver, especially now when flip-flops and sandals show the wear and tear that summertime can bring. Doing your own pedicure will save money, & leave you with feet that feel wonderful and toes that sparkle!

I attended cosmetology school as an 18-year-old, and was working in a salon by age 19. My specialty was hair cuts and colors, but I built up quite a few regular manicure and pedicure clients. I was always happy to see one of them on my appointment book, as it gave me a break from standing with my arms raised, and gave me a chance to just sit and enjoy my client while attending to their nails.

People always asked me if it bothered me to work on other people’s toes. It never did thanks to the soak that each client started out with. By the time I handled their feet, they were nice and clean and disinfected. I quite enjoyed giving pedicures, knowing that it made my clients feel pampered. I remember some great conversations and feeling relaxed as I filed, massaged and polished away!

Below is a step by step DIY Pedicure Routine. It is perfect for summertime, and really anytime! Doing it yourself just might give you the same pampered feeling as a professional pedicure would, but without the cost!

amore-pedicure-supplies-1

Supplies:

Basin big enough to fit both feet

Towels

Hot water

Soap

Epsom salt (optional)

Toenail clippers

Nail file

Nail buffer

Cuticle pusher

Cuticle clippers

Amopé Pedi Perfect™ electronic foot file

Exfoliator

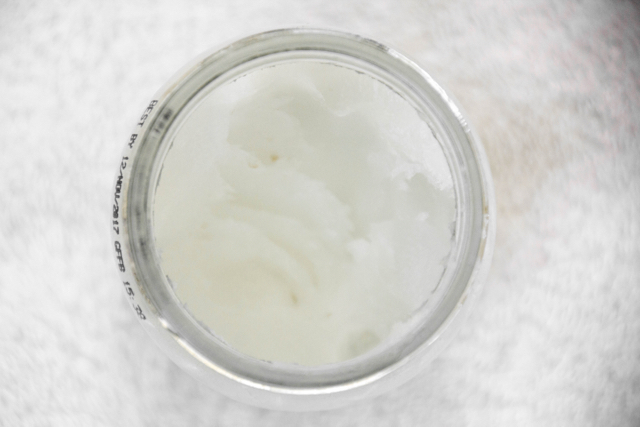
Moisturizer (I use Coconut Oil)

Polish (base coat, color, & top coat)


DIY Professional Pedicure Routine

DIY-Pedicure-Brush

Clean/Soak

Use a container big enough to fit both feet. Fill it with hot soapy water. You can add some epsom salts for a dose of magnesium. Lay a towel down on the floor, put the basin on top, and make sure the rest of your supplies are within reach. Sit in a chair in front of the basin and soak for 5 minutes. This cleanses, relaxes, and softens up the cuticle & rough skin.

DIY-Pedicure-nailclippers

Clip

Dry one foot, and keep the other soaking for these next 3 steps–clipping, filing and buffing. Only clip if you have excess length. Keep toenails straight across to avoid painful ingrown toenails.

File

Use a file to smooth out the rough edges, remembering to keep the toenail straight across, and not too short. Toenails that are too short show too much skin at the end of the nail, which is not aesthetically pleasing and makes polishing difficult. Want to try something different than the traditional nail file? Try the Amopé Pedi Perfect™ electronic nail file.

DIY-Pedicure-files

Buff

Toenails can tend to have ridges, and buffing is an easy way to make the top of the toenail nice and smooth. Start with the roughest part of the buffer, and work your way eventually to the smoothest side of the buffer.

DIY-pedicure-basin

Switch

At this point, switch feet. Repeat above steps with your other foot, and place the foot that you just buffed back into the water.

DIY-Pedicure-pusher

Push

Once both feet are clipped, filed and buffed, it is time to push back the cuticles. Dry both feet off. Gently push back any over-grown cuticle. Use the instrument to get any dirt out from under the toenails. Use the water to rinse and keep things clean.

DIY-peducre-cuticle-nippers

Trim Cuticle

Only do this step if you have excess cuticle. Do not over-trim. Make sure to get any hangnails.

Diy-pedicure-exfoiliate

Exfoliate

Use exfoliator of choice. My favorite is my Coconut Lime Sugar Scrub, or my Lemon Sugar Scrub. If you want to keep it simple, use coconut oil mixed with some sugar and maybe a drop of essential oils. Rub exfoliator into both feet and up onto the ankle. You could go as high as the knee if you’d like. That was our stopping point as professionals. Use basin water to rinse all exfoliate off & dry both feet.

Diy-pedicure-amore-4

Smooth

This is where I get to introduce you to my favorite tool for keeping my feet super soft and smooth. It is called the Amopé Pedi Perfect™ electronic foot file. I bought it at CVS great deal, thanks to a coupon that I used. It is perfect for summertime daily wear and tear, especially for cracked, dry, thick heels! This tool is wonderful for the heel, under the big toe, at the side edge beneath the pinky toe and anywhere you have hard, dry, rough skin that needs to be smoothed. I found it worked much faster and was so much easier than smoothing by hand with a foot file. The Amope’ Pedi Perfect conforms to the shape of your foot and feels wonderful while smoothing. It has a safety stop feature that makes it safe to use, and there are no sharp blades so I feel comfortable letting my teen girls use it. I so wish I had this tool when I was doing pedicures professionally, as I get better-than-professional results with it! It feels great, is easy to use, has replaceable roller heads and is one of my favorite recent purchases. Keep scrolling for an awesome coupon to get one for yourself.

diy-pedicure-coconut-oil

Moisturize

Give both feet one more good rinse, dry them off, then moisturize all the way up to the knee if desired. I simply use coconut oil.

Massage

Take a minute to pamper yourself and really rub the moisturizer into your feet. Pay attention to the arch, each toe, in-between toes and even the top of the foot. Do a couple of toe flexes and ankle stretches while you are at it.

DIY-Pedicure-cotton-pads

Prep

It is now time to polish, but if you don’t remove the moisturizer from your nail beds, the polish won’t stick and will chip immediately. Nail polish remover is perfect for removing any leftover oils and even your own natural oil from the nail bed. This step is key for good nail polish adhesion. Saturate a cotton ball or pad with polish remover and remove all moisturizer from each toenail.

Diy-pedicure-white-polish

Polish

Polish in this order: Base Coat, 2 Coats of Color, Top Coat.

I love getting more adventurous on my toes when it comes to color. I often choose my color depending on the season or if I have a special outing, I match it to my outfit. I love using brighter colors and even glitter polish on my toes, even though I am much more conservative with my nails.

Despite all the talk of adventure, my toenail polish crush right now is white. I love how clean it looks. It makes my feet look much more tan than they really are and it matches every flip-flop, sandal, and outfit that I have.

…………

AMORE-FOOT-CARE

…………………

So there you have it. Step-by step for a DIY Professional Pedicure. It is such a great feeling to have cute summertime toes by doing my own pedicure and saving money.


DIY/Crafts/ Featured/ FUN/DIY/ Seasonal

Snow Day Memories & 3 DIY Snow Paint Ideas

Snow-Paint-Collage

Have you ever made snow paint? It is one of the easiest DIY’s we have done & is lots of fun too!

We are on day two of blissful snow days. I’m wearing the same pajama pants that I wore all day yesterday and you would all just laugh at me if you saw the state of my crazy hair. It is 10:30am and even my husband is still walking around in his pajama pants, so we are truly taking advantage of the forced slow that snow brings!

Snow days are so different now that my girls are older (16, 15 & almost 13). I found myself reminiscing about snow days of old, and I remembered a few photos of one particular snow day from 2013.  My Avery was 10 and was so very excited to stay home from school. Those were the days when she was young and snow was magical & she couldn’t wait to get out in it. I dug the pictures out to keep the memories alive on this blog & to share them with you!

IMG_0867

I vividly remember my Avery waking up that day in her snuggly jammies with a cozy bathrobe wrapped around, but still her feet were bare.  Is it just me or do naked toes on cold days drive any of you other Mama’s out there nuts? To see naked feet on a snow day just makes me shiver.

“Put some socks on those cute feet, you are making me cold!” My kids have heard me say this more than once on cold winter days.

That morning, Avery made a list on the white board she kept in her room. I love that she made plans that took action. Now, during the last 2 snow days, the action is less as she lays in her bed with her ipod and Netflix.  I do know those cute toes got a coat of polish yesterday, so I guess that counts as movement!

IMG_6862

She did come our from her room yesterday afternoon and baked some cookies.  I can always count on my Avery to get in the kitchen on the weekends or days off of school to bake something yummy.  She LOVES to bake.  Back in 2013 on that fun snow day, we baked brownies while waiting for the afternoon sun to warm the day up a bit.  Look at that brownie batter all over her face! Now, the only mess is in my kitchen after she is done baking, but not on her face. Both are precious moments, though, and I know I will miss that messy kitchen someday, as much as I miss mess on her face!

IMG_6865

We continued to pass the time by making paper snowflakes. My goodness she was so adorable! I loved that stage with adult teeth but child face. So cute! Soon she will be getting braces on those teeth and look very much like the middle schooler that she is. Now if I want snowflakes, I make them myself. This is the first year she has not been too into crafty things. She is growing up!

IMG_6855

I snapped a picture of her boots warming by the vent.  She outgrew those long ago.  She now is in the stage of her feet staying the same size for more than a few months at a time. A blessing, as adult size shoes are about double the cost of children’s shoes.  She now wears the same size I do.

IMG_6843

DIY SNOW PAINT IDEAS

Before she went out into the snow, we decided to make some DIY Snow Paint. This is so simple to make. It is just food coloring and water.

~Fill squeeze bottles halfway with water.

~Add drops of food coloring until desired shade is achieved.

~Put your finger over the hole and shake to mix.

Kool-Aid Snow Paint

~Fill bottles up with water.

~Add a packet of kool-aid

~Shake to mix

~Enjoy the fun colors that smell wonderful!

Magic Snow Paint

~spinkle areas of snow with baking soda

~fill squeeze bottles or spray bottles with vinegar & a bit of water

~add food coloring for color & shake to mix

~have kids find the ‘magic snow’ by spraying the snow and watching for a bubbling reaction of the baking soda and vinegar

IMG_6846

IMG_6810

Avery had fun that day painting snow, but the highlight of the day was when a local news crew saw her shoveling and stopped to ask her a few questions. They featured her snowman & asked her why she liked shoveling. Her answer? “Because you get to help out your parents and..it’s just FUN shoveling!”  Aww…be still my heart.  She told me today that even though she looked cute and composed, she was a little freaked out as they didn’t ask us to interview her and just started filming. We still have it locked and saved on our DVR. I need to figure out how to get it off and save it another way! It was fun to watch again today as a family. Her little voice was so sweet.

IMG_6858

After her big interview, she came in to warm up… with an icicle?!? Love the pink cheeks & the willingness to pose for a photo.  I find that my teenage girls are now much less likely to let me take their photo.  Now I just steal their instagram photos and use them as my own when needed, knowing they are already approved for the public.  Or pictures like the one below, where they are prepared & ready to smile!

BOWMANCHRISTMAS_2015-13 resized

{Christmas 2015}

As much as I miss my girls and their younger versions, I am cherishing every moment of them as teens, as I know there will be a day coming where I will miss their teen version! I am so very thankful to be here, to be their Mom in every stage they go through. I love my girls…oh, and that man in the middle? He’s not so bad either!

…………

Do you have snow days in your part of the world?

What do you love to do on snow days?

Do you have littles or teens? How do you enjoy every stage?

SNOW-PAINT-HEART{for your pinning pleasure}

Top